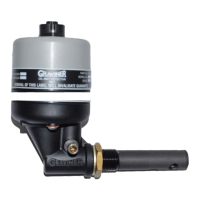
CO2 sensor
Carrier Sensors 31
Mounting location
A CO
2
sensor can be wall-mounted or mounted in a return air duct. (Duct installation requires an Aspirator
Box Accessory - Part #33ZCASPCO2.)
Wall mounting
Mount the sensor:
• Near the return air grill to sense the concentration of CO
2
leaving the space
• At least 3 feet (.9 m) from any corner
Do not mount the sensor:
• Where it can have direct breath contact
• In drafty areas such as near supply ducts, open windows, or fans
• Over heat sources
• Where it can be influenced by the supply air. The sensor gives inaccurate readings if the supply air blows
directly onto the sensor or the supply air does not have a chance to mix with the room air before it is
drawn into the return air stream.
NOTE The sensor mounting plate accommodates the NEMA standard 4x2-in. electrical box. However, the
sensor can be mounted directly on the wall surface if local codes permit.
Duct mounting
Mount the sensor:
• In a duct that has a diameter or depth of at least 9 inches (22.9 cm)
• At least 6 inches (15.2 cm) upstream or 15 inches (38.1 cm) downstream of a 90-degree turn in the
return air duct. The downstream location is preferred.
• In the center of the duct
• Where at least 1 foot (.3 m) of space in front of the sensor is free of obstruction
To wire and wall-mount the CO2 sensor
1 Turn the setscrew at the bottom of the sensor clockwise to release the sensor's cover from the mounting
plate.
2 Lift the cover from the bottom, and then release it from the top fasteners.
3 Feed the wires from the electrical box through the opening in the center of the sensor mounting plate.
4 Use the 2 mounting screws provided to attach the mounting plate to the electrical box.
5 Wire the 24 Vac transformer to the sensor. See diagram below.
6 Turn the two Allen screws at the bottom of the unit counterclockwise to secure the cover to the mounting
plate.
7 Wire the sensor to the Open controller. See the controller's Installation and Startup Guide for details.