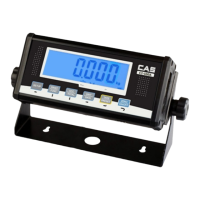
CI-100A Indicator Operation & Service Manual
────────────────────────────────────────────────────────
CAS-USA Corporation
www.cas-usa.com 31
12. Calibration
Note:
(1) Before calibrate the scale, you should prepare a standard weight (more than 10% of FS weight) for
calibration.
(2) In following steps, to press ON/OFF will show “EXIT?”, and press ON/OFF again or press TARE will
exit calibration
12.1 Go to setup mode, select “CAL”, then press TARE to confirm to enter calibration mode.
12.2 After entering this mode, the number of this indicator has been calibrated will be shown first, this number
will be increased one after every calibration and calibration data saved, and this counter can’t be modified
or erased by any other ways, it counts from 0000 to 9999, when it reaches 9999, it starts over at 0000.
After the counter number being displayed, it will show “CAL.OFF” or “CAL-ON” according to the status of
the sealed calibration switch is OFF or ON. If the switch is OFF, the following steps can be done, but the
result will not be saved. Press TARE key to go to next step.
12.3 When “ZERO” is shown, use PRINT or ACC key to select do zero point calibration (refer step12.4), do
linearity calibration (refer step12.5), do Geographical calibration (refer step 12.6) or Input/view calibration
parameters value (refer step 12.7).
12.4 When ZERO is selected, remove all weight on scale and then press TARE key to confirm, the ZERO will
flash when in catching zero point state. After getting reasonable data, it automatically goes to step12.8
12.5 When LINE is selected, press TARE key to confirm to enter linearity calibration.
12.5.1 0% weight will be displayed after CAL.P0 being shown, remove all weight on scale and then press
TARE to confirm to calibrate the zero point; the zero weight will flash in catching zero point state. After
getting the reasonable zero-point data, the zero weight will become steady and then go to next step.
12.5.2 When first default standard weight is displayed after CAL.P1 being shown. It will be calibrated on
standard weight for first point. Put corresponding weight (more than 10%FS weight) onto scale. The
default standard weight is 100%FS.
Use PRINT, ACC, UNIT keys to input the value of the loaded weight. Before input this value, you
can long press DATA key to change weight’s unit to kg or lb. Press TARE key to confirm, then, the
indicator will flash the input standard weight.
When this weight number becomes steady, it means the stable and reasonable data
corresponding to the standard weight has been gotten.
After this, the indicator will automatically go to next step. If this point can’t be calibrated correctly
(maybe the weight load onto scale is too small, maybe the input data is incorrect…), it will display
“CAL.Er” and return back to step12.5.1 for re-calibration.
12.5.3 When End.y is shown and y is flashing, it’s waiting command to exit calibration or go on next
calibration. Use PRINT or ACC key to select yes or no, use TARE to confirm. If yes is selected, it will
go to step12.8 to end calibration; if no is selected, it will go to next step.
12.5.4 When 100%FS weight is displayed after CAL.P2 being shown. It will be calibrated on standard weight
for second point. Put corresponding weight (more than 10%FS weight, and larger than the weight
used on CAL.P1) onto scale. Next operation is same as what in step12.5.2
12.5.5 When End.y is shown and y is flashing, Use PRINT or ACC key to select yes or no, use TARE to
confirm. Similar with doing in step12.5.3
12.5.6 When third standard weight displayed after CAL.P3 being shown. It will be calibrated on standard
