Playing on the Keyboard
EN-20
1.
Hold down dp SPLIT until “Split Pt” is
displayed.
2.
Use bn [–] and [+] or the bl dial to specify the
name of the note (the lowest note of the
desired UPPER part) where you want the split
point to be.
• You can also specify the split point by holding down
dp SPLIT and pressing the key where you want the
split point to be.
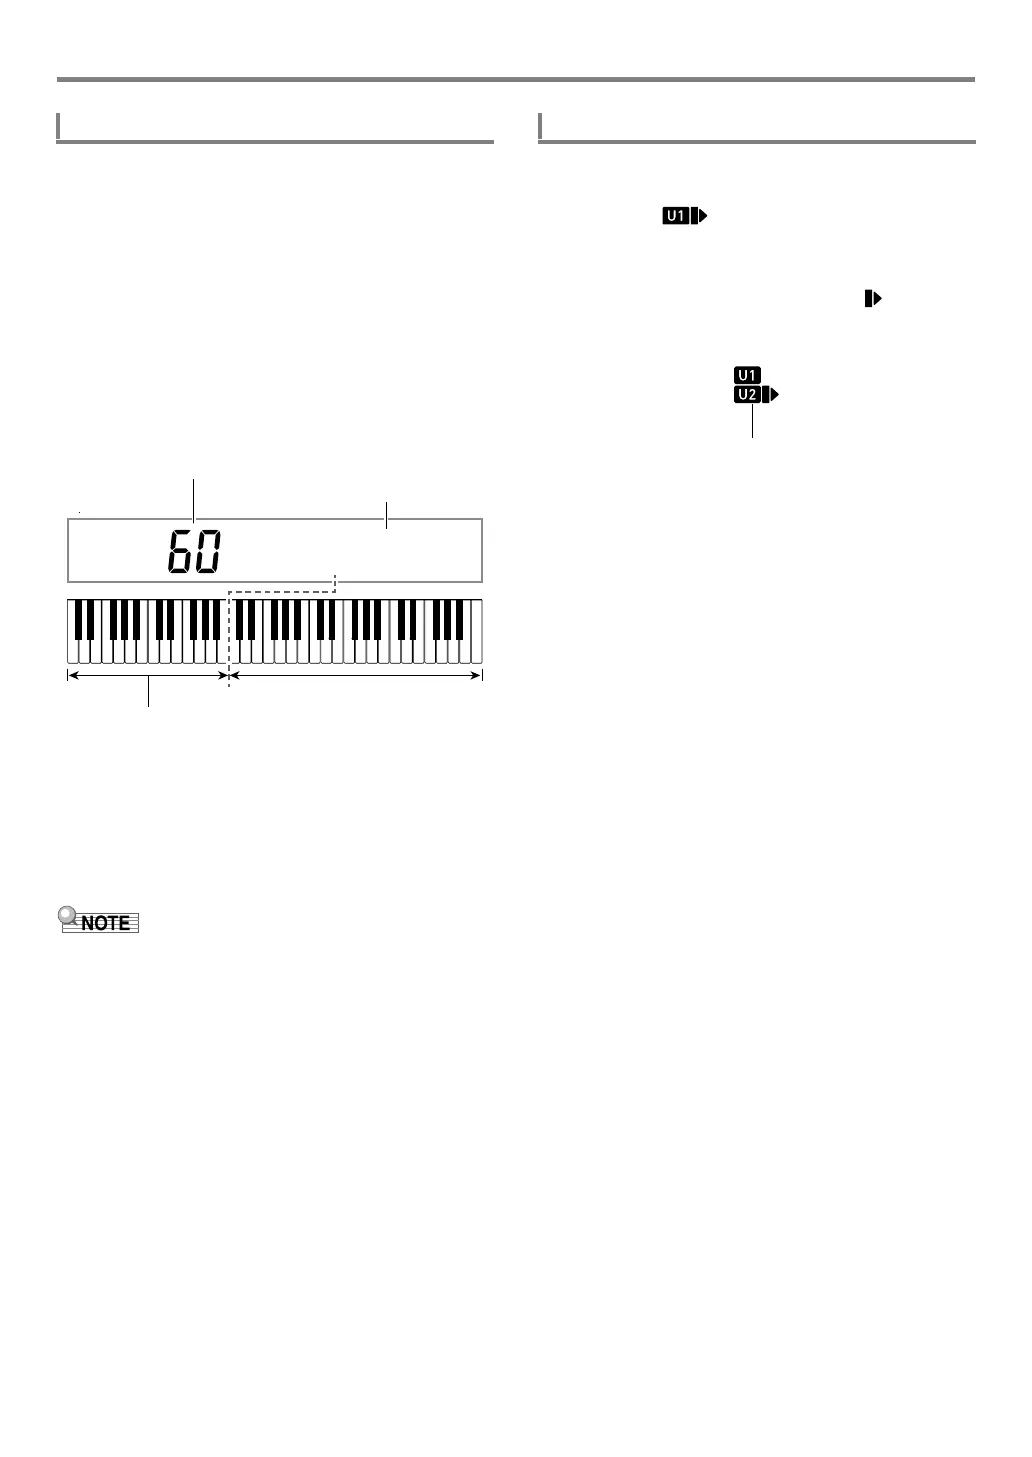
• This displays the specified current split point as shown
below.
Example: After C4 was specified as the split point
• The LOWER part keyboard specified by this operation
is also used as an accompaniment keyboard (page
EN-44).
3.
When the setting is the way you want, long-
press the [4] (EXIT) bm number key to exit the
setting screen.
• Specifying a split point puts the LOWER part keyboard and
the accompaniment keyboard in the same area. You can
also specify different areas for these two keyboards. You
can also configure a setting so the LOWER part tone does
not sound in the area where the LOWER part keyboard and
accompaniment keyboard overlap. For details, see the
“Advanced Split Settings” (page EN-50).
1.
After confirming that the keyboard part
indicator in the upper left corner of the display
looks like , select a tone.
• This will be the UPPER 1 part tone.
2.
Press dq UPPER LAYER.
• This will display the [U2] indicator, and will move to
the right of the [U2]. This indicates you can select the
UPPER 2 part tone.
3.
Select the tone you want to assign to UPPER 2.
4.
Play something on the keyboard.
• For information about how to change the tone
assigned to each part, see “To change the tones
assigned to each split/layer part” (page EN-21).
• Here, pressing dp SPLIT will enable use of the
UPPER 1 and UPPER 2 layered tones, in addition to
the LOWER 1 part created with the keyboard split.
5.
To cancel a layer (return the entire keyboard to
the UPPER 1 part), press dq UPPER LAYER.
This causes the [U2] indicator to disappear.
To move the keyboard split point
B3 I C4
Split point note number
LOWER part keyboard (or accompaniment keyboard)
Split point note name
UPPER part keyboard
To layer two tones
CTX5000_3000_EN.book 20 ページ 2018年2月26日 月曜日 午後3時56分