44
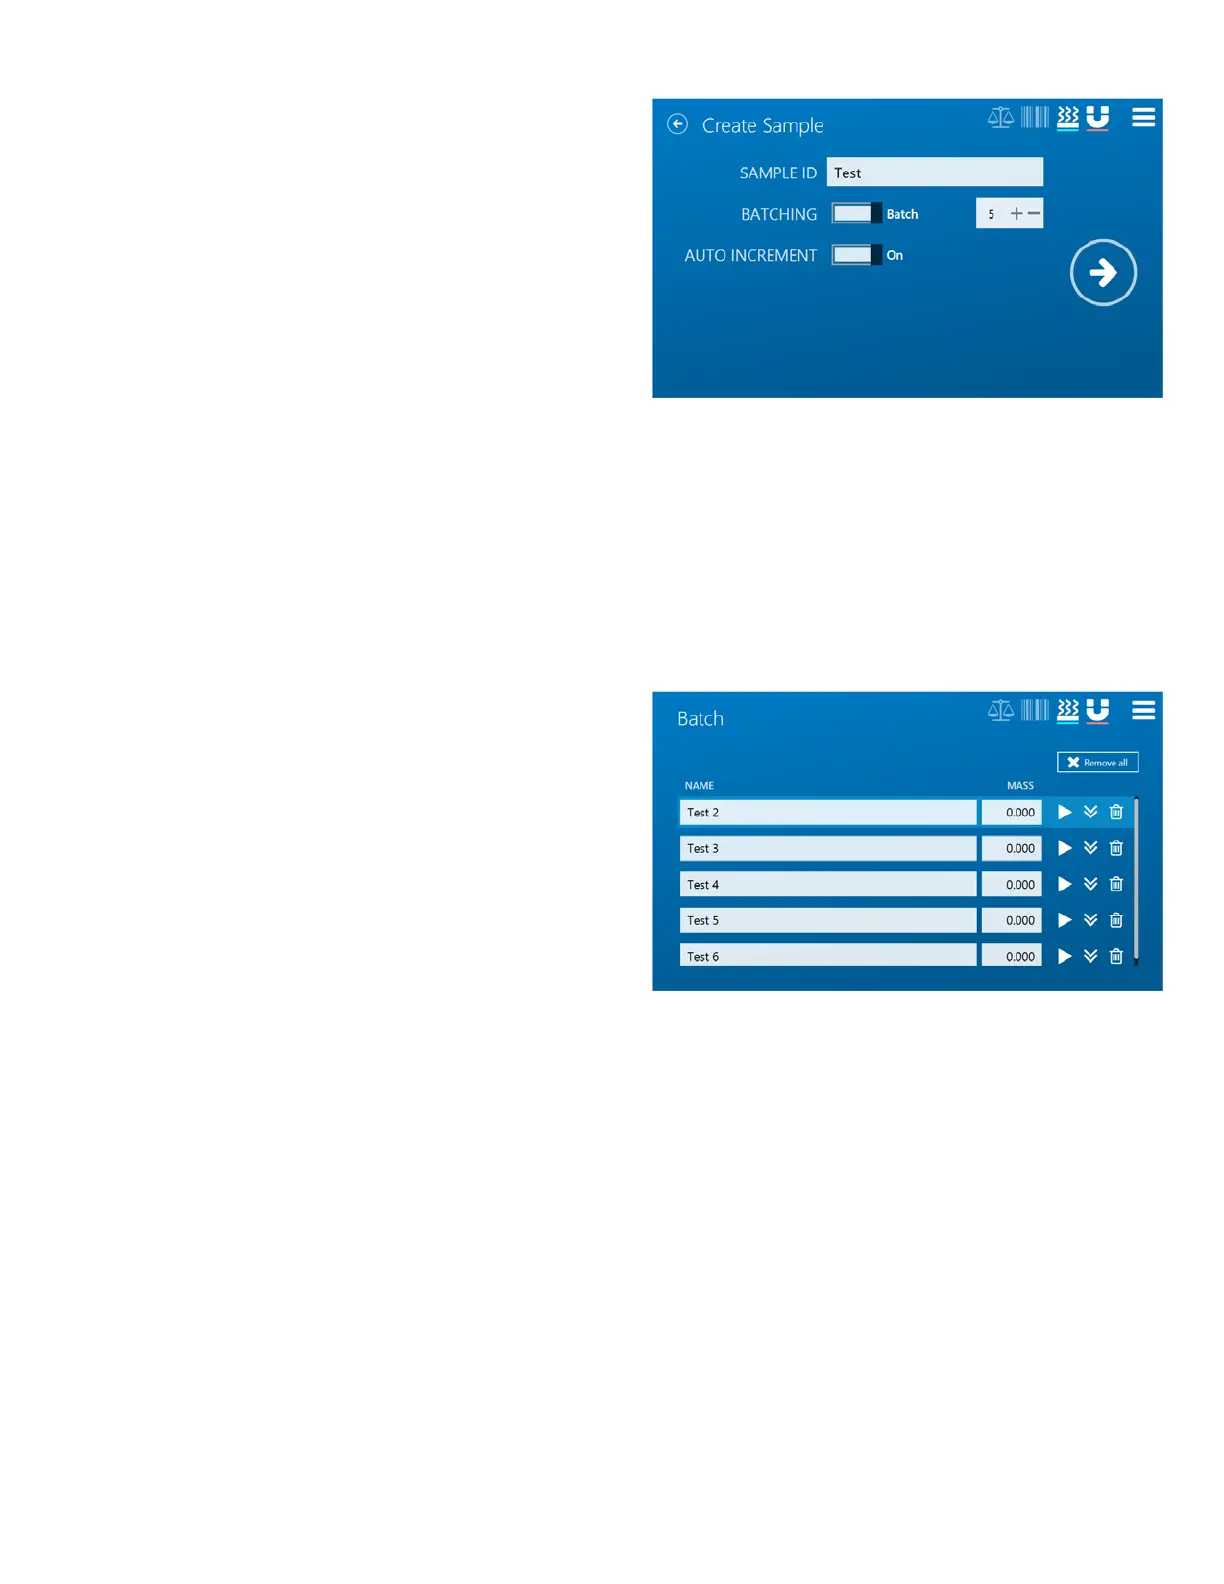
3. On the Sample Name page, the specific details for
the upcoming analysis can be entered:
- SAMPLE ID provides an identifier to best
represent the sample that will be analyzed. If
each sample needs a unique Sample ID, that can
be set in the next screen.
Note: The Sample ID can also be populated using the bar
code scanner that is supplied with every ORACLE.
- BATCHING should be turned Batch, and toggled
to the number of samples that will be analyzed
in this upcoming batch.
- AUTO INCREMENT will assign an incremental
number to the end of the Sample ID. This can be
toggled ON or OFF to fit the user’s needs.
4. Once all the values have been correctly entered, press the NEXT icon to continue.
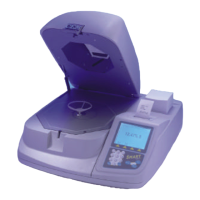
5. The total number of batches set in the BATCHING
section of the Sample Name page will be listed. Here,
each sample can be edited to provide a unique
Sample ID and Tag.
- The Play icon will begin the analysis for the
individual sample chosen.
- The Repeat Icon will duplicate the Sample ID and
Tag, in the case too few samples were chosen in
Step 3 and more are needed. The additional
sample will be added to the list directly
underneath the Sample ID from which the
duplicate icon was chosen.
- The Delete icon will delete any Sample ID in the
case that too many were chosen in Step 3, or any
other reason a sample must be removed from
the testing process.