Installation Model 55,75,90, & HMC FLEX-AUGER
18
MA1702D
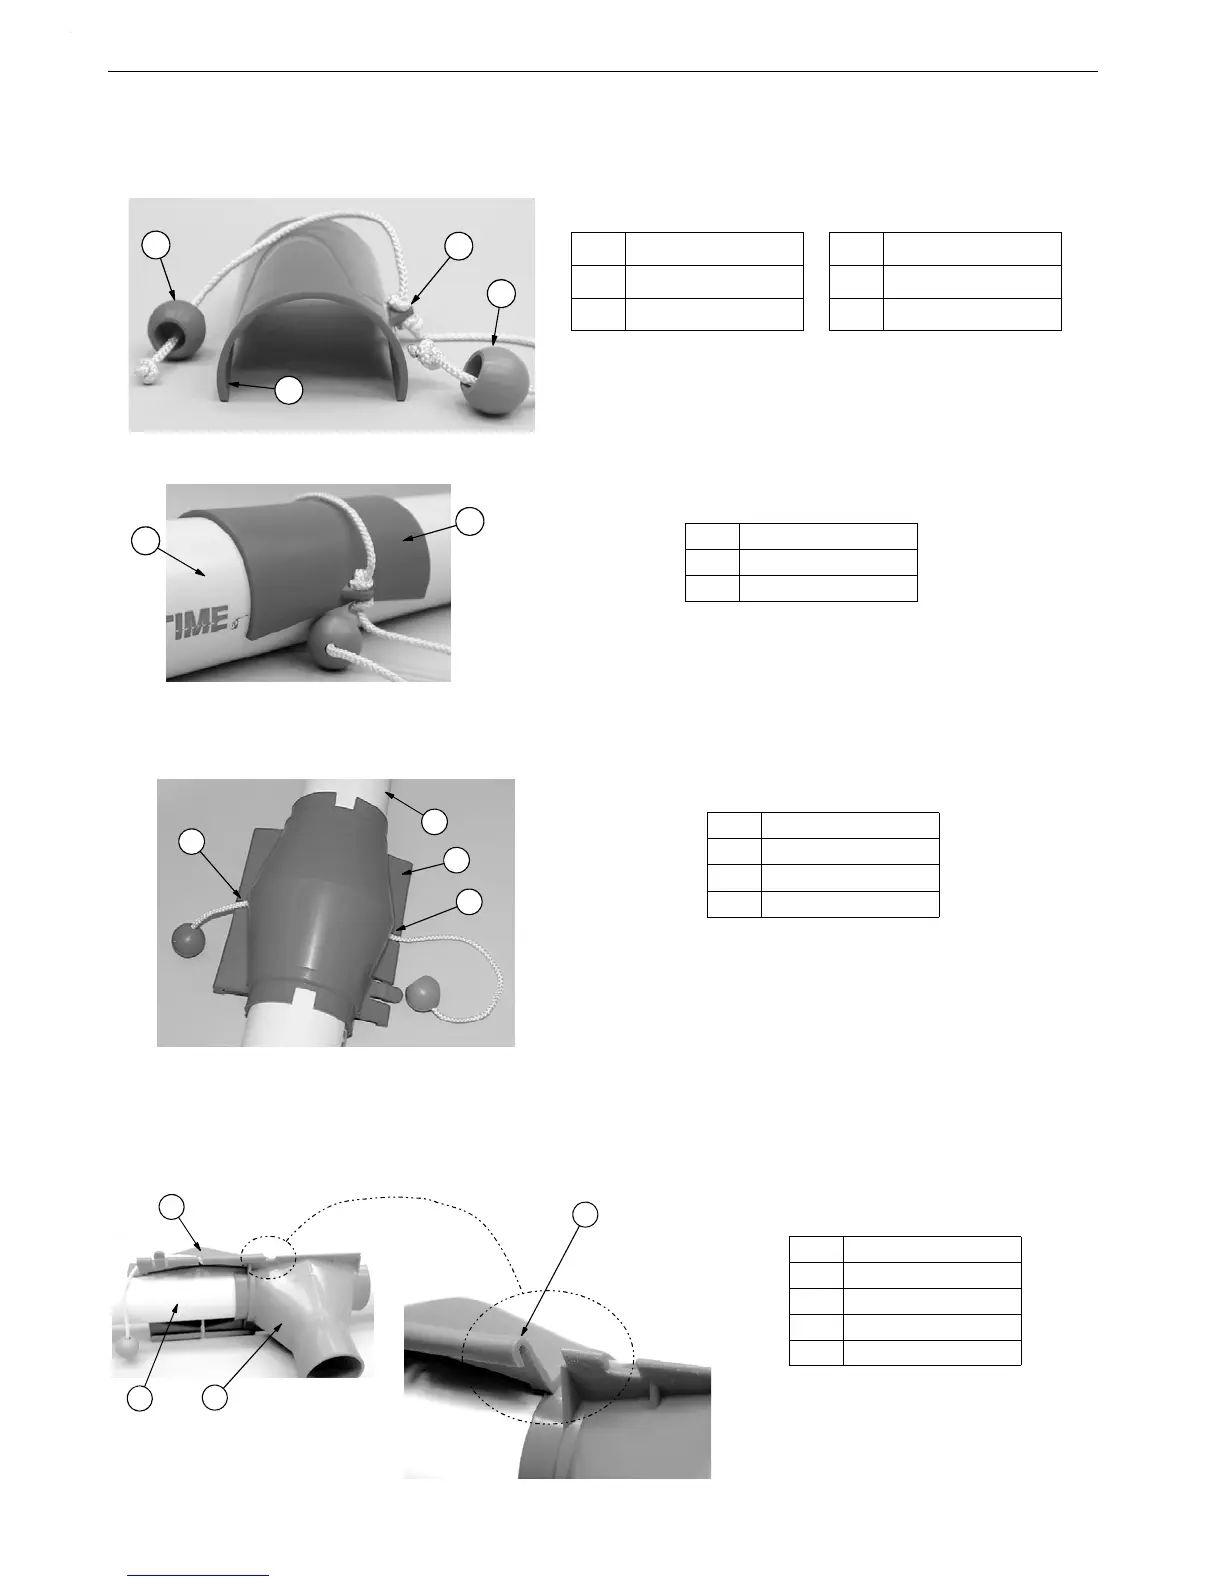
2.Insert the Cord through the hole in the Rotary Slide tab, pull until centered, and knot it on both sides of the
tab as shown in Figure 14. Slide the Indicator Balls on the Cord ends, as shown in Figure 14, and knot the
Cord ends so the Indicator Balls will not fall off.
3.Snap the assembled Rotary Slide over the Fill System Pipe as shown in Figure 15.
4.Snap the Outlet Top to the Fill System Pipe over the Rotary Slide as shown in Figure 16. Make sure the Cord
comes out through the notches on each side of the Outlet Top as shown in Figure 16.
5.Use the Cord ends to hold the Rotary Slide in the full open position (cradled inside of the Outlet Top.)
Engage the top edges of the Outlet Bottom into the open ends of the Outlet Top Tracks. Slide the parts
together pressing the locking tab on the Outlet Top out of the way, allowing the Outlet Bottom to pass until
completely assembled. The locking tab should then snap into place preventing the outlet assembly from
sliding apart. (See Figure 17)
Item Description Item Description
1 Red Indicator Ball 3 Green Indicator Ball
2 Rotary Slide 4 Tab on Rotary Slide
Figure 14.Assembling the Rotary Slide
Item Description
1 Fill System Pipe
2 Rotary Slide
Figure 15.Rotary Slide Snapped onto the Fill System Pipe
Item Description
1 Notch on Top
2 Fill System Pipe
3Outlet Top
Figure 16.Top Placed over the Rotary Slide
Item Description
1 Fill System Pipe
2 Outlet Bottom
3 Outlet Top
4 Outlet Top Track
Figure 17.Assembling the Outlet Bottom
to the Outlet Top