Installation Model 55,75,90, & HMC FLEX-AUGER
22
MA1702D
Auger Installation
Use extreme caution when working with the auger. The auger is under
tension and may spring causing injury. Always wear protective clothing
and protective glasses when working with the auger.
Use extreme caution when pushing the auger into the auger tubes. Keep
your hands away from the end of the auger tube to avoid injury.
Handle the FLEX-AUGER carefully. Dropping the rolls of auger may
cause the auger to kink. Do not install an auger that has a sharp kink in it.
The kink will cause the auger to wear a hole in the tube at that spot. If the
kink cannot be straightened with pliers, the kink must be cut out and the
auger brazed back together. Refer to the "Auger Brazing" section in this manual for the correct brazing procedure.
1.Beginning at the boot, push the auger into the auger tube through the rear of the boot until the auger reaches
the control unit end of the line.
Use extreme caution when pushing the auger into the auger tubes. Keep your hands away from the
end of the auger tube to avoid injury.
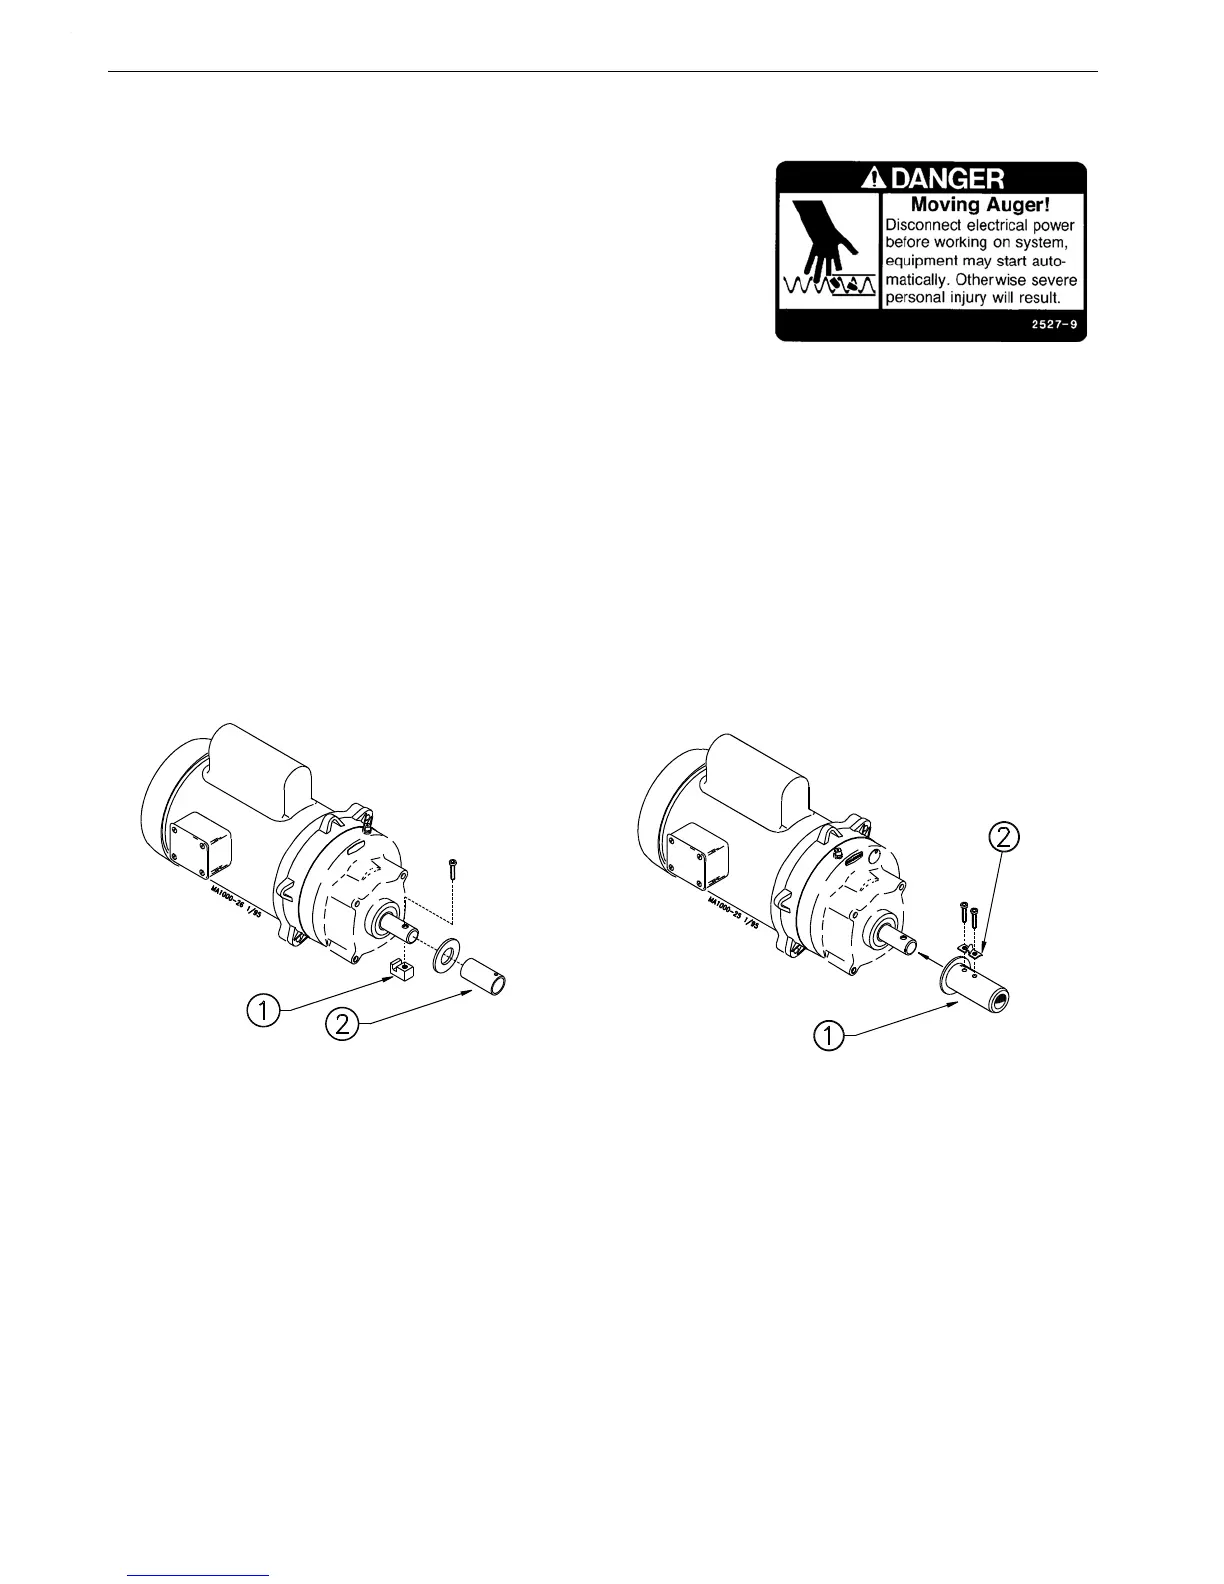
2.Attach the auger to the driver by rotating the driver and threading the auger through the anchor clamp.
Figure 22 shows the Model 55 Driver installation procedure. Control Unit not shown for clarity.
Figure 22 shows the Model 75, 90, & HMC Driver installation procedure. Control Unit not shown for
clarity.
3.Rotate the auger so that it is fully engaged on the Driver. Tighten the screws securely to clamp the auger to
the control unit.
Key Description
1 Model 55 Driver Block
2 Model 55 Driver Tube
Key Description
1 Model 75, 90, & HMC Driver As-
sembly
2 Anchor Clamp
Figure 22.Auger Installation