Installation for Layer Cage Systems Only ULTRAFLO
®
Cage Feeding Systems for Brood Grow & Layer Installations
24
MC656P
3.Align the End Caps but DO NOT TIGHTEN THE END CAPS AT THIS TIME.
4.Position the Drive Unit Base, with the End Caps attached, so that it is centered in front of a
cage (on one and three motor systems). Position the Drive Unit Base, with the End Caps
attached, in the center of the opening where the cages were removed for two and four motor
systems).
5.Mark the Trough so that the Drive Unit Base remains as centered as possible in the cage.
Allow enough trough length to fit in the End Caps (See Figure 33.).
6.Cut the Trough.
7.Remove the End Caps from the Drive Unit Base.
8.Use self-drilling screws to fasten an End Cap on each Trough end.
9.Slide the Drive Unit Base on to the left hand End Cap. Then slide the right hand End Cap
into the Drive Unit Base.
10.Tighten the End Connector Weldments securely and install the Trough Clips, if required, on
the Trough Sections.
11.After the Auger has been installed, bolt the Power Unit on the Drive Unit Base. Use chain
and “S” hooks to support the Drive Unit.
12.Remove the plastic shipping plug from the Gearhead and replace it with the Vented Plug
provided.
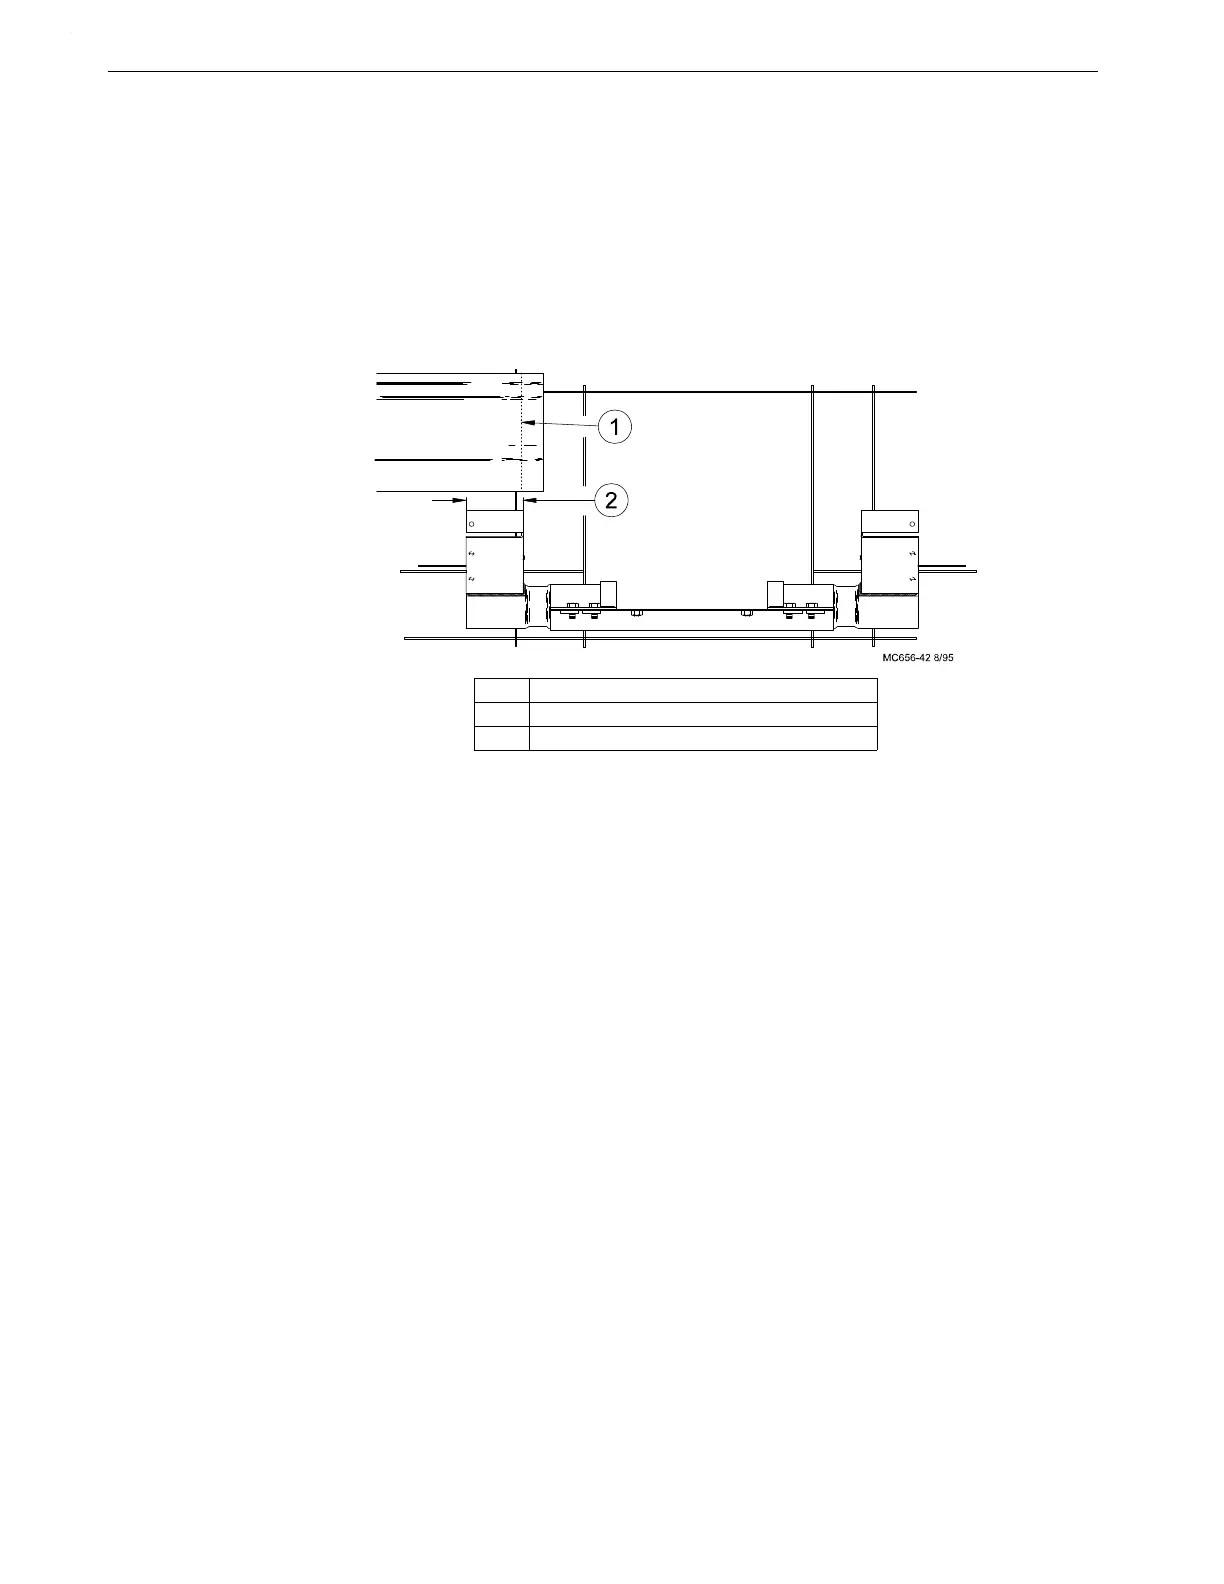
Key Description
1 Cut Trough as required to fit into End Cap.
2 2-1/2” (64 mm)
Figure 33.Trough Installation at Power Unit Location (front view)
 Loading...
