15
Do not pull or kink the hose. Moving the hose prior to it being up
to operating temperature could permanently damage the hose.
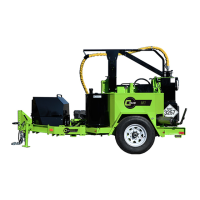
7. SET WAND FLOW CONTROL SPEED:
A) Set flow control (A) to “0” with the wand securely in the recircula-
tion port, the trigger pinned (B) and the manual valve open (C).
B) Slowly adjust the flow control knob to begin the flow of material
through the wand. The flow of material can be observed through
the recirculation port.
C) Generally most sealant materials dispense at a setting between
“3” and “5” on the flow control.
D) Once the material is flowing at the desired rate pull the manual
valve handle back to close the valve on the wand.
M-Series Start Up Procedure
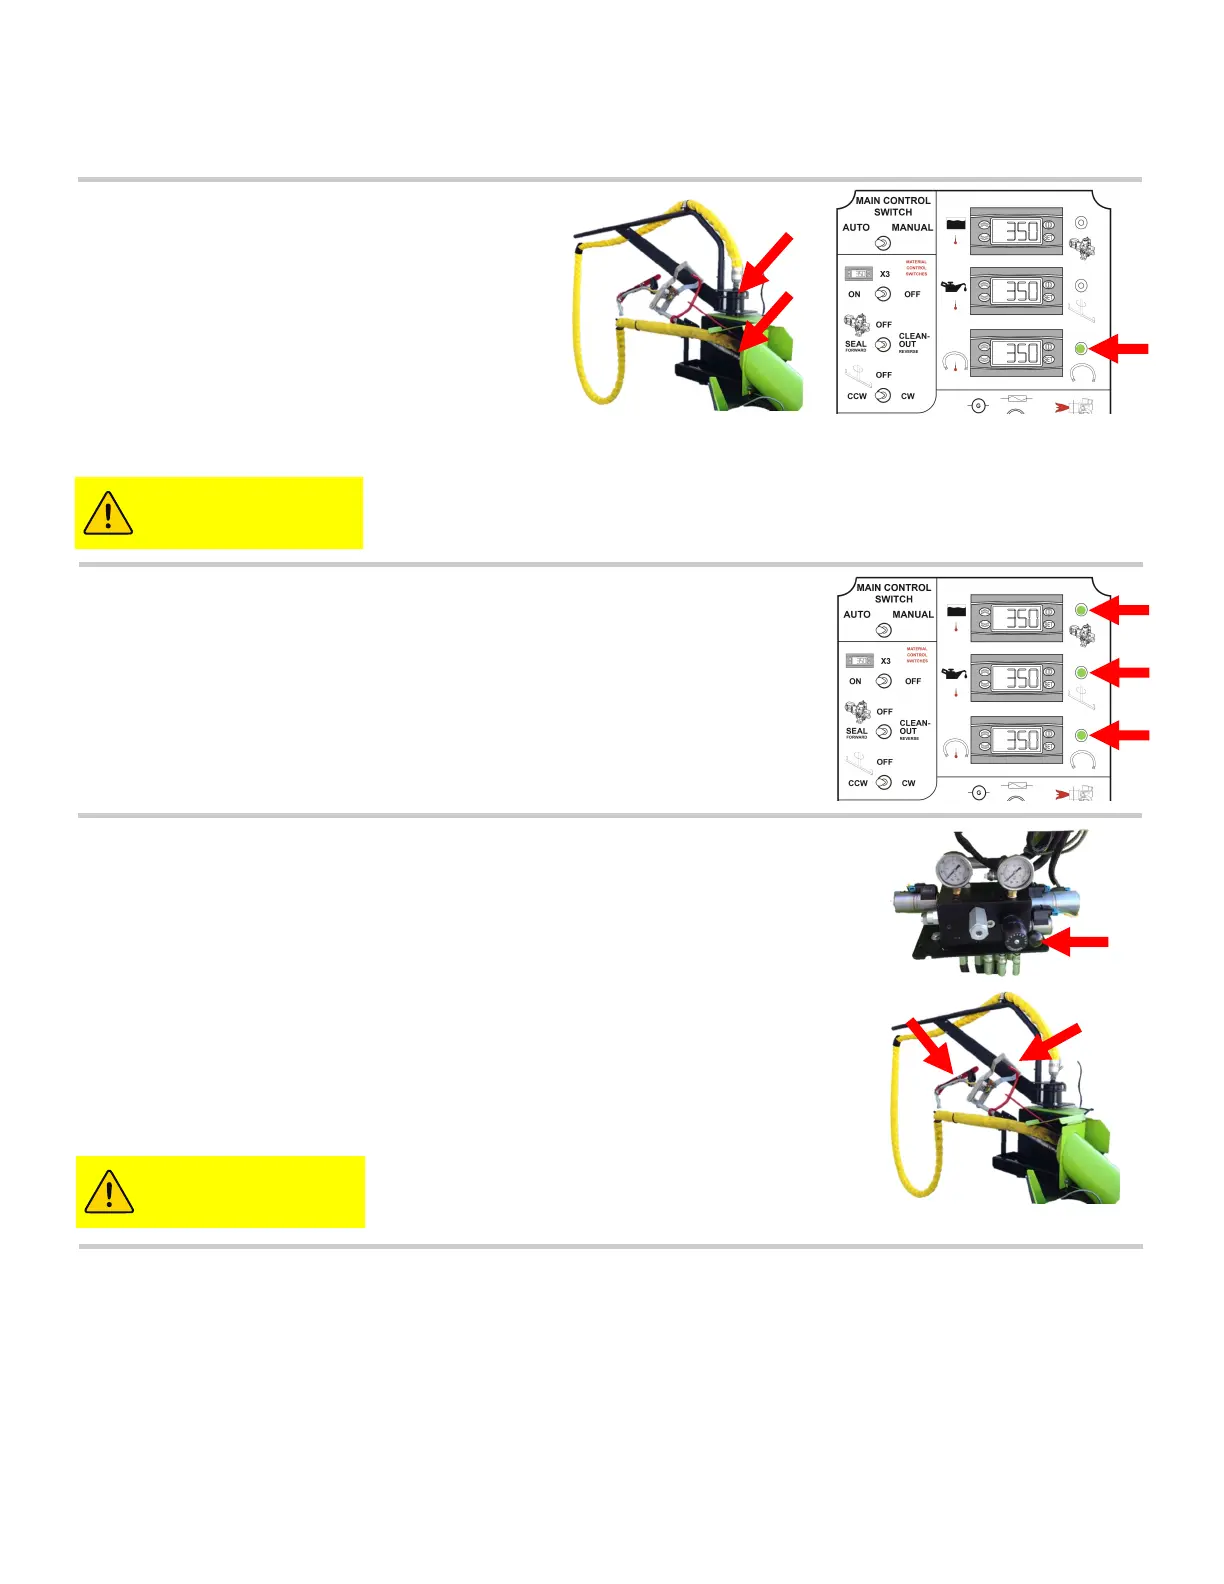
5. PREPARE HOSE AND WAND:
When the (green) hose ready light (A) is
illuminated.
A) Unlock the boom (B) by raising and
displacing the locking pin. The boom
is free to swing now.
B) Place the wand in the recirculation
port (C) and pin the trigger.
C) If your wand has a manual valve, move the handle forward to open the valve on the wand.
6. ALLOW UNIT TO HEAT SEALANT MATERIAL TO
CORRECT APPLICATION TEMPERATURE:
The unit should be ready for operation when all three (green) ready
lights are illuminated. The correct sealant material temperature is
now reached in the sealant material tank. The agitator and pump
should be running and the heated hose should be up to the proper
temperature.
(B)
(C)
(B)
(C)
Use caution when in proximity of flowing
hot material. This includes proper face
and skin protection.
8. RUNNING SEALING WAND:
With the start up procedure complete you are ready to begin sealing.
A) Remove the pin from the wand trigger.
B) Remove the wand from the recirculation port.
C) Push the manual valve handle forward and squeeze the wand trigger to begin the flow and
start sealing.
D) Adjust the flow control as needed to best fit your movements and the size of the areas you
are sealing.
(A)
(A)
CAUTION
CAUTION