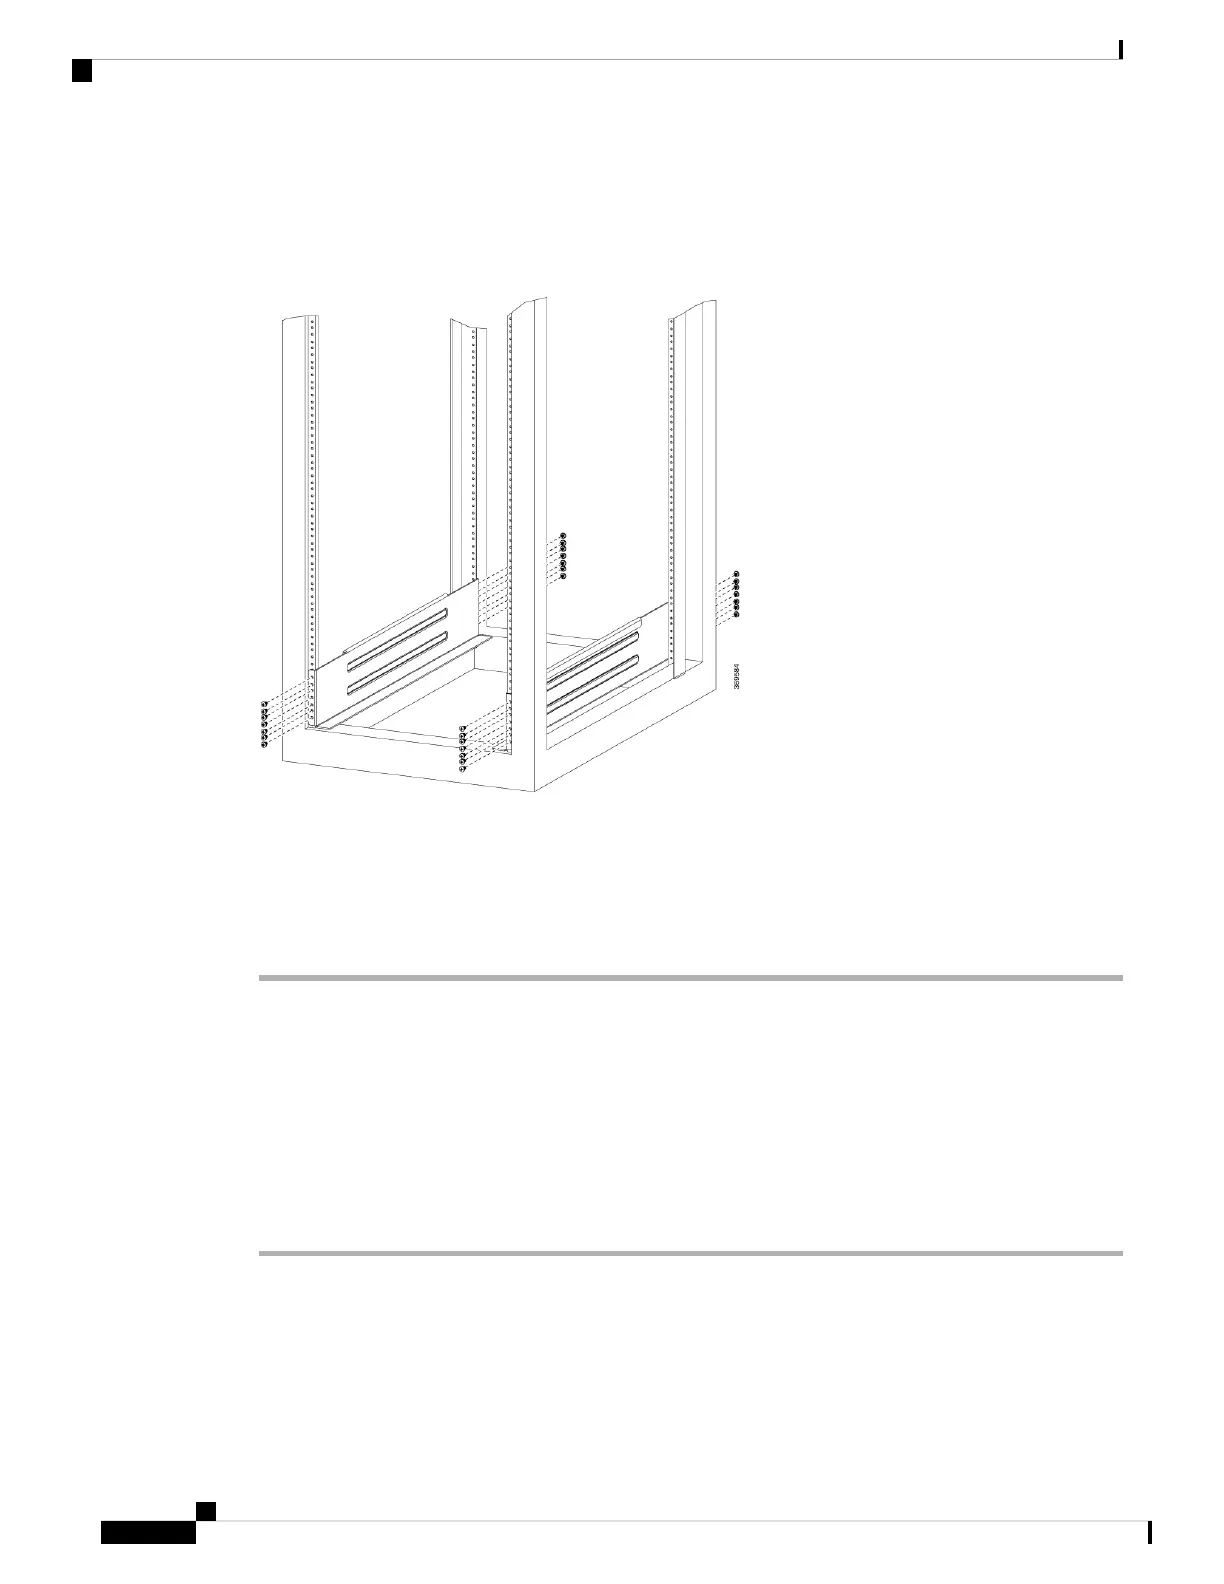
Step 2 Attach the bottom-support rail to the rack using a Phillips torque screwdriver on M6 x 19 mm or 12–24 x 3/4
inch screws for each end of the rail (as shown in the following figure) and tighten each screw to 40 in-lbs (4.5
N-m) of torque.
Figure 10: Attach Bottom-Support Rails to a Rack
Use at least three screws on each end of each bottom-support rail.
Note
Step 3 Repeat Steps 1 and 2 to attach the other bottom-support rail to the rack.
Make sure that the two bottom-support rails are level with one another. If they are not level, adjust
the higher rail down to the level of the lower rail.
Note
What to do next
Mount the chassis into the rack.
Transfer Chassis to a Mechanical Lifting Device
Procedure
Step 1 Place the mechanical lifting device in front of the chassis on the pallet (or on Line Card side) as shown.
Hardware Installation Guide for Cisco 8800 Series Routers
28
Unpack and Install the Chassis
Transfer Chassis to a Mechanical Lifting Device
 Loading...