3
• The router needs 19 inches (48.26 cm) of clearance at the front and rear to allow for field-replaceable unit replacement or
installation, or to access cables or equipment.
• The shared port adapters are installed. If shared port adapters are not installed, then the slots must not be empty. Use filler
panels for an empty slot.
2 Prepare for Rack-Mount Installation
Before you begin the rack-mounting tasks:
• Decide whether or not you want to front rack-mount or rear rack-mount the chassis
• Decide whether or not you want to attach cable-management brackets to your chassis.
Note If you install cable-management brackets, make certain that the chassis is installed in the equipment rack first.
• Decide if a two-post or four-post rack-mount will be used.
3 Rack-Mount the Router
This section provides information for rack-mounting the router.
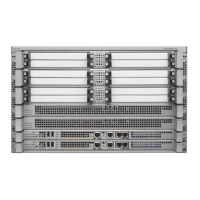
Note Your Cisco ASR 1013 Router comes with the front rack-mount brackets installed. But there is also an extra set of front
rack-mount brackets in the accessory kit that is shipped with the chassis.
Attach the Rack-Mount Brackets—Chassis Front-Mounted
This section describes how to attache the front rack-mount brackets if necessary, otherwise skip this section. Figure 1 shows the
front rack-mount brackets (callout 2) and the rear rack-mount brackets (callout 4) on the Cisco ASR 1013 Router.
To install the Cisco ASR 1013 Router for a front rack-mount configuration, follow these steps:
Step 1 Locate the threaded holes in the front sides of the chassis. Make certain that you hold the front rack-mount bracket
with the ear and holes facing outward and towards the front of the chassis.
Step 2 Align the rack-mount bracket to the side of the router. Depending on which set of rack-mount bracket holes you choose
to use to attach the rack-mount bracket to the router, the chassis will either be recessed in the rack or protrude from
the rack.
Step 3 Position the front rack-mount bracket top hole with the chassis first top hole behind the side vent holes.
Step 4 Repeat Step 1 through Step 3 on the other side of the chassis. Use all the screws to secure the rack-mount brackets to
the chassis.
Step 5 Tighten the screws on both side.
Step 6 To install the Cisco ASR 1013 Router in the equipment rack, see “Four-Post Rack Installation” section on page 5 or
“Two-Post Rack Installation” section on page 7.

 Loading...


