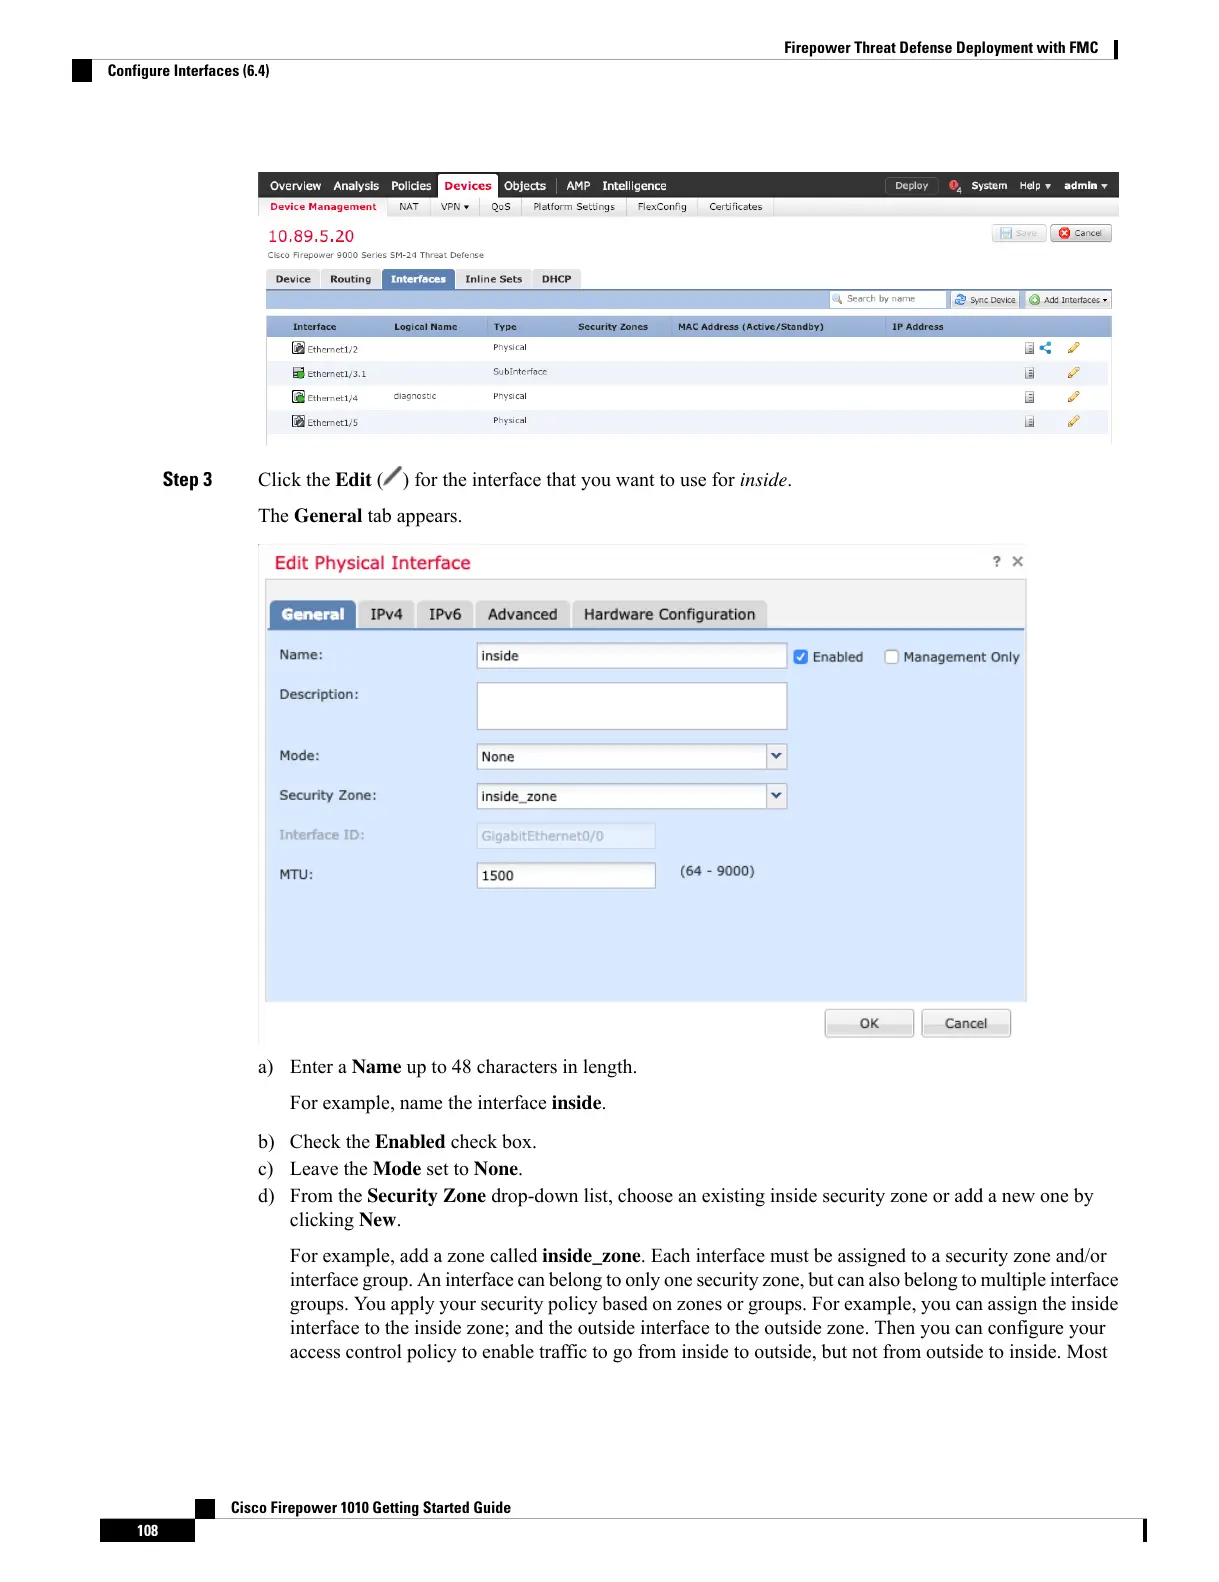
Step 3 Click the Edit ( ) for the interface that you want to use for inside.
The General tab appears.
a) Enter a Name up to 48 characters in length.
For example, name the interface inside.
b) Check the Enabled check box.
c) Leave the Mode set to None.
d) From the Security Zone drop-down list, choose an existing inside security zone or add a new one by
clicking New.
For example, add a zone called inside_zone. Each interface must be assigned to a security zone and/or
interface group. An interface can belong to only one security zone, but can also belong to multiple interface
groups. You apply your security policy based on zones or groups. For example, you can assign the inside
interface to the inside zone; and the outside interface to the outside zone. Then you can configure your
access control policy to enable traffic to go from inside to outside, but not from outside to inside. Most
Cisco Firepower 1010 Getting Started Guide
108
Firepower Threat Defense Deployment with FMC
Configure Interfaces (6.4)