10-77
Cisco Nexus 7000 Series Hardware Installation and Reference Guide
OL-23069-07
Chapter 10 Installing or Replacing Components
Replacing the Cable Management Frame on the Cisco Nexus 7018 Chassis
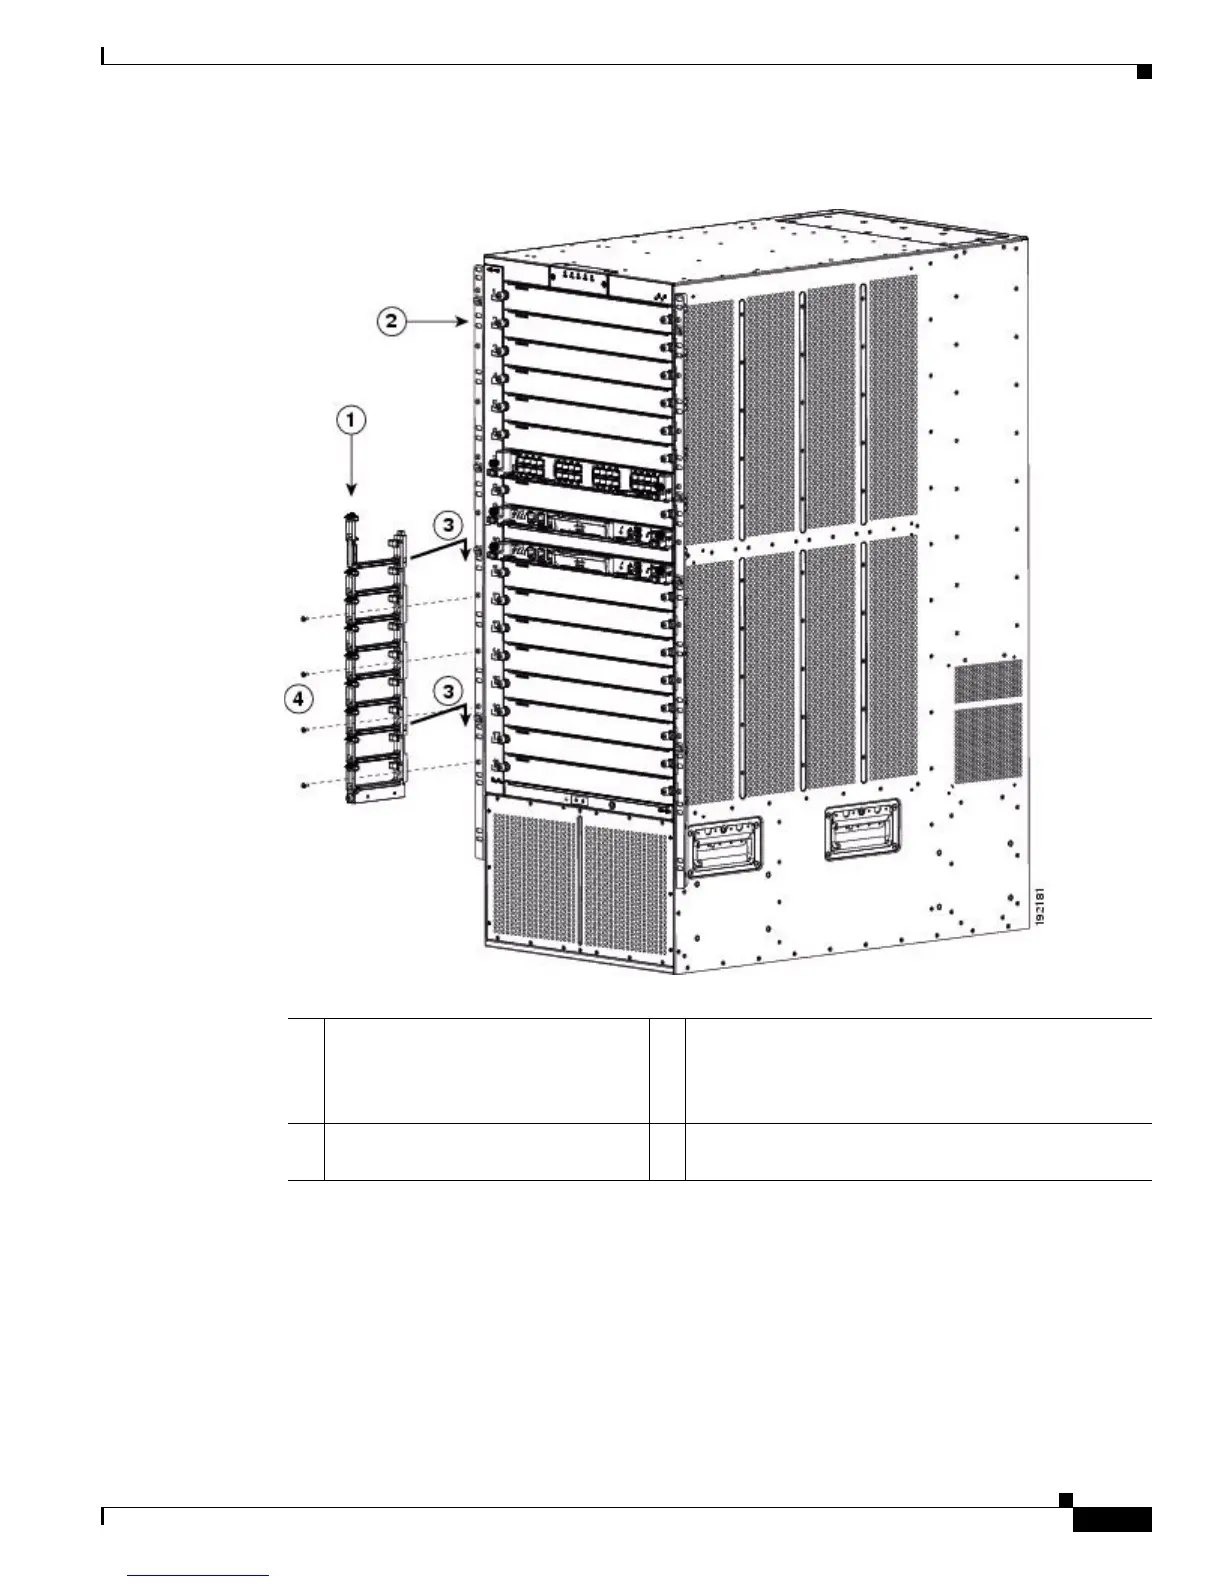
Figure 10-30 Attaching a Lower Cable Management Assembly to a Rack-Mount Bracket
Step 3 Repeat Step 1 to attach a lower cable management assembly to the right side of the chassis.
Step 4 Attach an upper cable management assembly onto the two hooks that protrude from the upper half of the
left rack-mount bracket that is attached to the Cisco Nexus 7018 switch chassis, and loosely fasten the
assembly to the chassis with four flat-head M4x10 screws as shown in Figure 10-31.
1 Lower cable management assembly. 3 Position the assembly so that the two lower hooks on
the rack-mount bracket fit inside the two holes on the
assembly, and then slide the assembly down so that it
is held by the hooks.
2 Rack-mount bracket. 4 Loosely fasten the assembly to the rack-mount bracket
with four M4x10 screws. Do not tighten these screws.

 Loading...


