E-17
Cisco Nexus 7000 Series Hardware Installation and Reference Guide
OL-23069-07
Appendix E Repacking the Cisco Nexus 7000 Series Switch for Shipment
Repacking the System Components
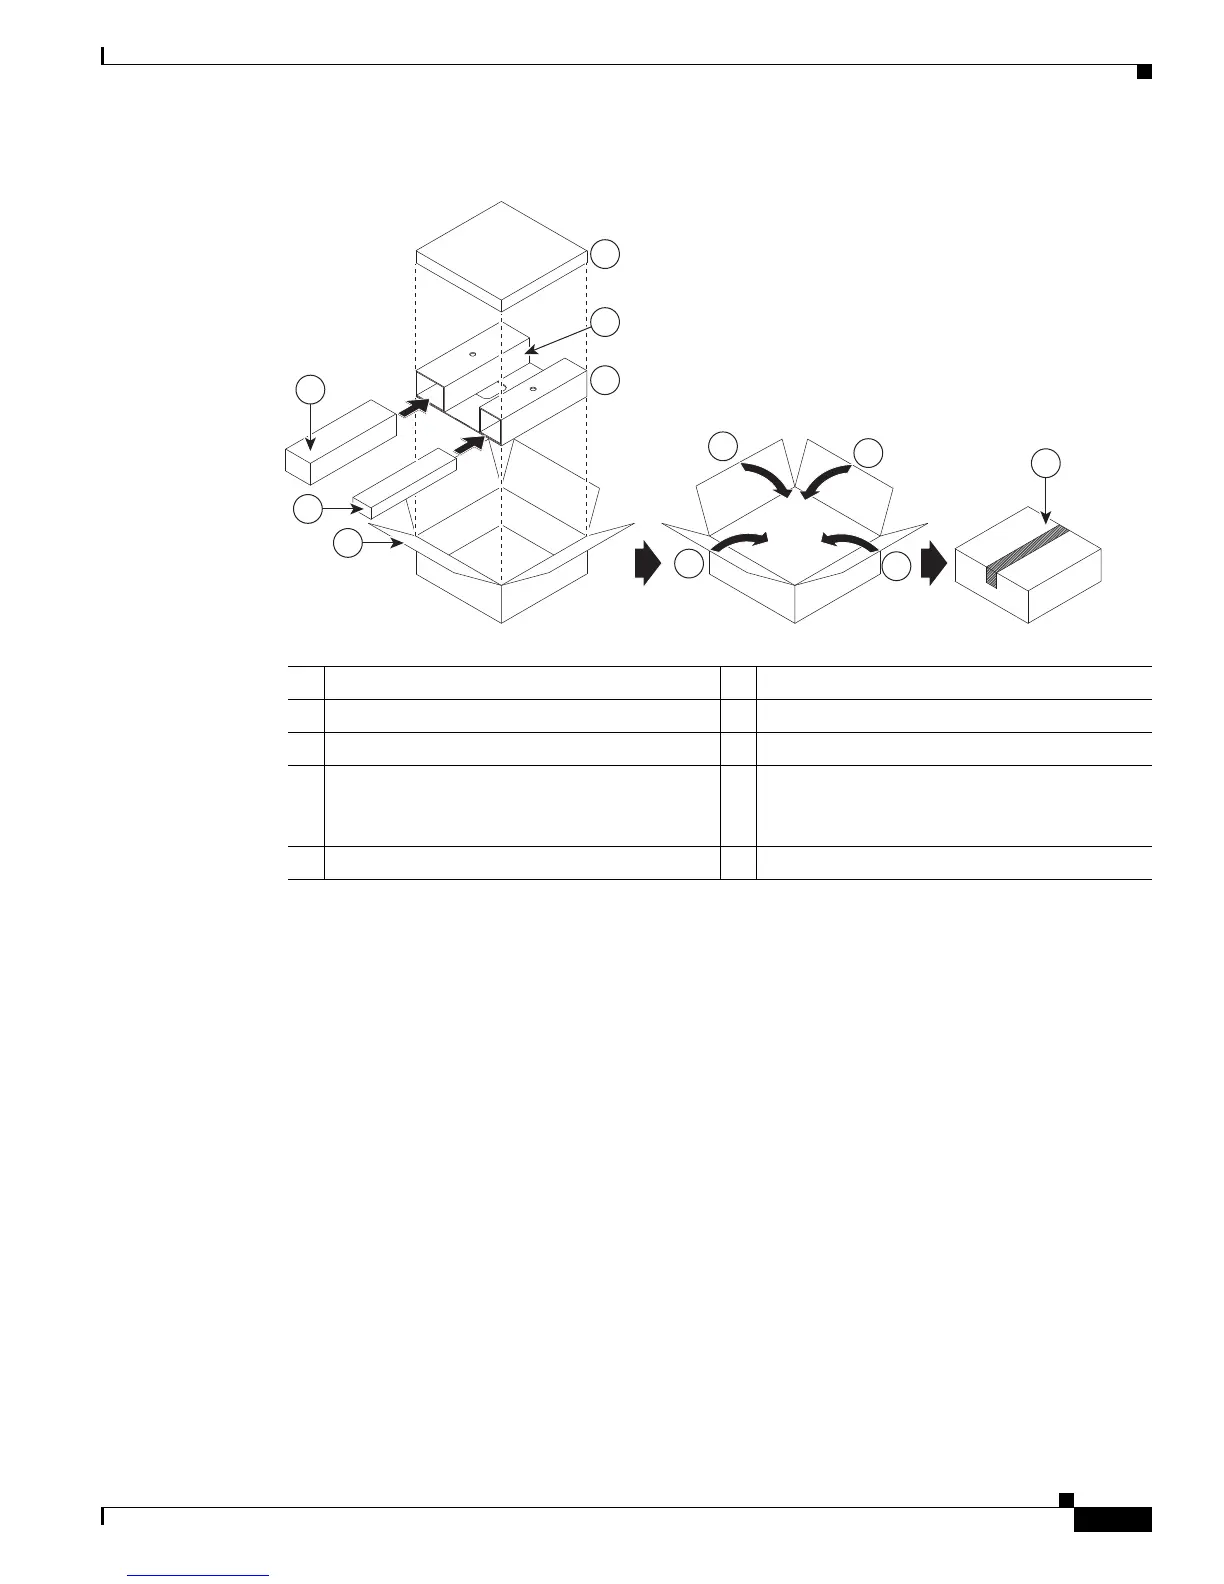
Figure E-10 Repacking the Front Door and Air Intake Frame
l.
Slide the air-intake frame and the hinge bracket inside separate slots of the protective cardboard
insert (see Callouts 2, 3, and 4 in Figure E-10), and place the cardboard insert in the bottom of the
box.
m. Place the small parts bag in the open slot of the cardboard insert (see Callout 5 in Figure E-10).
n. Place the front door, which is wrapped in bubblewrap, inside the box (see callout 6 in Figure E-10).
o. Fold the flaps of the box on top of the front door (see Callouts 7 and 8 in Figure E-10).
p. Secure the top two flaps together and to the box using packing tape (see Callout 9 in Figure E-10).
Step 8 Remove and repack the cable management frames as follows:
a. Remove the top cable management frame by unscrewing its four M4 screws (two on each side as
shown in Figure E-11) and pulling the frame off the chassis. Place the screws in a bag for small
accessory kit parts.
1 Box for the front door and air intake frame 6 Front door wrapped in bubble wrap
2 Hinge bracket for the front door 7 Shorter box flaps folded over the front door
3 Air-intake frame 8 Longer box flaps folded over the shorter flaps
4 Protective cardboard insert with slots
available for the hinge bracket and air-intake
frame
9 Tape securing the box flaps together and to the
box
5 Small parts bag placed in open slot

 Loading...


