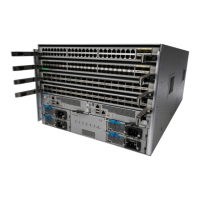
Figure 11: Attaching the Chassis to the Rack
Six M6 x 19 mm or 10-24 x 3/4 in. Phillips screws used to attach each
side bracket to a front mounting rail (use a total of 12 screws)
2Handles used to adjust the chassis
placement
1
Step 8 If you removed any fabric modules before moving the chassis, replace each one in the chassis as follows:
a) Holding the front of the fabric module (the side with the LEDs), turn the module so that the front side is vertical.
The top of the module has an alignment bracket running from the rear to the front. The electrical connectors
will be at the bottom.
Note
b) Align the rear of the fabric module to an open fabric slot and insert the bracket on top of the module into the track
at the top of the slot.
If there are only three fabric modules to install, install them in fabric slots 1, 3, and 5.
Note
c) Slide the module part way into the slot.
d) Press the ejector button on the front of the module, to release the levers from the front of the module.
e) Rotate the levers away from the front of the module and hold them while sliding the module all the way into the
slot.
f) Simultaneously rotate both levers to the front of the module. They click when locked to the front of the module.
Step 9 If you removed any fan trays before moving the chassis, reinstall each one in the chassis as follows:
a) Holding each of the two handles on the fan tray with your two hands, align the fan tray to an open fan tray slot.
The two alignment brackets on top of the fan tray should align to two tracks at the top of the slot.
Note
b) Slide the fan tray into the slot until the front of the fan tray comes in contact with the rear of the chassis.
The two alignment pins on the fan tray (on the top and one on the bottom) should go into holes in the
chassis and the four captive screws on the fan tray should align to screw holes in the chassis.
Note
c) Screw in the four captive screws to the chassis and tighten each screw to 8 in-lb (0.9 N·m).
Step 10 If you removed any power supplies before moving the chassis, reinstall each one as follows:
Cisco Nexus 7706 Hardware Installation Guide
OL-31330-0130
Installing the Switch Chassis
Installing the Chassis on a Four-Post Rack or Cabinet

 Loading...


