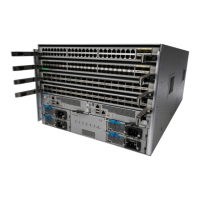
Figure 18: Attaching the Top Hood to the Chassis and Cable Management Assemblies
M4 x 13 mm screws (two) secure the top hood to
the chassis
4Top hood cable management frame1
Four M4 x 13 mm screws (two per side) secure the
top hood to each upper cable management frame
5Alignment pins on the back side of the top hood
frame
2
Alignment holes in the chassis3
b) Verify that two alignment pins on the back side of the hood (see Callout 2 in the previous figure) align with the two
holes (see Callout 3 in the previous figure) in the front of the chassis. If they align, slide the hood to the front of the
chassis.
The screw hole next to each alignment pin should align with a screw hole on the chassis, and two screw holes on
each of two sides of the hood should align with two screw holes on the top of a cable management assembly.
c) Secure the top hood to the chassis using two M4 x 12 mm flat-head Phillips screws (see Callout 4 in the previous
figure). Tighten each screw to 11.5 to 15 in-lb (1.3 to 1.7 N·m) of torque.
d) Secure the top hood to the two side assemblies by using four M4 x 12 mm flat-head Phillips screws (use two screws
for each assembly) (see Callout 5 in the previous figure). Tighten each screw to 11.5 to 15 in-lb (1.3 to 1.7 N·m) of
torque.
What to do next
You are ready to attach the optional door to the cable management frames.
Attaching the Front Door to the Chassis
Before you can attach the optional front door to the chassis, you must attach a door-stop bracket to the bottom
of the cable management top hood.
Optionally, you can install an air filter inside the door and brush filters to the sides of the door and to the sides
of the cable management assemblies (see Installing Cable Management Frames onto the Chassis , on page
36).
Cisco Nexus 7706 Hardware Installation Guide
OL-31330-0138
Installing the Switch Chassis
Attaching the Front Door to the Chassis

 Loading...


