5-10
Cisco Wireless LAN Controller Configuration Guide
OL-9141-03
Chapter 5 Configuring Security Solutions
Configuring Access Control Lists
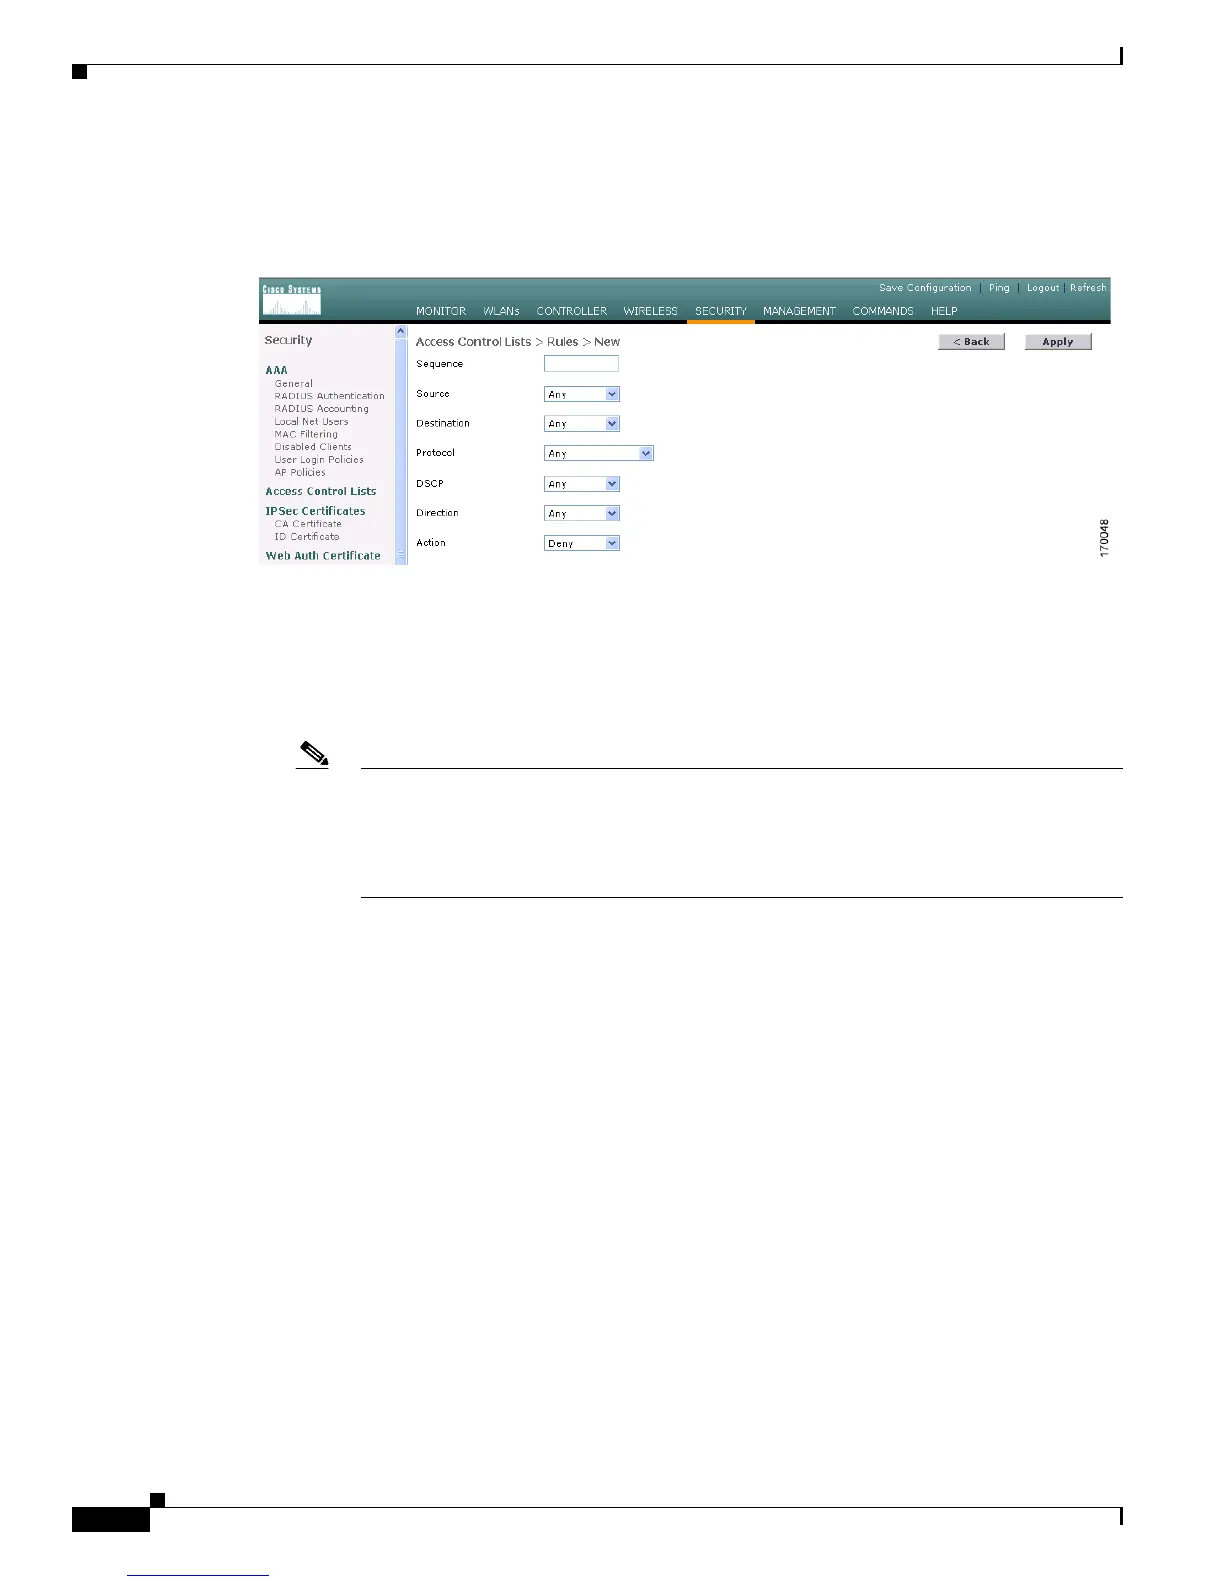
Step 5 When the Access Control Lists > Edit page appears, click Add New Rule. The Access Control Lists >
Rules > New page appears (see Figure 5-4).
Figure 5-4 Access Control Lists > Rules > New Page
Step 6 Follow these steps to configure a rule for this ACL:
a. The controller supports up to 64 rules for each ACL. These rules are listed in order from 1 to 64. In
the Sequence field, enter a value (between 1 and 64) to determine the order of this rule in relation
to any other rules defined for this ACL.
Note If rules 1 through 4 are already defined and you add rule 29, it is added as rule 5. If you add
or change a sequence number for a rule, the sequence numbers for other rules adjust to
maintain a contiguous sequence. For instance, if you change a rule’s sequence number from
7 to 5, the rules with sequence numbers 5 and 6 are automatically reassigned as 6 and 7,
respectively.
b. From the Source drop-down box, choose one of these options to specify the source of the packets to
which this ACL applies:
• Any—Any source (This is the default value.)
• IP Address—A specific source. If you choose this option, enter the IP address and netmask of
the source in the edit boxes.
c. From the Destination drop-down box, choose one of these options to specify the destination of the
packets to which this ACL applies:
• Any—Any destination (This is the default value.)
• IP Address—A specific destination. If you choose this option, enter the IP address and netmask
of the destination in the edit boxes.
d. From the Protocol drop-down box, choose the protocol to be used for this ACL. These are the
protocol options:
• Any—All protocol (This is the default value.)
• TCP—Transmission Control Protocol
• UDP—User Datagram Protocol
• ICMP—Internet Control Message Protocol
• ESP—IP Encapsulating Security Payload
 Loading...