Setup
DHCP Relay
SPS208G/SPS224G4/SPS2024 Service Provider Switches User Guide 25
2
Replies
The switch verifies if Option-82 is both included in the message and was inserted
by the switch. In that case, the switch removes Option 82, determines the packet's
VLAN and the egress port according to the information included in the removed
Option 82, and forwards the packet.
To enable and configure DHCP Relay:
STEP 1 Click Setup > DHCP Relay. The
DHCP Relay Screen
opens.
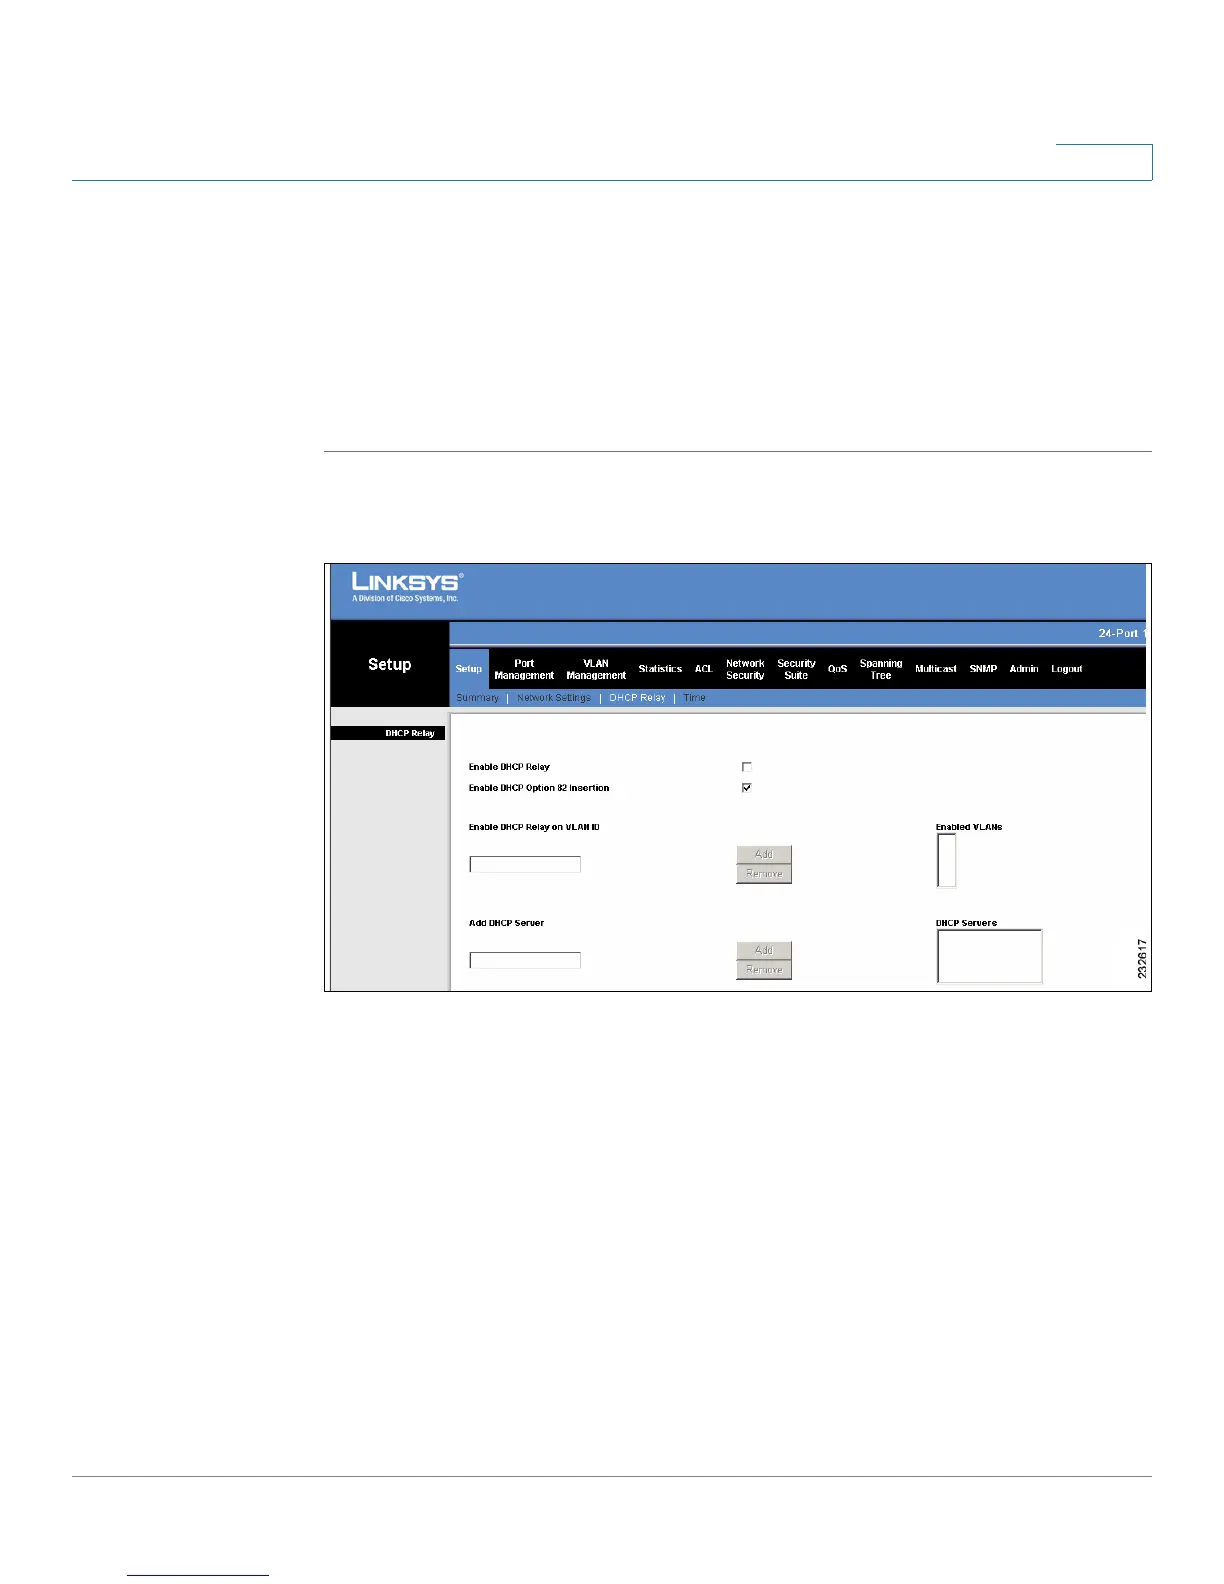
Figure 8 DHCP Relay Screen
The
DHCP Relay Screen
contains the following fields:
• Enable DHCP Relay — Enable or disable DHCP Relay on the device. The
possible values are:
-
Checked
— Indicates that DHCP Relay is enabled on the device.
-
Unchecked
— Indicates that DHCP Relay is disabled on the device.
• Enable DHCP Option 82 Insertion— Enable or disable DHCP Option 82
Insertion on the device. The possible values are:
-
Checked
— Indicates that DHCP Option 82 Insertion is enabled on the
device. This option enabled automatically (and grayed) when “Enabled
DHP Relay” option is checked. When using Transparent L2 DHCP relay,
the user must enable DHCP Snooping manually.