© 1999-2017 Citrix Systems, Inc. All rights reserved. p.62https://docs.citrix.com
To remove the inner rails from the rail assembly
1. Place the rail assembly on a flat surface.
2. Slide out the inner rail toward the front of the assembly.
3. Depress the latch until the inner rail comes all the way out of the rail assembly.
4. Repeat steps 1 through 3 to remove the second inner rail.
To attach the inner rails to the appliance
1. Position the right inner rail behind the handle on the right side of the appliance.
2. Align the holes on the rail with the corresponding holes on the side of the appliance.
3. Attach the rail to the appliance with the provided screws: 4 per side for a 1U appliance and 5 per side for a 2U appliance,
as shown in the following figure.
Figure 1. Attaching inner rails
4. Repeat steps 1 through 3 to install the left inner rail on the other side of the appliance.
To install the rack rails on the rack
1. If you have a round-hole, threaded rack, skip to step 3.
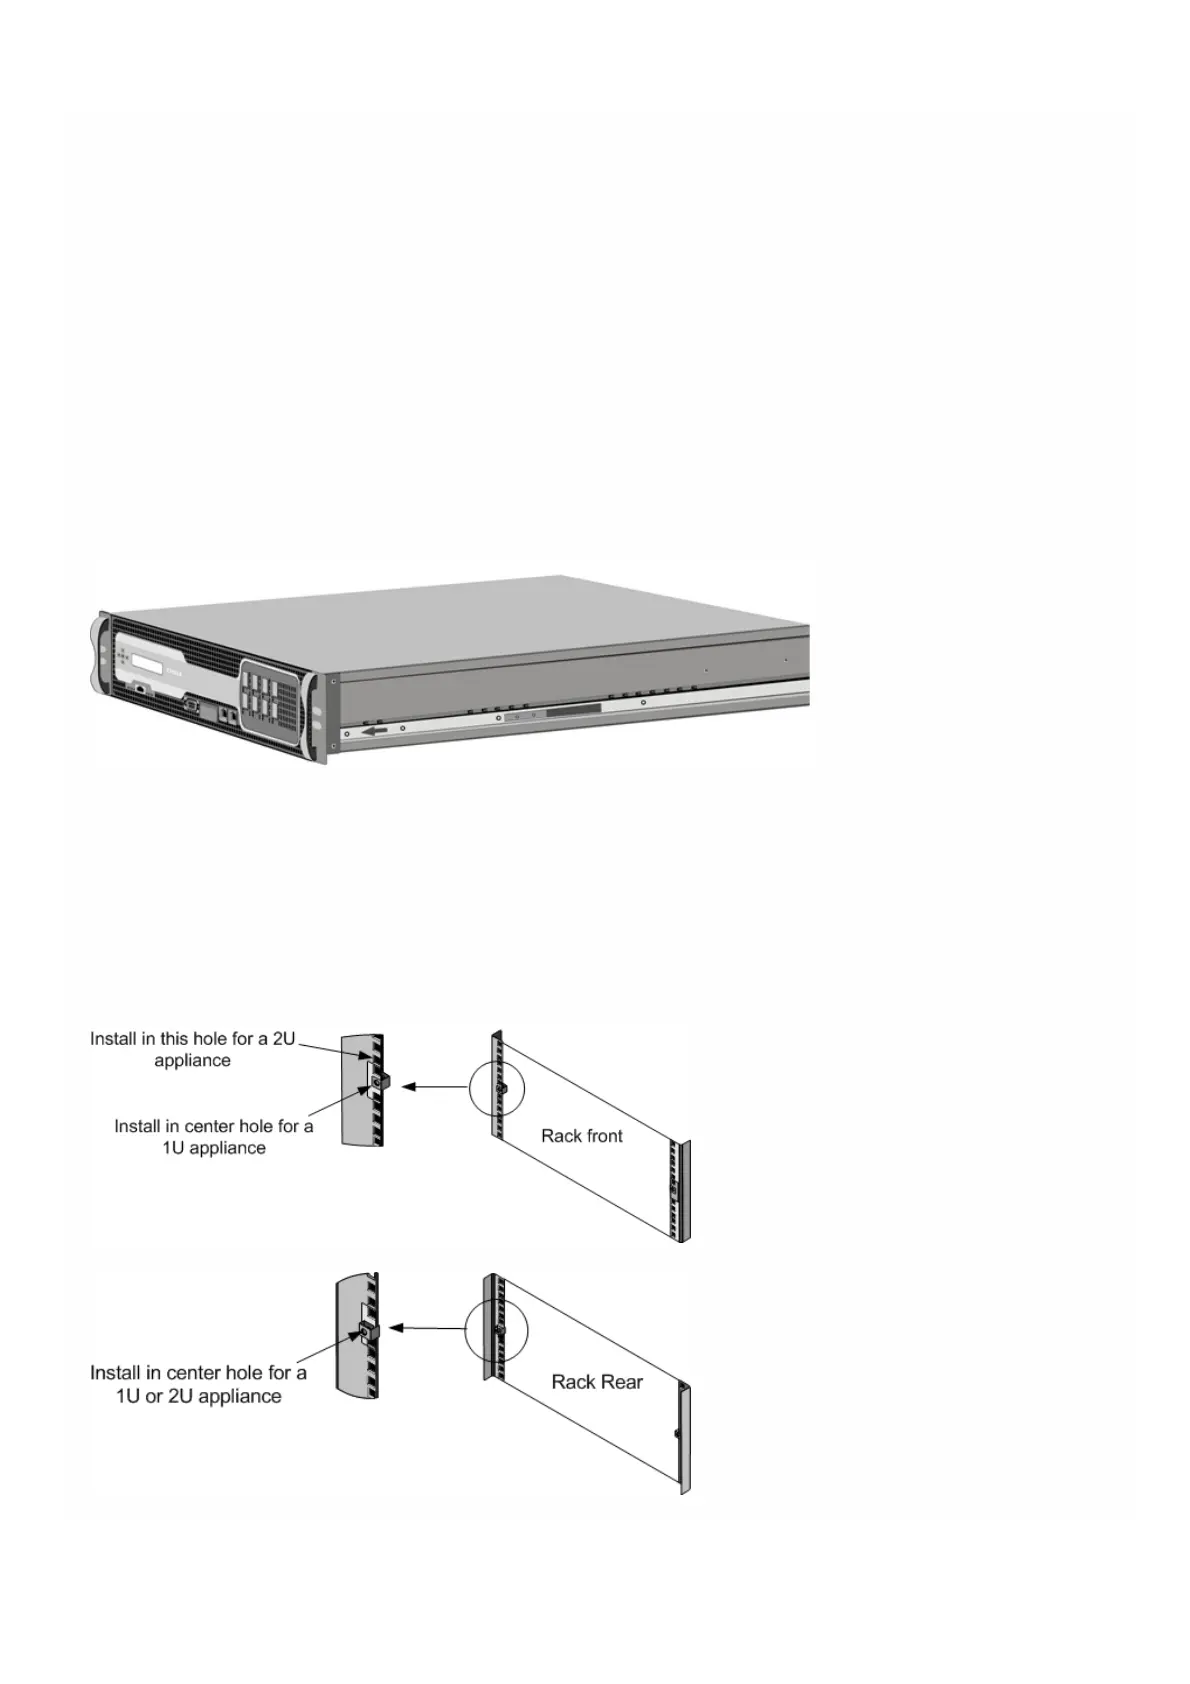
2. Install square nut retainers into the front post and back post of the rack as shown in the following figures. Before
inserting a screw, be sure to align the square nut with the correct hole for your 1U or 2U appliance. The three holes are
not evenly spaced.
Figure 2. Installing Retainers into the Front Rack Posts
Figure 3. Installing Retainers into the Rear Rack Posts