60
Step 9
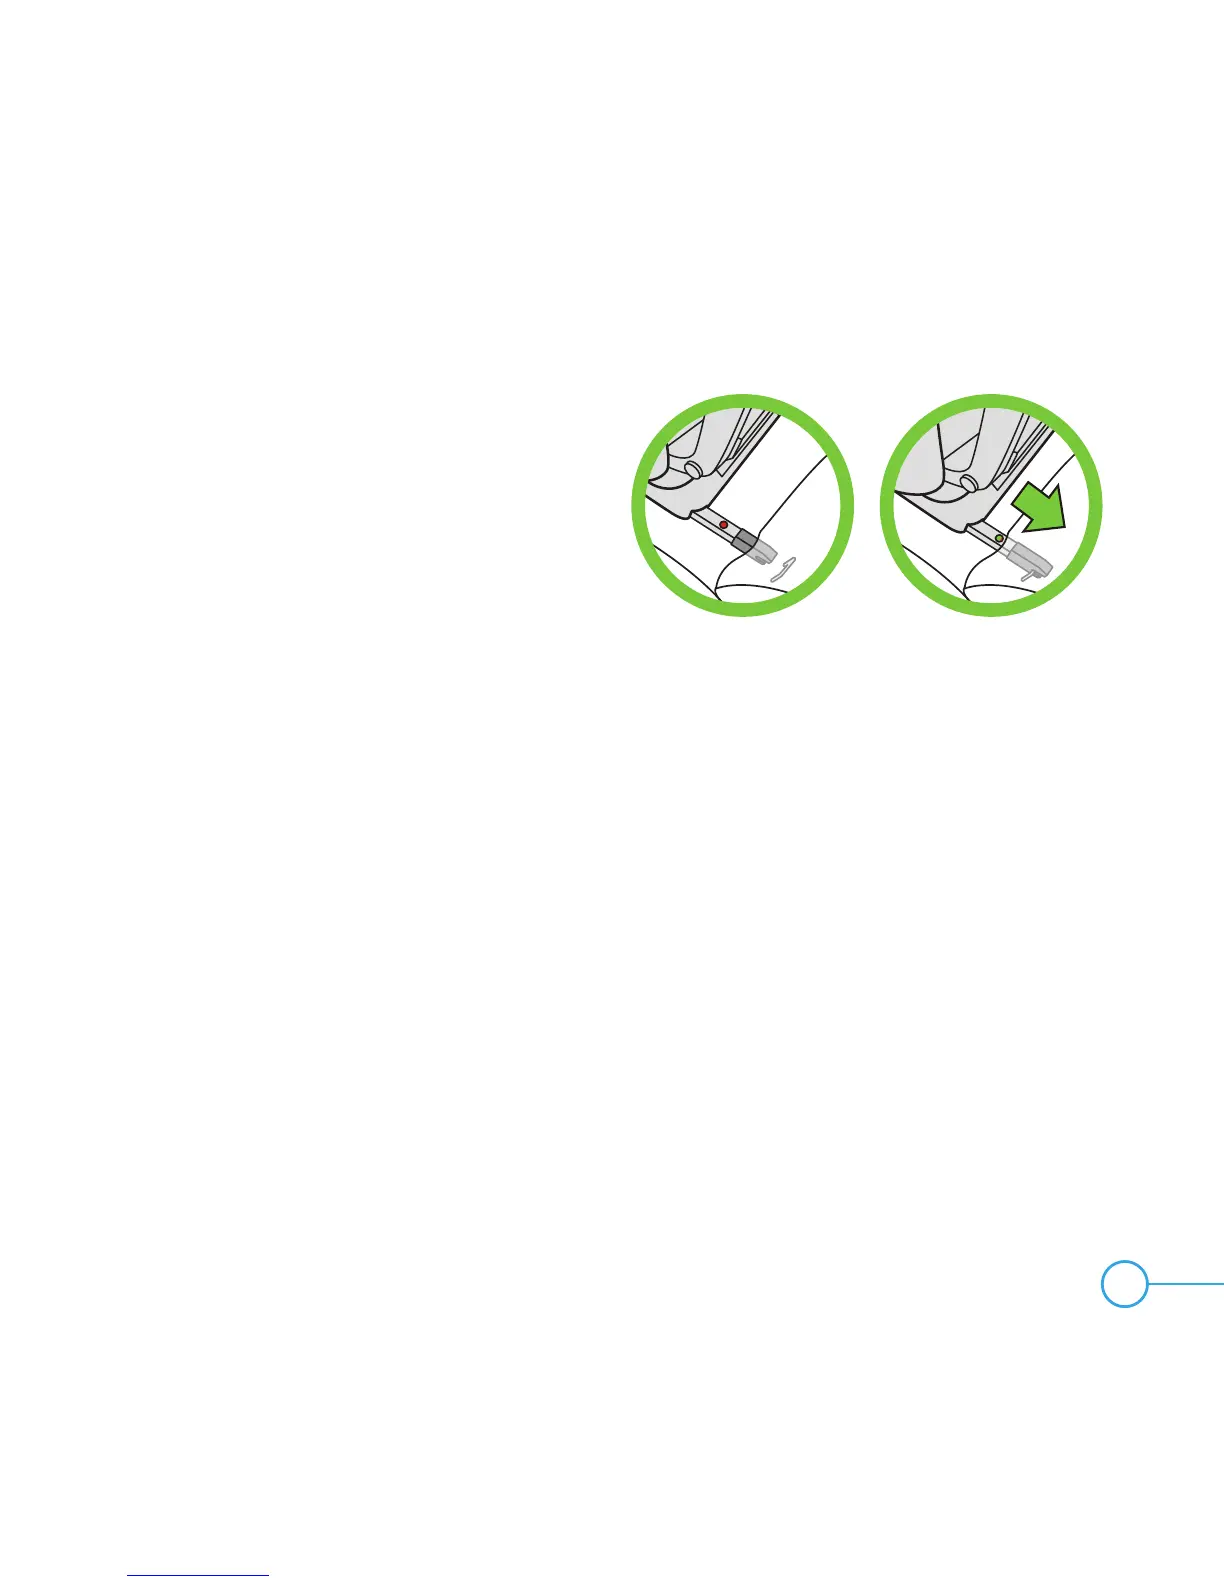
Once the Rigid LATCH Connectors are
connected to the LATCH lower anchors,
check both LATCH Connector lock indicators
located behind the Rigid LATCH Connectors
to make sure they have changed from
completely red (unlocked) to mostly green
(locked) as shown in Figure 82.
Pull forward on this car seat to make sure it
is securely attached to the vehicle’s LATCH
lower anchors on both sides. If not, go back
to Step 8.
NOTE: It may be necessary to adjust the car
seat to recline position 1 in some vehicles in
order to connect Rigid LATCH Connectors
to the vehicle lower anchors. If Rigid LATCH
Connectors cannot be successfully connected
in this seating position, it may be necessary
to go back to Step 2 and try a different
seating position.
IMPORTANT: If Rigid LATCH Connectors
fail to connect to the vehicle’s LATCH lower
anchors, you can still use this seat. See
“Installing Forward-Facing Car Seat With
Vehicle Belt” on page 66 of this manual.
Please notify Clek Customer Service if the
Rigid LATCH Connectors fail to latch by
calling 1-866-656-2462.
Figure 82