30
Installation
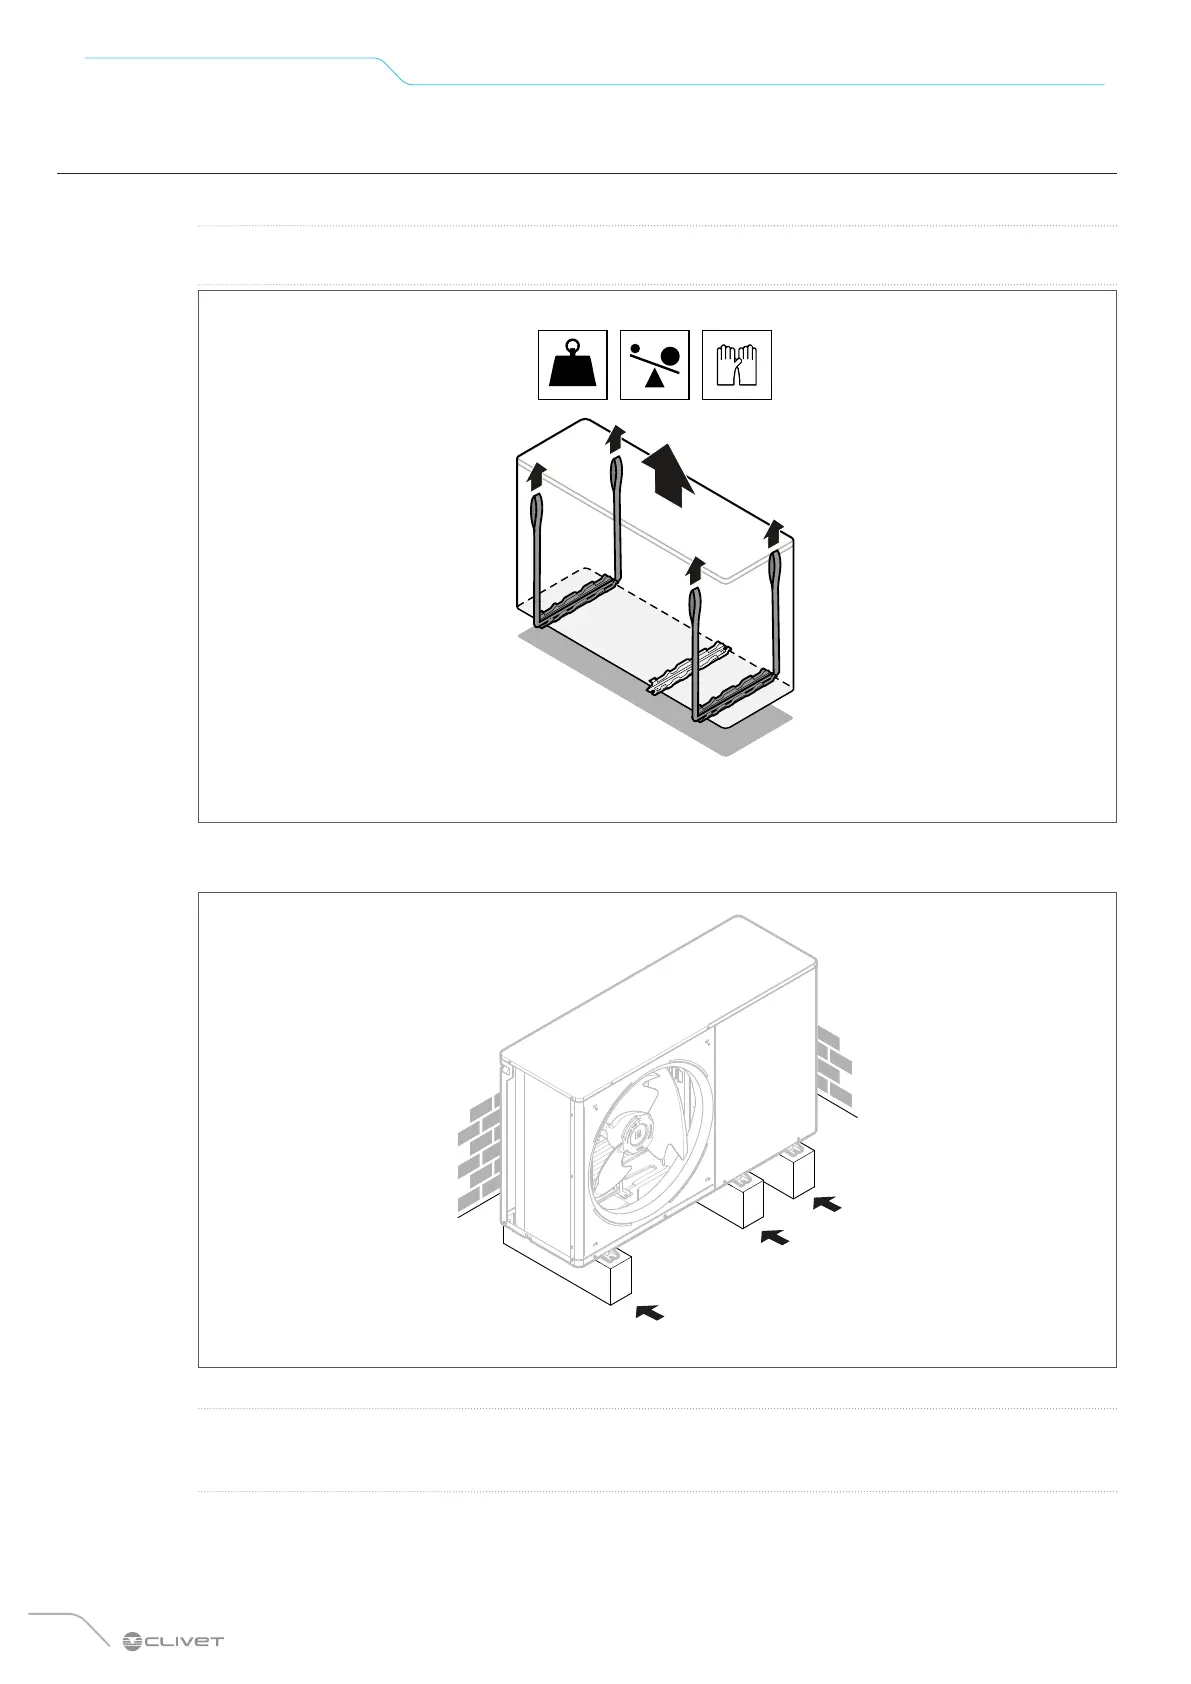
5.6 Handling
Place the unit on the installation structure using slings.
W
CAUTION
Do not tilt or damage the unit during handling.
)Ì
×
Â×Ø#Ù×Ø#
+×#Ú
&-,
© ½; ) ½&""
&¥66
2"" ()) "" &
2&;
)'!'! "Ì
¿ )& 2 & && 6
(;
! ¨( ; ( )&
(
±150
kg
¢6)&
) ;
)'!' "gh
&.-+6-&
¥&<()6&&
( & ( ( "&&
&,&
&-,
¥;À+%æ(&
& & ( 6 (
; Þ &2" & &
&
&-,
¥ 2 && ; 2 &(
)""(2&(6
;(&()#/
;
.hh
A
171 300758
43
48
288
451
613
776
408
414
349
214
111
480~490
107
148
B B
B
406
C
D F
=
E
&&
(&""
* ¨2
©(((6
¨)2)&&66&
. ©&&
&{
&; & 6& ())2" &&
6"&& &) & 6& ;
Þ ()) 22& 2 + 6
,()0
¢62(()(2""
&&&&6(
! ¢6 )6 ((& 6& (
( ) && ( (6
2""
Fig. 24
• Assemble the unit on the installation structure.
Fig. 25
O
WARNING
If the unit's drainage holes are covered by the installation base or floor surface, raise the unit to leave a gap
of at least 120mm under the unit.
 Loading...