5. Remove the float cover (4)
6. Remove the vacuum filter (5) from the float body
7. Clean the filter and float body with a jet of water
8. Reassemble all the elements
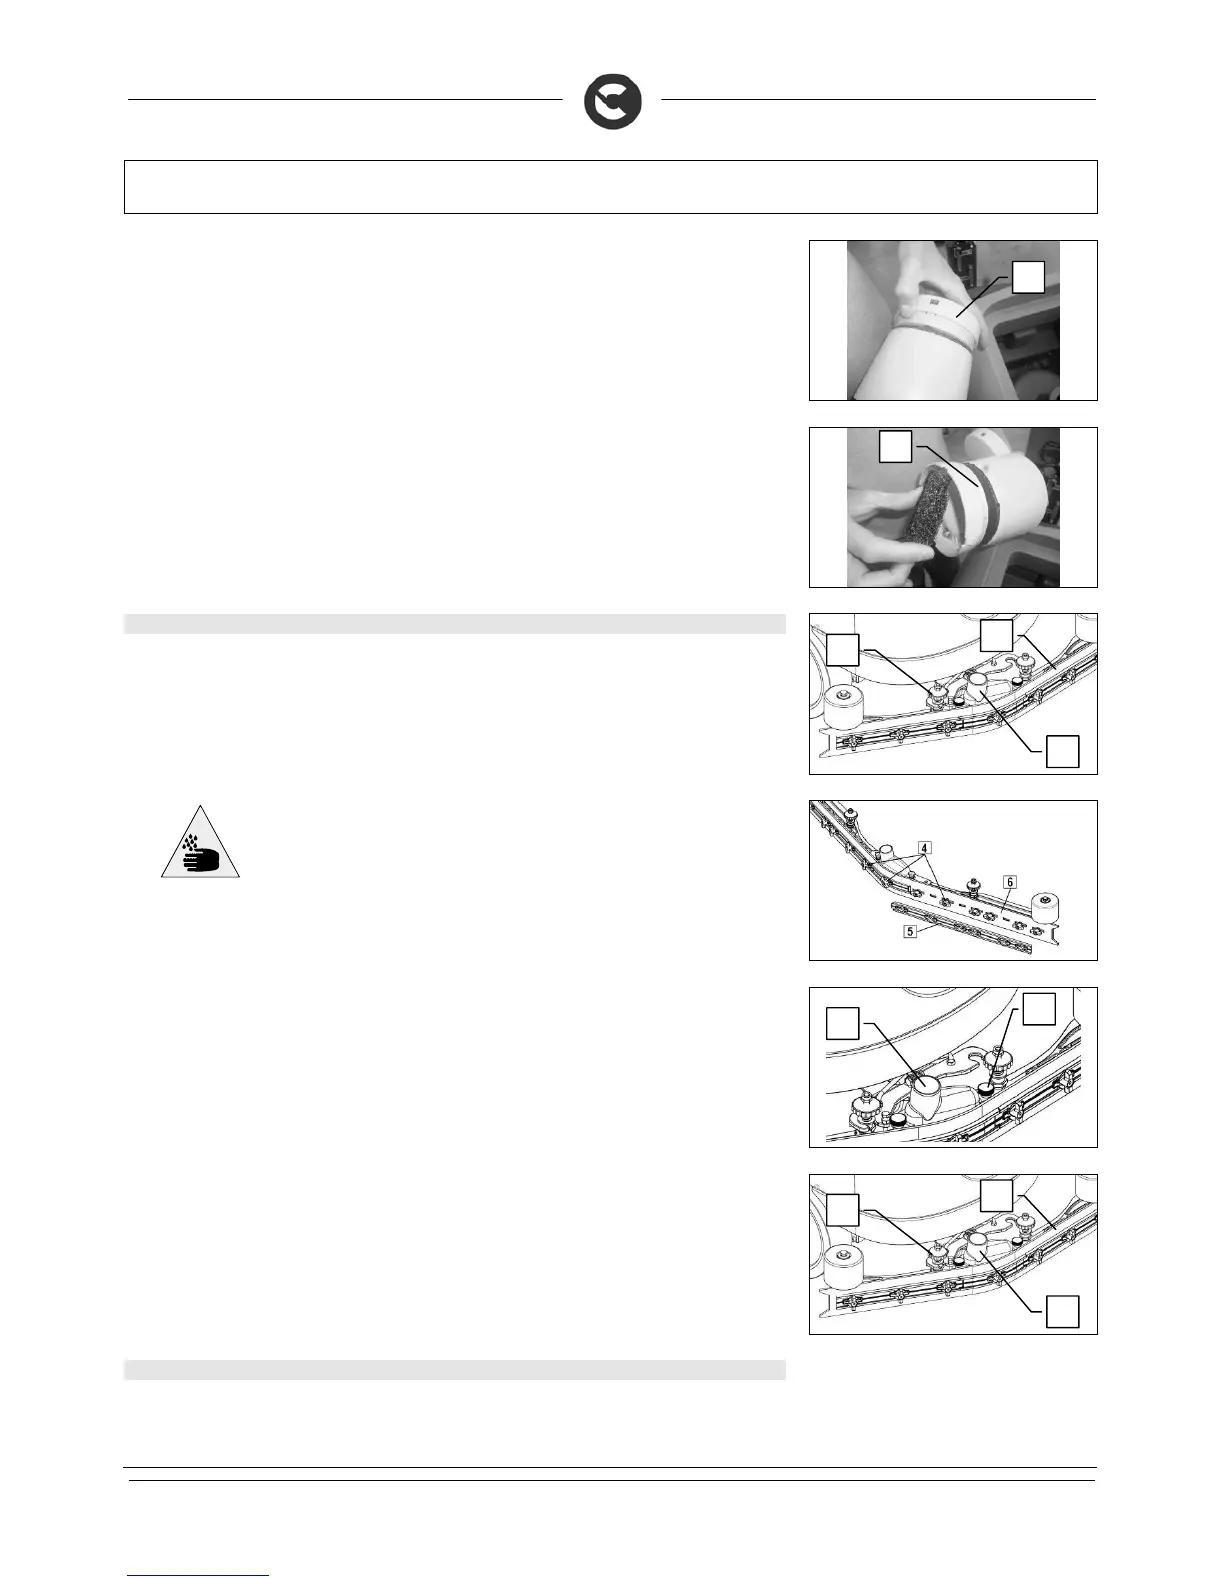
35. CLEANING THE SQUEEGEE
The careful cleaning of the whole vacuum unit ensures better drying and cleaning of the floor as well as
greater duration of the vacuum motor. Proceed as follows for cleaning:
1. Slide the vacuum tube (1) from the squeegee sleeve.
2. Remove the squeegee (2) from the support arm by unscrewing the handwheel (3).
3. Use a damp cloth to clean the front and rear rubbers, and also clean the vacuum chamber of the
squeegee body
ATTENTION: this operation must be carried out using gloves to protect against
contact with dangerous solutions.
4. Check the wear of the rubbers. If the edge of the rubber is badly damaged, the rear rubber (6) can be
turned on all four edges. If the rubbers are completely worn proceed with the replacement. To remove
the rubber, turn the wing nuts (4) in a horizontal position, remove the rubber-pressing blades (5) and
then remove the rubber to turn it or re
5. Clean the vacuum nozzle (7). To do this, remove it from the squeegee body by rotating the knobs (8)
anticlockwise
6. Reassemble the vacuum nozzle on the squeegee body
fter cleaning, replace the squeegee (2) on the initial support, firstly inserting the left pin of the
squeegee in the left slot of the arm, then the right pin in the right slot, being careful to keep the spring
and washer on the plate of the arm. This can be simplified by first loosening the handwheel (3) on the
pin. Then tighten the handwheel (3) to lock the squeegee in place
8. Insert the squeegee tube in the appropriate sleeve (1).
36. CLEANING THE SOLUTION TANK FILTER
Careful cleaning of the detergent/water solution filter ensures a better working capacity. Proceed as follows
for cleaning:
1. Check the main switch is on “0” (turn it to this position if necessary)
2. O
 Loading...