28
EXTRAORDINARY MAINTENANCE
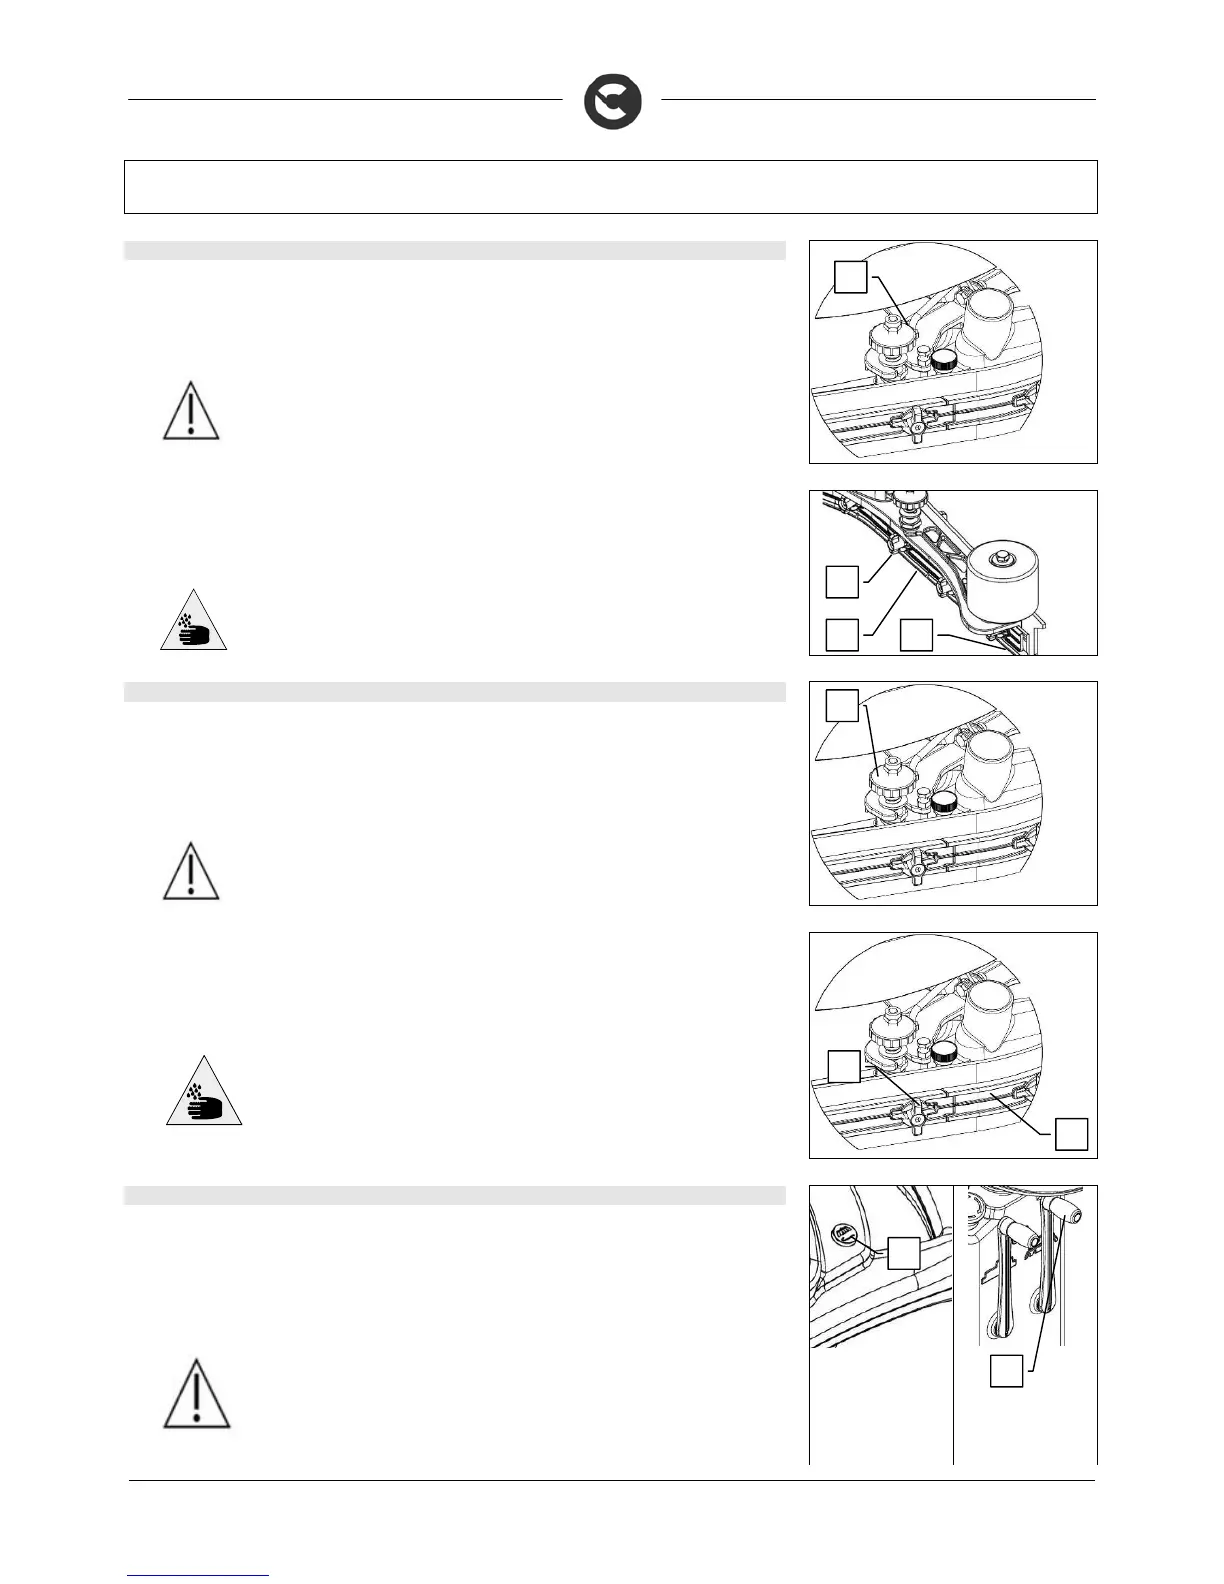
39. REPLACING THE FRONT SQUEEGEE RUBBE
acuum will be poor and the machine will not dry perfectly if the front squeegee rubber is worn. Proceed as
follows to replace:
1. Check the main switch is on “0” (turn it to this position if necessary)
2. Disconnect the squeegee by loosening the knobs (1)
WARNING: Before performing any maintenance, remove the keys from the panel
and disconnect the battery connector
3. Turn the wing nuts (2) in the horizontal position
4. Remove the front rubber-pressing blades (3)
5. Remove the rubber (4) and replace it
6. To replace the rubber, proceed in reverse order
WARNING: These operations must be carried out using gloves to protect against
contact with dangerous solutions.
40. REPLACING THE REAR SQUEEGEE RUBBE
If the squeegee rear rubber is worn and does not dry well, it is possible to change the drying edge using
one of the 4 edges of the rubber.
This can be done with the squeegee removed, proceeding as follows:
1. Check the main switch is on “0” (turn it to this position if necessary)
2. Disconnect the squeegee by loosening the knobs (1)
WARNING: Before performing any maintenance, remove the keys from the panel
and disconnect the battery connector
3. Turn the wing nuts (2) in the horizontal position
4. Remove the rear rubber-pressing blades (3) and then the rubber, to turn it over or replace it
5. To replace the rubber, proceed in reverse order
6. Adjust the height of the squeegee depending on the rubber (see “ADJUSTING THE HEIGHT OF THE
SQUEEGEE SUPPORT”)
WARNING: These operations must be carried out using gloves to protect
against contact with dangerous solutions.
n undamaged brush ensures a better working capacity, to replace it proceed as follows:
1. Check the main switch is on “1” (turn it to this position if necessary)
2. Raise the brush head by turning the right-hand lever (1) anticlockwise, then press the brush release
button (2) on the steering wheel
3. As soon as you press the button, you will see "RELEASE?" on the screen. Press the brush release
button (2) on the steering wheel again, to confirm
4. Take the brush and replace it
WARNING: During this operation, check there are no people or objects near the
brush.