34
MACHINE PREPARATION
MACHINE PREPARATIONMACHINE PREPARATION
MACHINE PREPARATION
14.
14.14.
14.
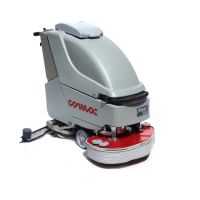
SQUEEGEE ASSEMBLY
SQUEEGEE ASSEMBLY SQUEEGEE ASSEMBLY
SQUEEGEE ASSEMBLY
The squeegee, which is packed separately from the machine, should be assembled as
shown in the figure, threading the stud bolt in the coupling until the release of the lever.
Fit the squeegee hose into its coupling, paying attention that the hose has to pass on
the right side from the lifting cable.
15.
15.15.
15.
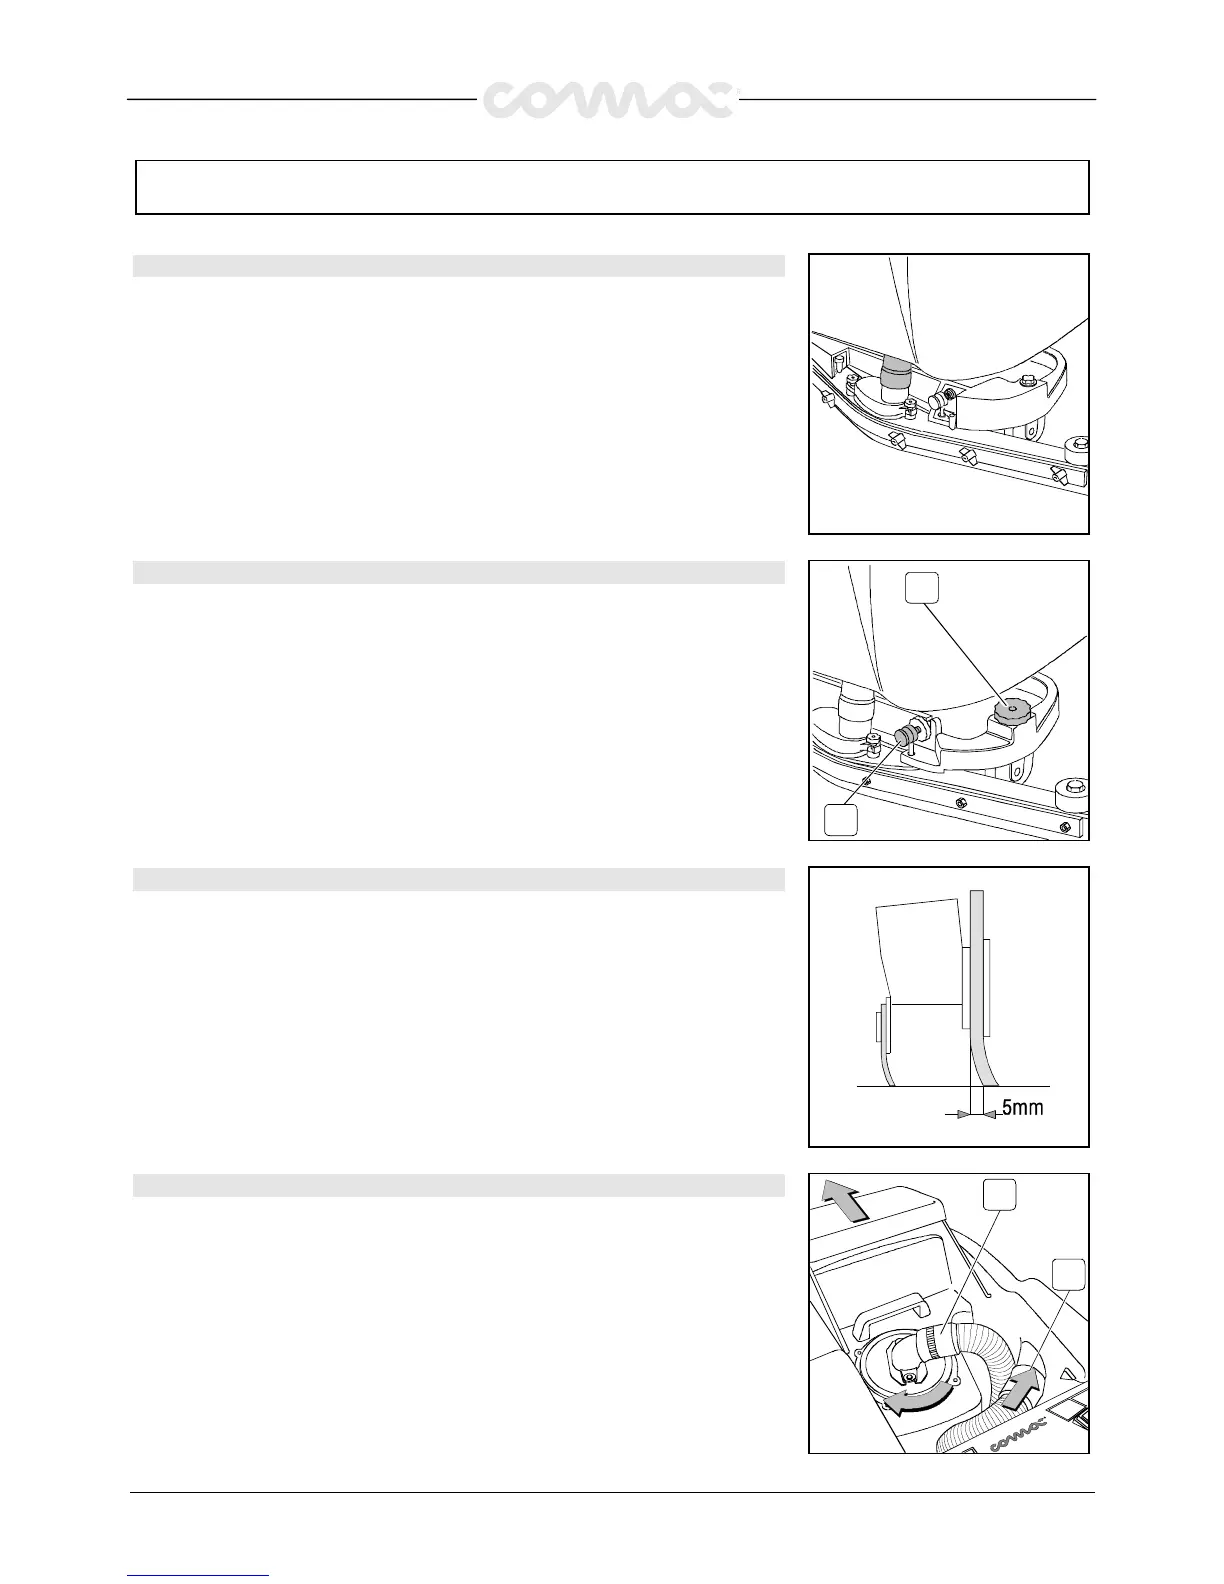
ADJUSTMENT SQUEEGEE HEIGHT
ADJUSTMENT SQUEEGEE HEIGHT ADJUSTMENT SQUEEGEE HEIGHT
ADJUSTMENT SQUEEGEE HEIGHT
The squeegee has to be regulated depending on the wearing of the rubbers. To adjust
this, rotate the knob (2) counterclockwise to lift the squeegee and clockwise to lower it.
Note:
Note:Note:
Note: The right and left wheels must be adjusted at the same amount so that the
squeegee works in parallel to the floor.
2
1
16.
16.16.
16.
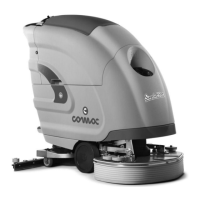
ADJUSTMENT SQUEEGEE INCLINATION
ADJUSTMENT SQUEEGEE INCLINATION ADJUSTMENT SQUEEGEE INCLINATION
ADJUSTMENT SQUEEGEE INCLINATION
During working operation, the rear rubber has to work slightly tilted backwards and this
equally in its whole length for about 5mm. Should it be necessary to increase the
rubber bending in the central part, then tilt the squeegee body backwards and turn
the adjuster (1) counterclockwise. If the rubber bending is to be noticeable at the sides
of the squeegee, turn the adjuster clockwise. At the end of the adjustment, block the
adjuster nut.
17.
17.17.
17.
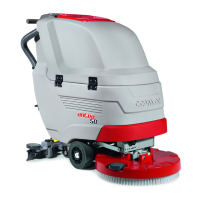
RECOVERY TANK
RECOVERY TANK RECOVERY TANK
RECOVERY TANK
Open the cover and check that, the suction plug (2) is properly blocked by fitting the
notches in its proper seat rotating it clockwise and that it is connected regularly to the
hose which goes to the suction motor.
Check furthermore that, the squeegee hose (1) is properly placed in their seats and that
the plug of the exhaust pipe, which is located in the front part of the machine, is closed.
1
2