Mounting a UAP2 on a Ceiling
Note: The drop rail is NOT included with the UAP2 and needs to be ordered separately. In the
NAR market, this drop rail can be ordered as part OC-BA50A. In other markets the drop rail may not
be available as a CommScope part number; look for compable third-party opons such as the
Eaton BA50A.
Before starng the UAP2 ceiling installaon, go to Connect the Fiber UAP2 to a Classic CAN or TEN.
1. Follow the steps in Unpack and Inspect the UAP2 and Accessories.
2. Refer to and observe all cauons listed in General Mounng Cauons.
3. Refer to UAP2 Dimensions to determine the mounng locaon, which must be able to support the
weight and dimensions of the UAP2 .
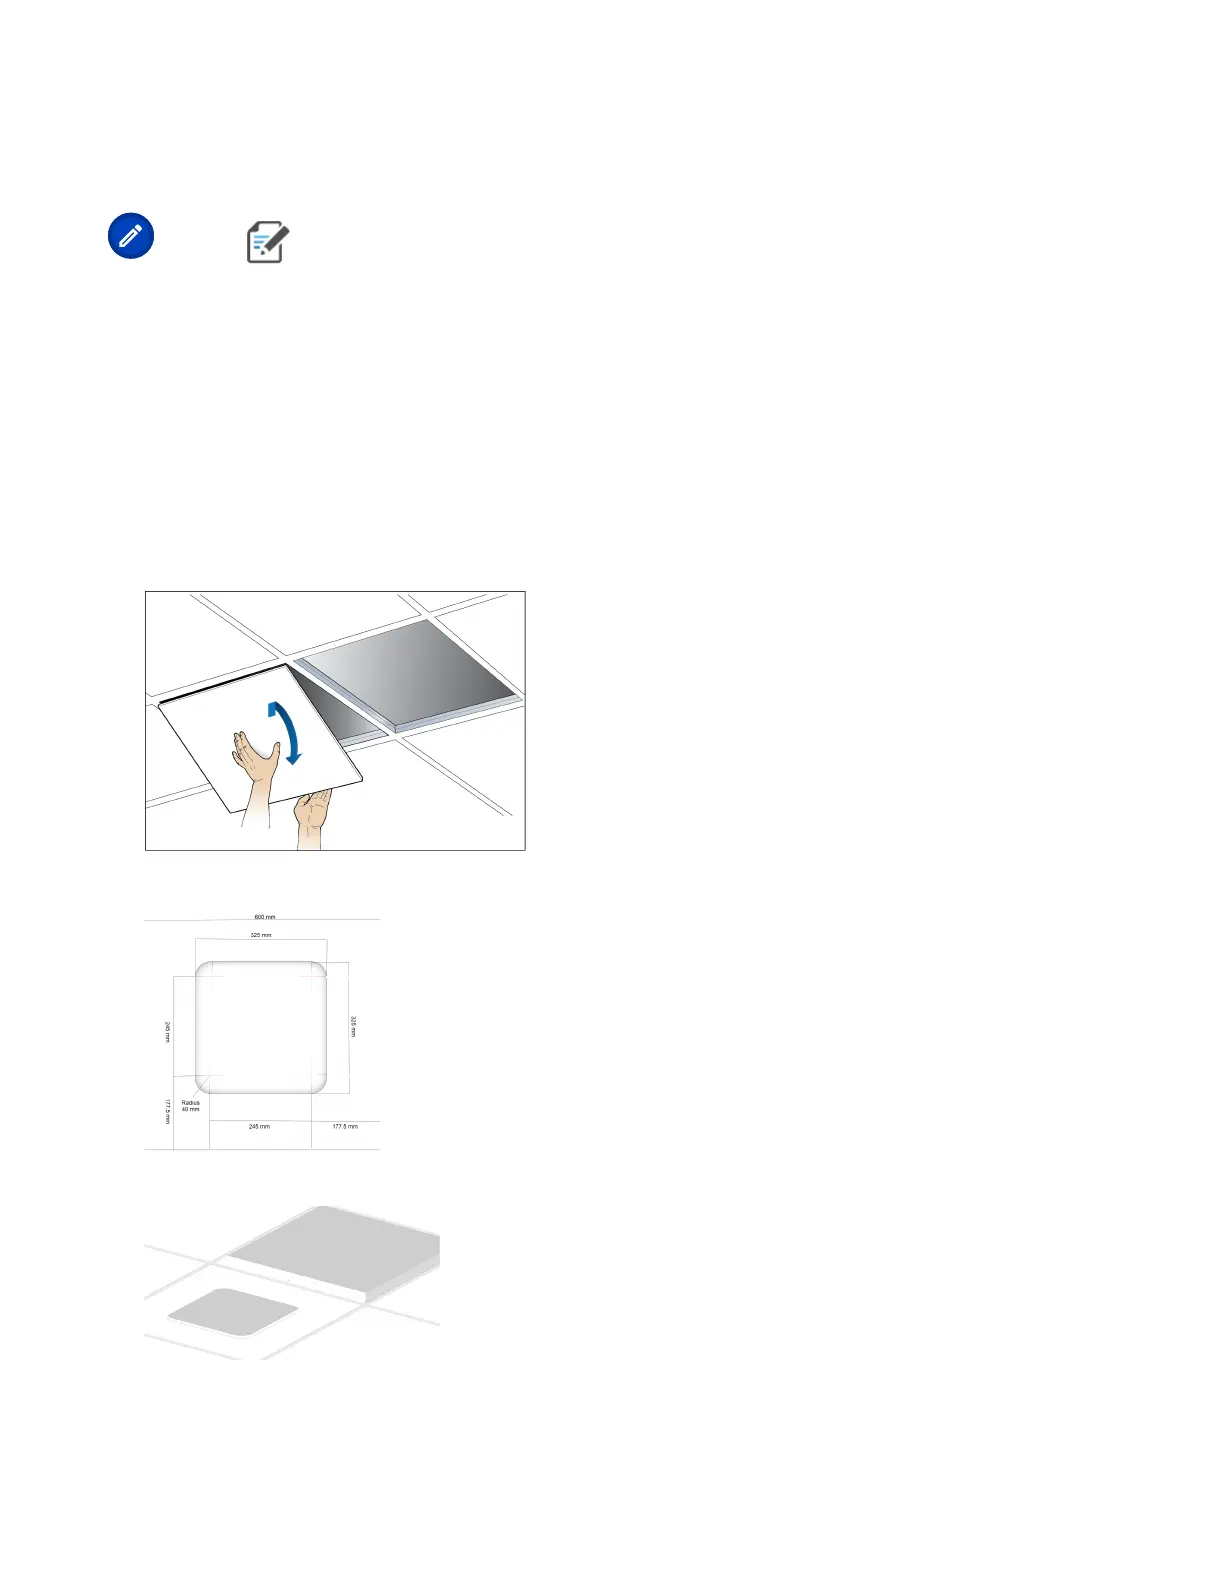
4. Remove two adjacent ceiling les.
5. Mark and cut the opening according to the dimensions in the following drawing.
6. Replace the cutout le in the ceiling. (Leaving the adjacent le out.)
7. Aach the splice box U-bracket to the drop rail.
DRAFT: CONFIDENTIAL
Chapter 4: Mount the Fiber UAP2
CommScope ERA
®
UAP2 with Fiber Interface Installaon Guide , Release
P/N M0203AB, DRAFT Rev D 29