ComNav Marine 1420 Autopilot System
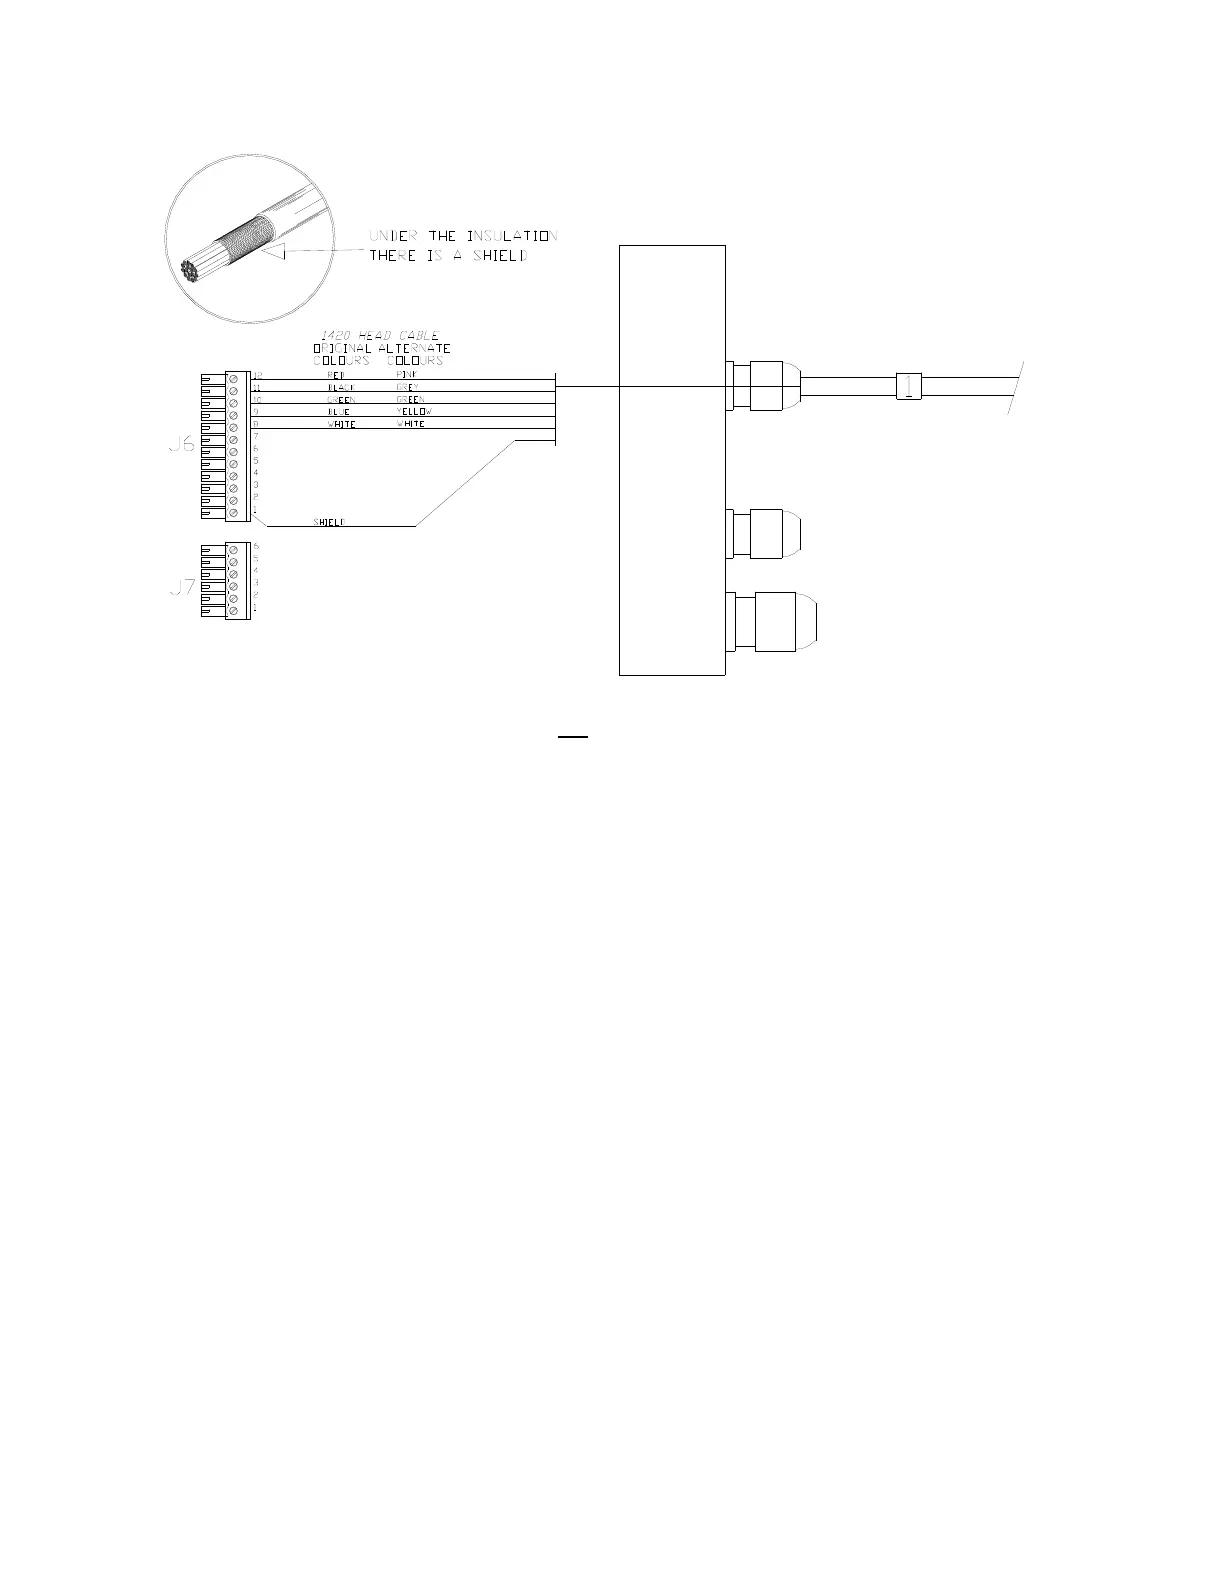
Right Side, Cable 1 (Control Head) to J6
Note: There is an extra wire that is not
used, in the 1420 Head’s cable; the wire is
yellow on the original cable, brown on the alternate cable.
Right Side Connections
Pull all of the terminal strips from the right
hand end of the Processor.
Note that there is an empty socket that
does not have a terminal strip. When you
replace the terminal strips, do not
accidentally place one into the empty
socket!
Pass the cables numbered "1", "2" and
"3" through the watertight glands on the
right end cap, and then connect each
cable’s wires to the terminal strips, as
shown in the diagram above & those on
the following pages:
• Right Side, Cable 1 (Control Head) to
J6
• Right Side, Cable 2 (Compass) to J6
• Right Side, Cable 3 (Rudder
Feedback) to J7
Caution: there are some differences in
the colour codes of the cable types that
can be used for Cable 1 (the Head), and
Cable 2 (the Fluxgate Compass). Pay
attention to the colours shown in the
wiring diagrams, and in the wiring table
on the next page!
Insert the bared end of the wire into the
terminal strip and fasten it there by
tightening the screw on the terminal strip.
Start from one end of the terminal strip
and work to the other in sequence.
Check your work!
Leave the strips unplugged when you are
done; they will be plugged back in when
you mount the Processor (see page 39)
Document PN 29010012 V1.3
34