3
Installation
Installation l 3-9
Testing the Installation
You have completed the installation. Now it’s time to make sure everything works.
1 Check to ensure that there is no material in the drying hopper. If you have mounted
an optional vacuum receiver on the hopper, disconnect the material inlet hose at the
source.
2 Turn on the main power to the dryer. Check to ensure that the dryer’s disconnect dial
is in the ON position. This powers up the touch screen control.
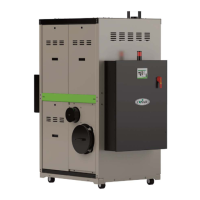
3 From the Home Screen, press
the “Start” button.
If everything is installed correctly:
• The regeneration and process blowers turn on
• The regeneration heater turns on
• The process heater will energize (if configured as a stand alone dryer)
• The dryer’s desiccant wheel starts turning. (If the desiccant wheel does
not turn, turn off the dryer, disconnect from power, and verify that the desiccant
wheel tie has been removed
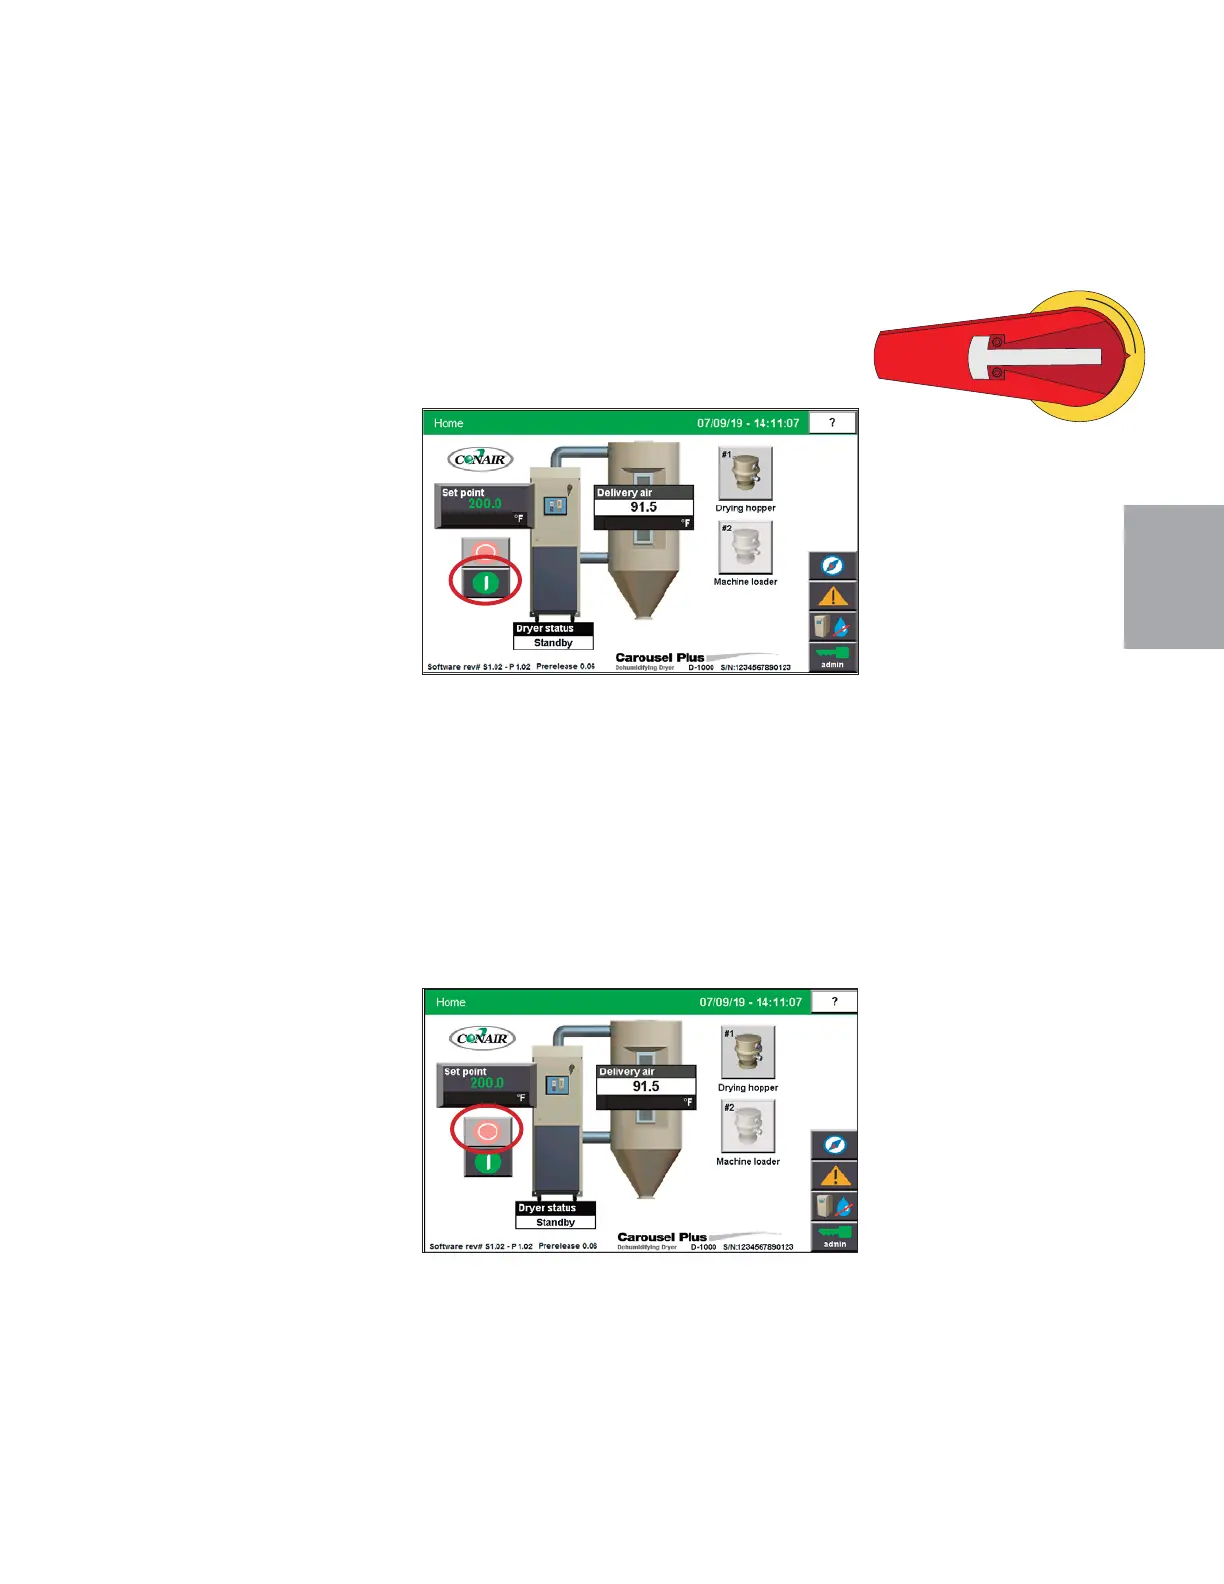
6 Press the dryer stop button.
If everything is installed
correctly:
• The blowers will continue
running as needed to cool
the heaters. (Until regen-
eration heaters are less than
150°F {66°C}.)
7 The test is over. If the dryer performed the normal operating sequences as outlined, re-
connect the material source to the optional hopper receiver and begin normal operation.
If it did not, refer to the Troubleshooting section of the User Guide.
(continued)