7.11 MACHINE CLEANING
Do not use high-pressure cleaners to clean your machine! If you want to use pressure cleaning, make sure
that no water will enter the engine carburettor, ignition system, exhaust, battery and electrical system.
Never aim the pressure gun at ball bearings, (knife holders bearings, wheels) and other parts that needs to be
well lubricated or may get damaged (oil filter,tank bottle neck etc.).
We recommend leaving the engine and the transmission mechanism running at least 3 minutes after cleaning.
That way the remaining water evaporates.
7.12 MOWING MECHANISM CLEANING
Clean the mowing mechanism after each use. Pay extra attention to the inner wall of the mechanism. Use water,
scrubber or wooden spatula for cleaning. Regular and thorough maintenance extends the operation life of your
machine and improves the cut quality.
• Make sure to secure the machine against movement before cleaning.
• Lift the mowing mechanism to the transport position.
• Flip open the steel cover on the right side of the mowing mechanism. Clean the entire inner area of the mowing
mechanism.
• Always inspect the knife condition during cleaning.
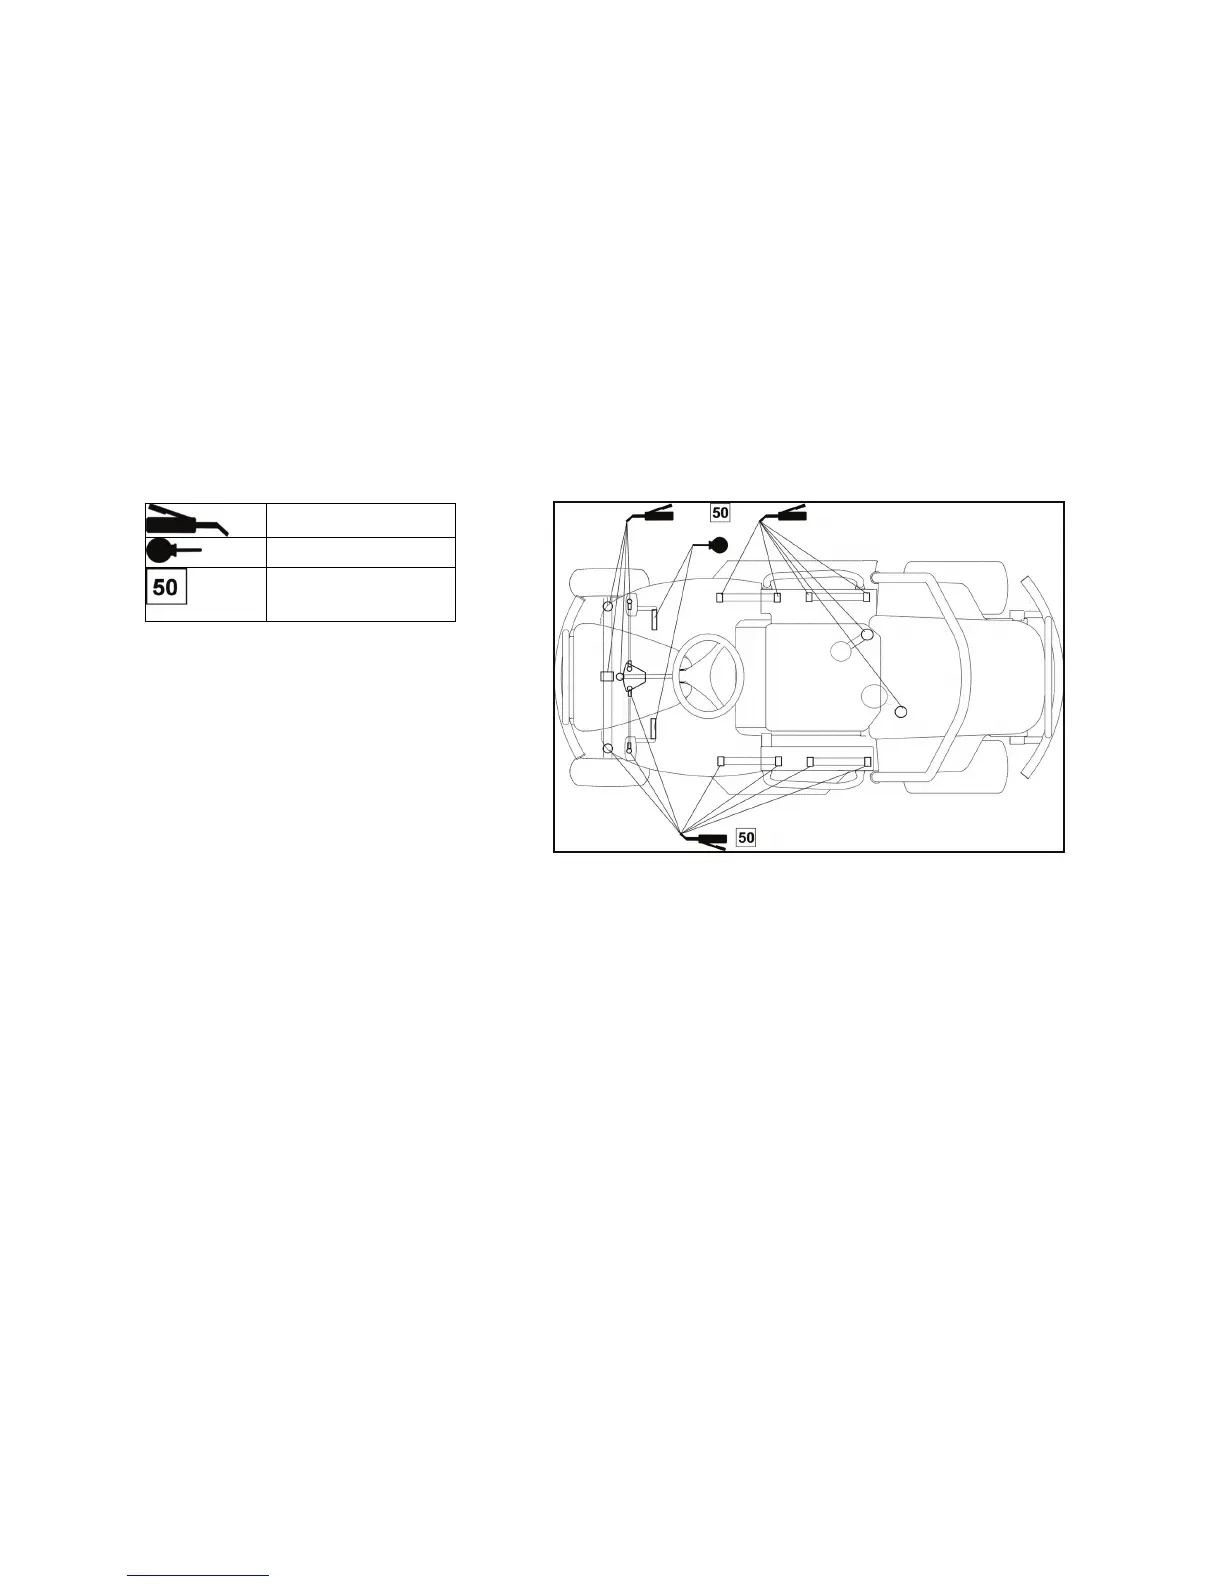
7.13 LUBRICATION
plastic grease
oil SAE 30
50 hour lubrication
interval
To ensure flawless operation,
you must lubricate
the following parts with plastic grease
regularly:
• steering segment - use the grease nipple
• steering wheel studs - use the grease
nipples
• mowing mechanism lifting arm - use the
grease nipples
• tensioning pulley - must be disassembled
and lubricated
• centre rotary stud of the front axle - use the grease nipple
(model AC 92-23 4x4 is equipped with self-lubricating casings)
• angular joints of the steering connection rods - must be disassembled and lubricated
Use oil to lubricate these turning points:
• differential lock pedal
• break pedal
• travel control lever
7.14 WHEEL CHANGE
If you do not have the necessary tools or experience, contact your vendor.
• Before changing the wheel, place the machine on an even and solid ground.
• Stop the engine and remove the key from the ignition.
• Secure your machine against movement. Do not attempt to change the wheel if the lifted machine is not
secured!
Follow this procedure when changing the front wheel:
• Place the jack under the front bumper, close to the wheel that you want to change.
(model AC 92-23 4x4 – place the jack against the frame - do not lean it against the transmission! You may
damage the transmission) You may damage the tramsmission)
• Lift the machine so the wheel that you want to change does not touch the ground.
• Remove the safety ring and washer.
• Pull out the wheel.
Follow this procedure when changing the rear wheel:
• Loosen all four fastening wheel screws.
• Place the jack under the axle of the wheel you want to change.
• Remove the loosen screws and pull the wheel out of the axle.
To put the wheel back, use the above described procedure in reverse order. Check the tire pressure.
48

 Loading...