Infotainment System
Function button: function
Repeat all tracks.
Repeats all the tracks that are on the same
memory level as the track being played at
that moment. If in the Media Settings
menu the Mix/Repeat including subfolders
option is enabled, it also includes the sub-
folders
›››
page 195.
Random play.
Includes all the tracks that are on the same
memory level as the track being played at
that moment. If in the Media Settings
menu the Mix/Repeat including subfolders
option is enabled, it also includes the sub-
folders
›››
page 195.
CLOSE
×
To close the tracks list.
a)
Only available for the model: Navi System Plus.
Note
Tracks, folders and playlists can also be se-
lected by turning the setting button, and
they can be played or opened by pressing it.
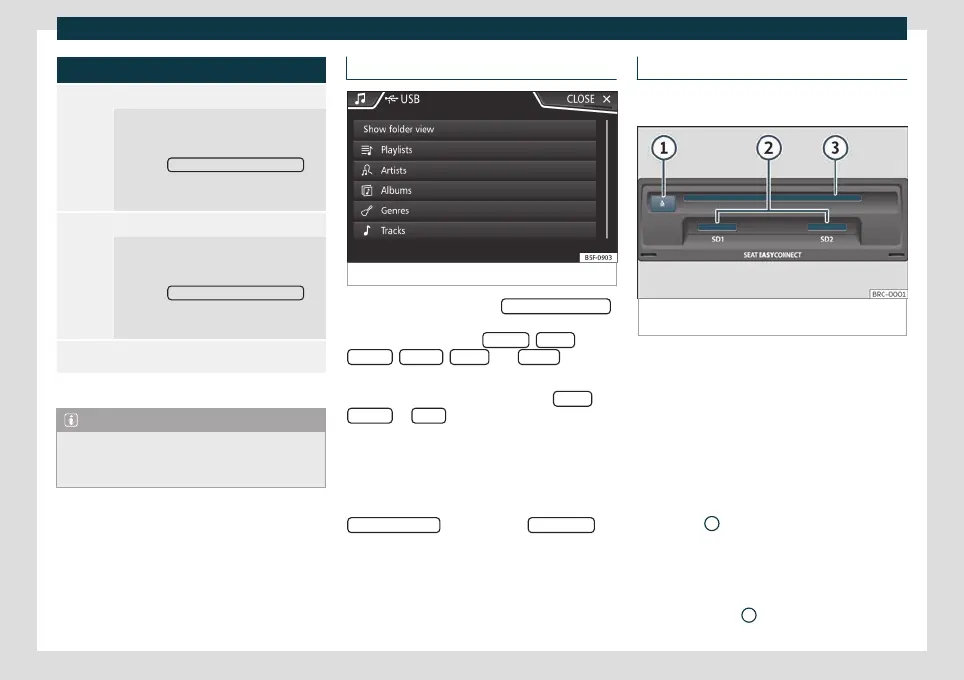
Data bank view
Fig. 155
Media Mode: data bank view
On the track list, click the Sho
w dat
abase view
option. The content of the current Media
sour
ce will be list
ed by Playlists
, Artists ,
Albums , Genr
es
, T
racks
and Video
s
›››
Fig. 153.
When selecting one of the f
older
s Artists
,
Albums or Titles , a search button is dis-
pla
y
ed in the upper right corner (magnifying
glass) that allows searching within the selec-
ted category
›››
page 152, Input window
with on-screen keypad.
To return to the folder view, press the
Show folder view
option on the SELEC
TION
menu.
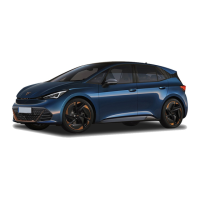
Insert or remove a CD or DVD
3 The DVD drive is only available for model: Navi
S
ystem Plus
Fig. 156
Slots for data storage devices in the glove
compartment.
The driver should refrain from operating the
unit while the v
ehicle is in motion. Insert or
chang
e the data storage device before mov-
ing off!
The CD and DVD drive can play audio CDs
and DVDs and audio data CDs and DVDs.
Insert a CD or DVD
●
Insert a CD or DVD into the slot
›››
Fig. 156
3
with the printed side facing
up
w
ards, until the equipment inserts it auto-
matically.
Eject a CD or DVD
●
Press button
1
.
186