Cybex 425T Treadmill Service Manual
Service
Page 4-35
23. Secure the new metal contacts.
A. Remove the protective paper from the four
metal contacts and from the eight strips of
tape on the plastic housing.
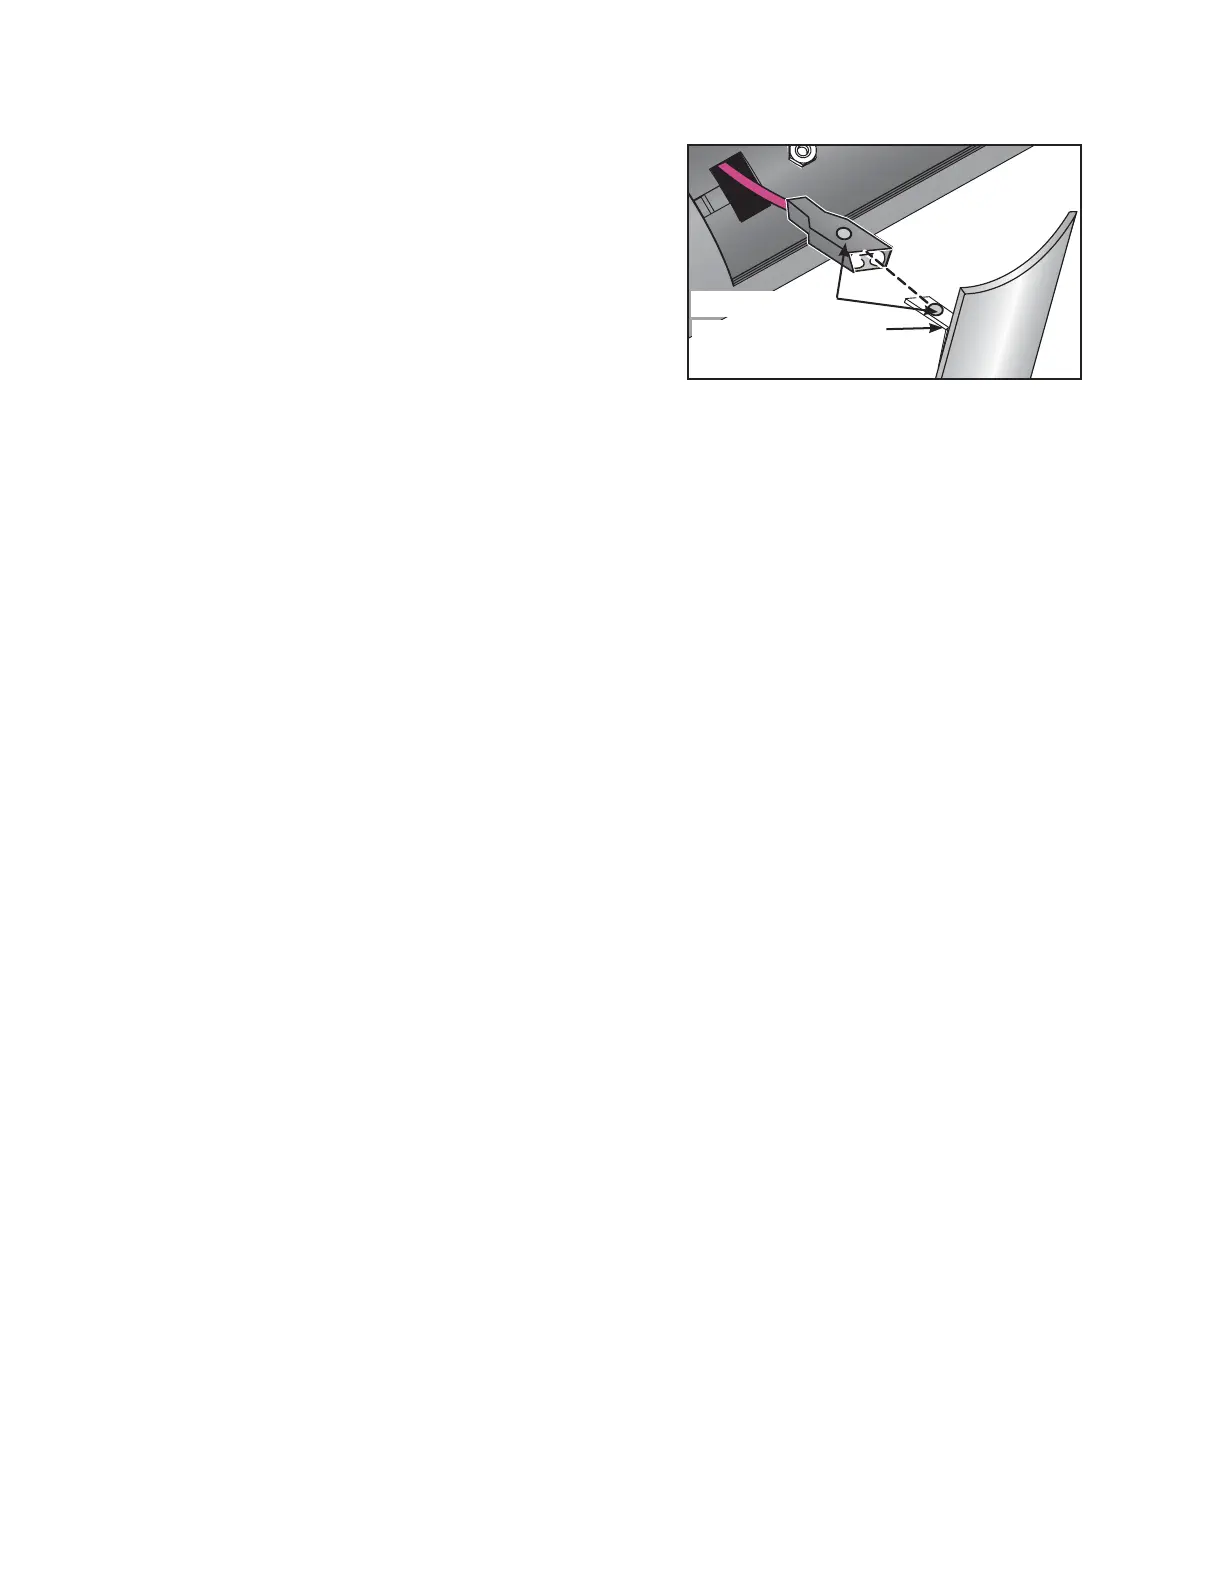
B. Locate the small bump on the metal contact
prong and on the connectors. See Figure 34.
C. Connect the each cable to a metal prong
with the bumps lined up. See Figure 34.
D. Push the excess wire into its rectangular hole.
E. Press each metal contact into the grooves (one groove at a time) on the plastic
housing. NOTE: They will snap in.
24. Connect the cables removed in step 2D.
A. Confirm that the two cables and one molex placeholder are firmly connected to the
heart rate board in their proper places. See Figure 22.
25. Secure the motor cover.
A. Lower the motor cover center into position. See Figure 3.
B. Using a Phillips head screwdriver, tighten the two screws on each side and the two
screws in the front of the unit.
26. Connect the external power source.
A. Plug the treadmill into the power outlet.
27. Calibrate speed (if you replaced the display board).
A. Follow the Speed Calibration procedure located in this chapter. .
28. Test the unit for proper operation.
A. Connect the treadmill to the power outlet.
B. Operate the unit at all levels to verify proper operation.
Figure 34
Prong on Metal Plate
Line Up Bumps

 Loading...


