57D-Link DNR-322L User Manual
Section 3 - Conguration
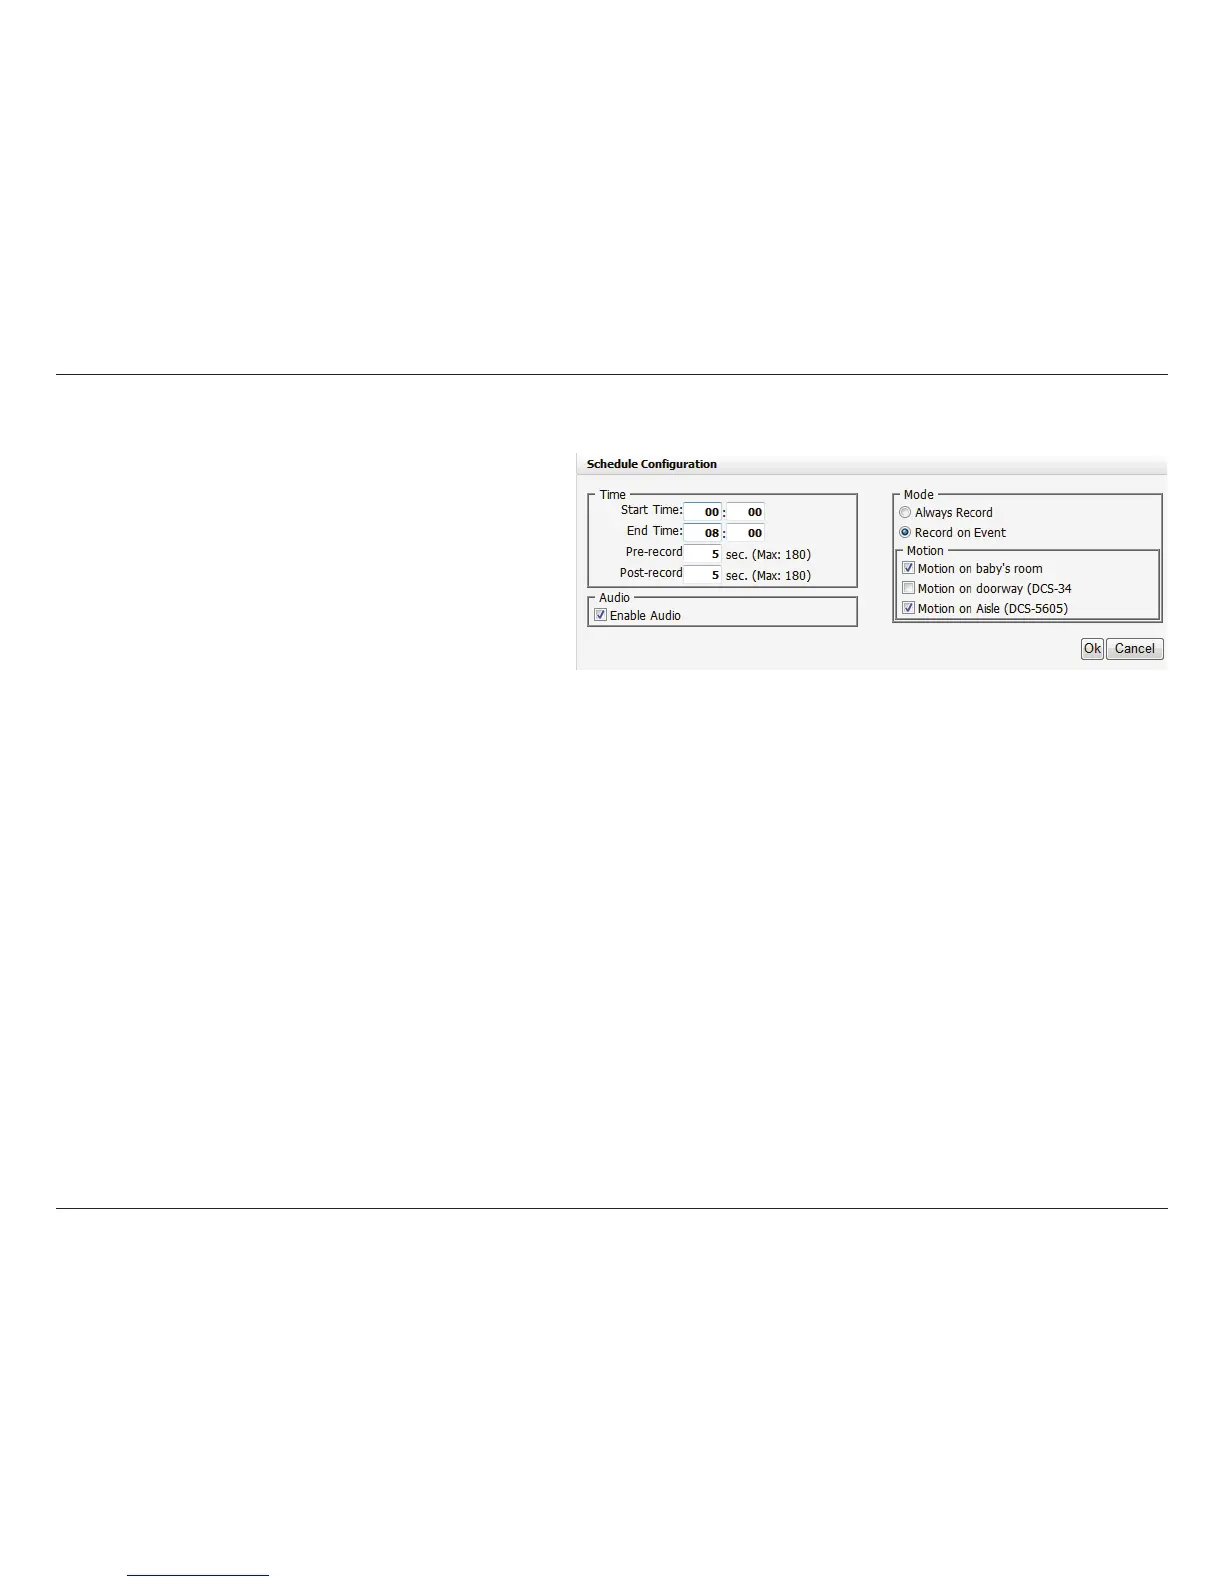
Recording Schedule
Set Recording Schedule Configuration
Step 1: Enter the desired Start Time and End Time.
Step 2: Enter pre-record and post-record periods for
event trigger recording.
Step 3: Check the enable audio box to record audio
from your camera (if supported).
Step 4: Choose the recording mode and the trigger
source.
Step 5: Press OK to add this new schedule.
Step 6: If you would like to add another new schedule, click Insert.
Note:
• When configuring the Motion Detection event, be sure to set up the motion detection function on your camera first.
• After changing the motion detection settings of your camera, be sure to disconnect the camera from the NVR and then re-connect it to update
all new changes.
• Alternatively users can drag the time bar to change the recording period. The red bar represents the Always Record feature and the blue bar
represents the Event Recording feature.
 Loading...