Si18-201 Installation
Caution Before Operation 347
Hanging bolt (M10 or M8)
Six-sided nut (M10 or M8)
Hanger metal 7
Hanger metal 7
Screws 8
Screws 8
Screws(M5)
(locally procured)
Screws 8
Screws 8
Procedure
(1) Fix the furnished hanger metal 7 with
two screws 8 . (3 locations in total)
(2) After checking with a level that the unit is
level, fix the unit with the furnished wood
screws 7 .
*The tilt of the unit should be within
+
5˚
in front/back and left/right.
Flat washer
Flat washer
15~20
Hanging bolt
Nut
Hanger metal 7
BP unit
Cautions:
•
Once a screw-hole on the main unit has
had a screw hammered in, make sure to
either hammer it again or cover it with
aluminum tape.
(This is to prevent condensation.)
•
Be sure to install the unit with the ceiling-side
up.
•
Do not install near bedrooms. The sound
of refrigerant flowing through the piping
may sometimes be audible.
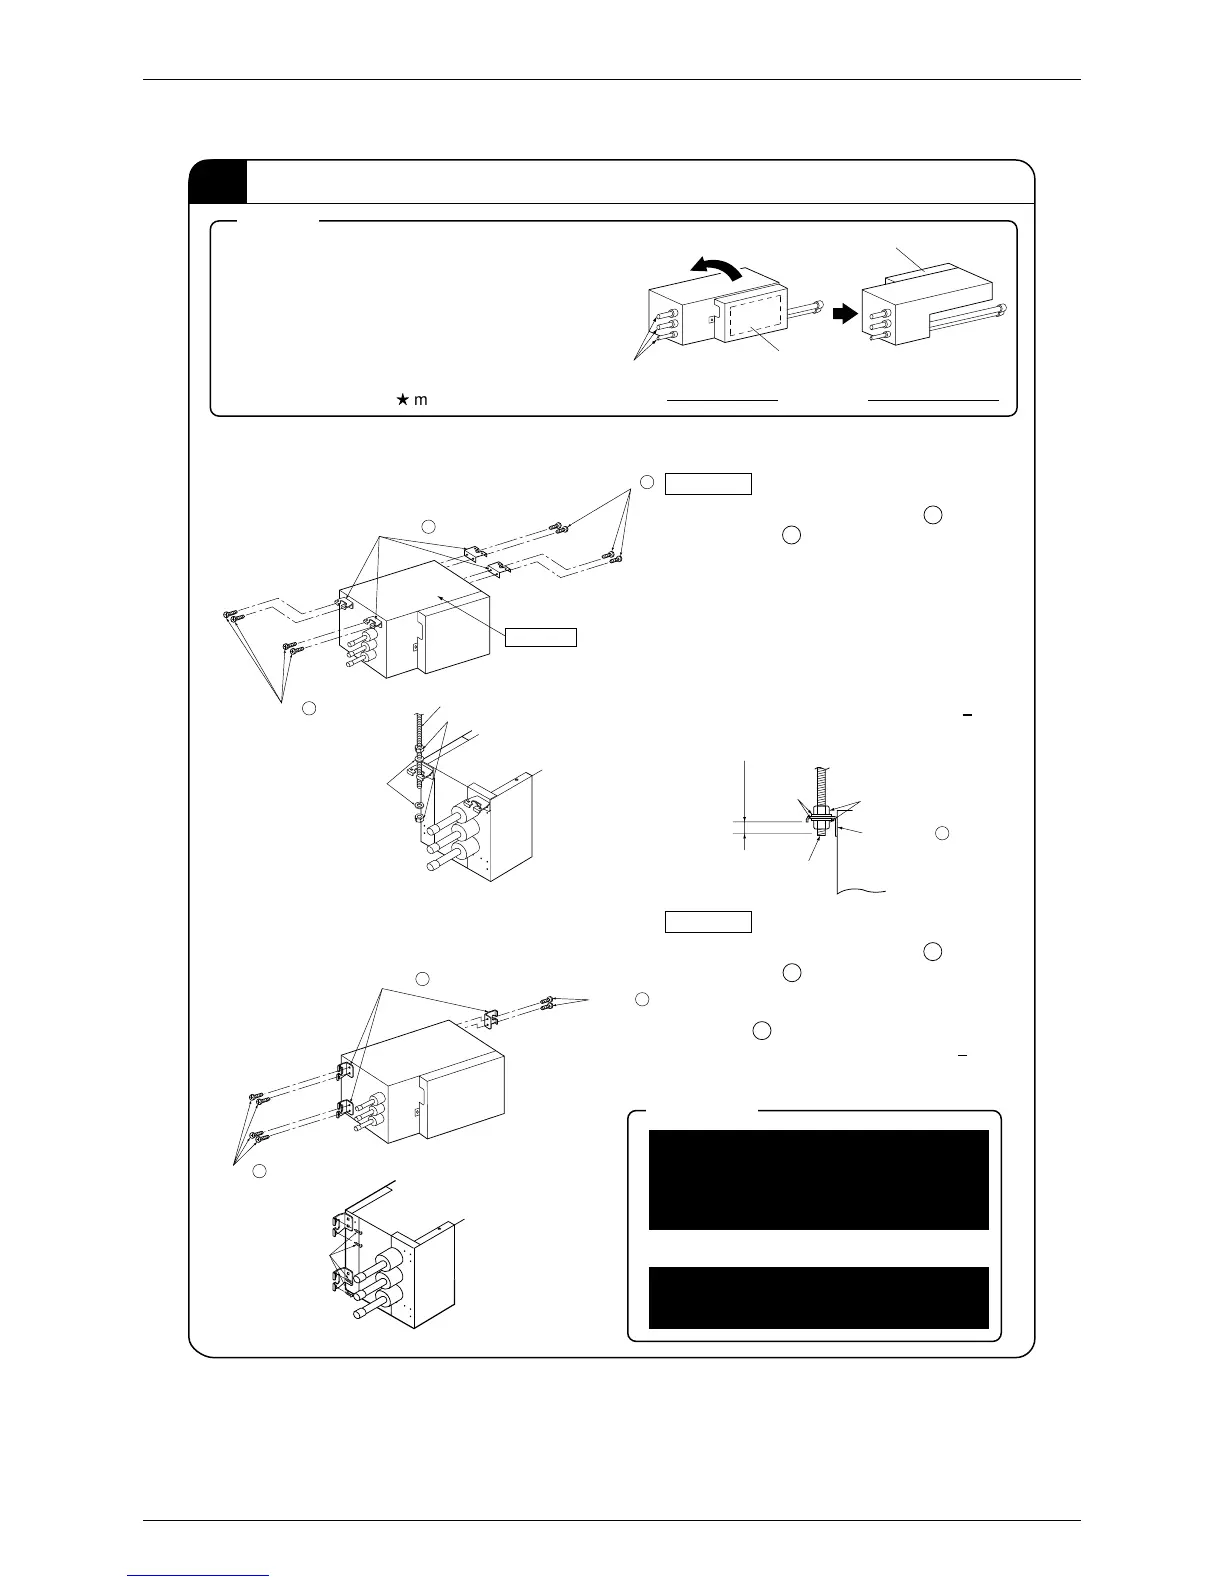
INSTALLATION OF THE MAIN UNIT
(1) Ceiling-suspended type
(2) Wall-mounted type
Reverse position
Branch pipe side
Printed wiring board
Printed wiring board
As-Shipped condition After-location is changed
•
This unit has two different installation types:
(1) ceiling-suspended type and (2) wall-mounted type.
•
Choose the proper installation pattern according to
the location of installation.
•
The installation location for printed wiring board can
be changed.
Follow the procedure specified in the
“CONNECTING THE WIRING” section to change
the location. (Refer to
H
mark)
Procedure
(1) Fix the furnished hanger metal 7 with
two screws 8 . (4 locations in total)
(2) Using an insert-hole-in-anchor, hang the
hanging bolt.
(3) Install a hexagon nut and a flat washer
(locally-procured) to the hanging bolt as
shown in the figure in the left, and lift the
main unit to hang on the hanger metal.
(4) After checking with a level that the unit is
level, tighten the hexagon nut.
*The tilt of the unit should be within
+
5˚
in front/back and left/right.
Ceiling side
NOTES:
CAUTIONS:
2
 Loading...