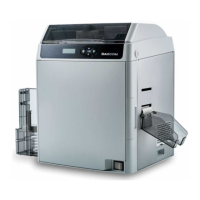
Dascom DC-7600 User Guide V1.0
2.1.6 Managing Rejected Cards
This printer is equipped with left and right slots to separate correctly printed cards from rejected
ones. By default, rejected cards are ejected from the right slot. However, the two slots are
interchangeable for your preference.
Follow the below procedures to assign the location of the Reject Slot:
Refer Section 4.2 to change from Normal Mode to User Mode.
Press the ▼ Key until [Card Setup] is displayed. Press the SET Key.
Press the ▼/▲ Key until [ Std card exit]/[Error card exit] is displayed. Press the SET Key.
Press the ▼/▲ Key to select the proper reject slot:
For factory defaults, the printer outputs correctly printed cards and
rejected ones to the left and right slots, respectively.
2.2 Replacing the Ribbon
Change the ribbon when the LCD prompts [RIBBON END] message.
Approved ribbons for this printer:
Type Description Product Code
YMCK Color Ribbon
YMCKU Color Ribbon
YMCKIKI
Color Ribbon
YMCKI Color Ribbon
YMCFK
Color Ribbon
YMCKH
Color Ribbon
YMCKO Color Ribbon
YMCKK_HALF Color
Ribbon
YMCK_HALF
Color Ribbon
YMCKK
Color Ribbon
Please contact your local reseller for ribbons not listed above.
27