EasyManuals Logo

Datamax E-Class Mark II User Manual

Datamax E-Class Mark II
58 pages
To Next Page IconTo Next Page
To Previous Page IconTo Previous Page
Page #39 background imageLoading...
Page #39 background image
Chapter 4 – Maintenance and Adjustments 33
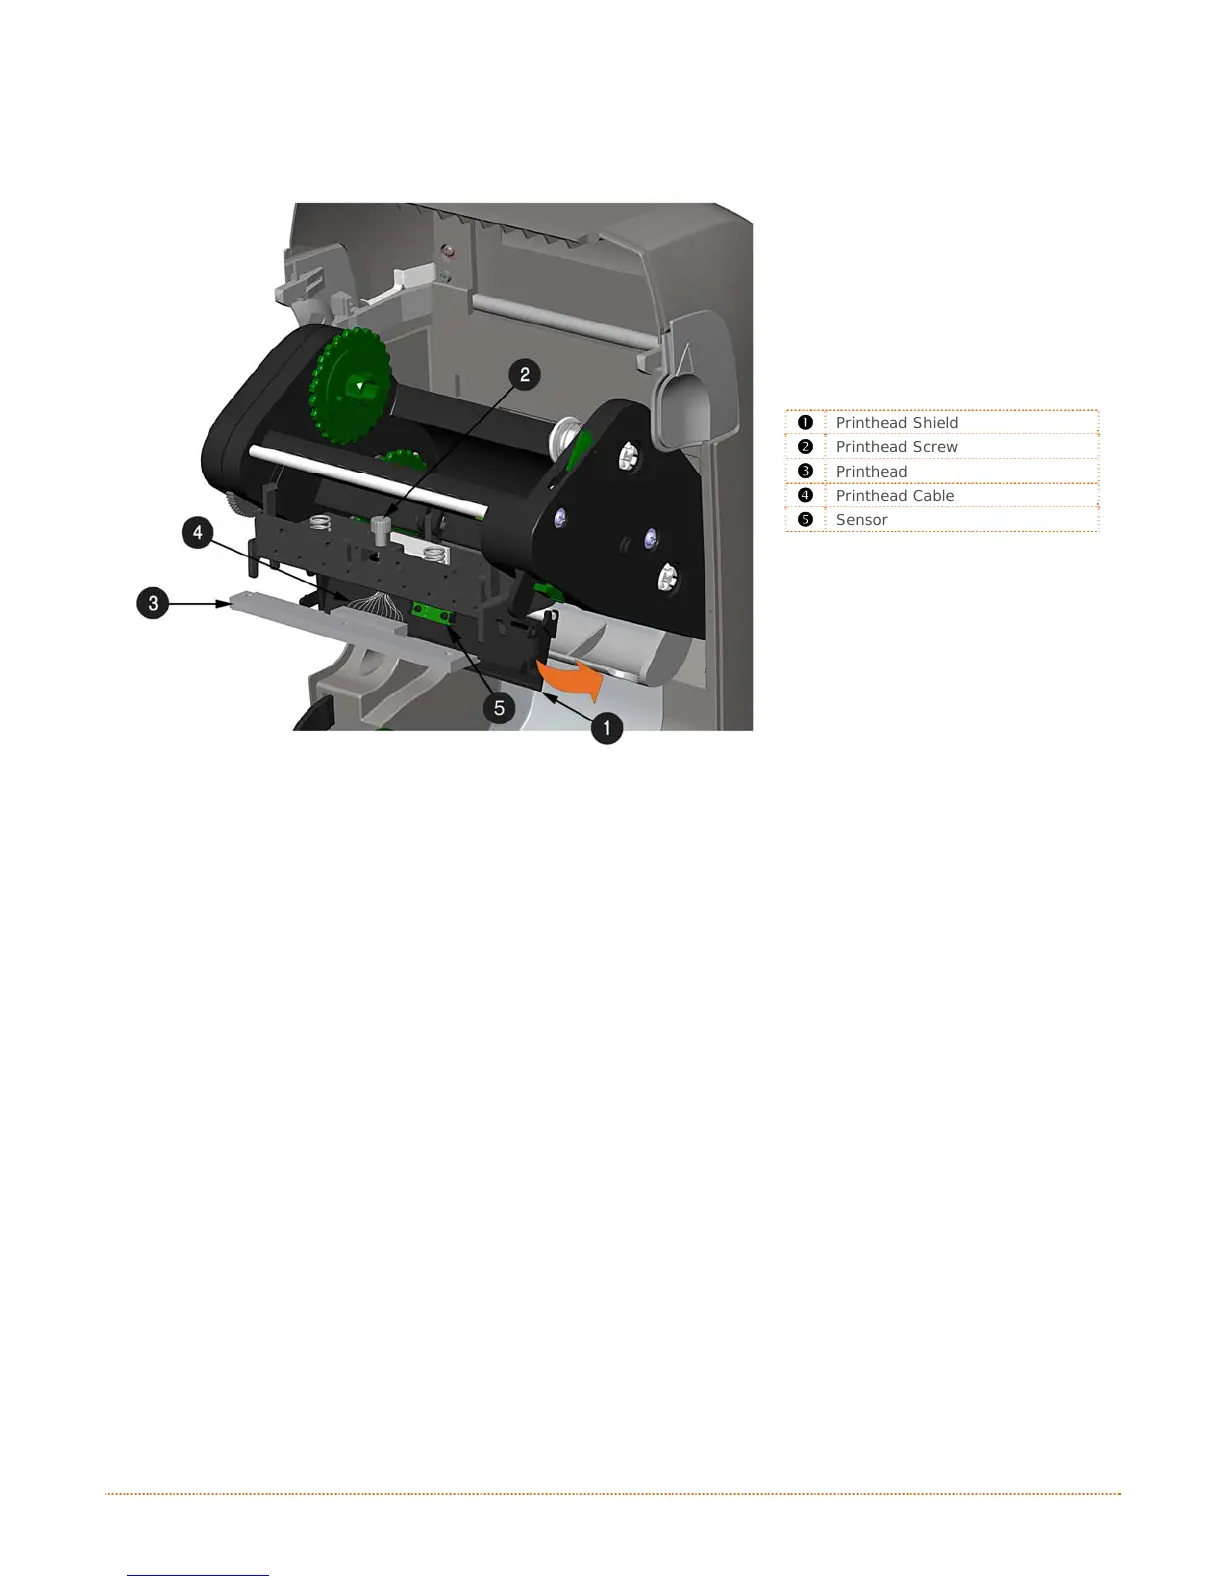
5) Loosen the Printhead Screw and allow the Printhead to fall free.
6) Remove the Printhead Cable.
312
Printhead Shield
Printhead Screw
Printhead
Printhead Cable
Sensor
Installation:
1) Carefully connect the Printhead Cable to the new Printhead.
2) Position the Printhead in the Printhead Carrier and tighten the Printhead Screw.
3) Ensure the Sensor properly seated and rotate the Printhead Shield upward until it snaps into
place.
4) Rotate the Printhead Carrier upward until it snaps into place.

Other manuals for Datamax E-Class Mark II

Questions and Answers:

Question and Answer IconNeed help?

Do you have a question about the Datamax E-Class Mark II and is the answer not in the manual?

Datamax E-Class Mark II Specifications

General IconGeneral
Resolution203 dpi (8 dots/mm) or 300 dpi (12 dots/mm)
Operating Temperature40°F to 95°F (4°C to 35°C)
Storage Temperature-40°F to 140°F (-40°C to 60°C)
Print MethodDirect Thermal / Thermal Transfer
Max Print Speed6 inches per second (ips)
Memory8 MB DRAM
InterfaceSerial, Parallel, USB
Media TypeLabels, Tags, Receipts
Media Width0.75" (19 mm) to 4.65" (118 mm)
Media Thickness0.0025 to 0.008 inches (0.0635 to 0.2032 mm)
Power Requirements100-240 VAC, 50-60 Hz

Related product manuals