23
3
3
3
.
.
.
5
5
5
P
P
P
r
r
r
e
e
e
s
s
s
e
e
e
n
n
n
t
t
t
e
e
e
r
r
r
M
M
M
o
o
o
d
d
d
e
e
e
To set the printer to work in Presenter Mode, follow the following steps:
- Set the “Presenter Sensor Equipped” parameter to enable the presenter sensor.
- Set the “Advance After Qmark” parameter to instruct the printer to advance n/100 inches after the
Black Mark or Gap is found (only change if necessary, default value will work for most media).
- Calibrate the Presenter Sensor to store the media settings (liner and media).
These setting changes can be performed using the NETira CT configuration utility, (see section 3.3 for
more information on NETira CT).
Launch the NETira CT configuration utility, and query (connect) to the printer.
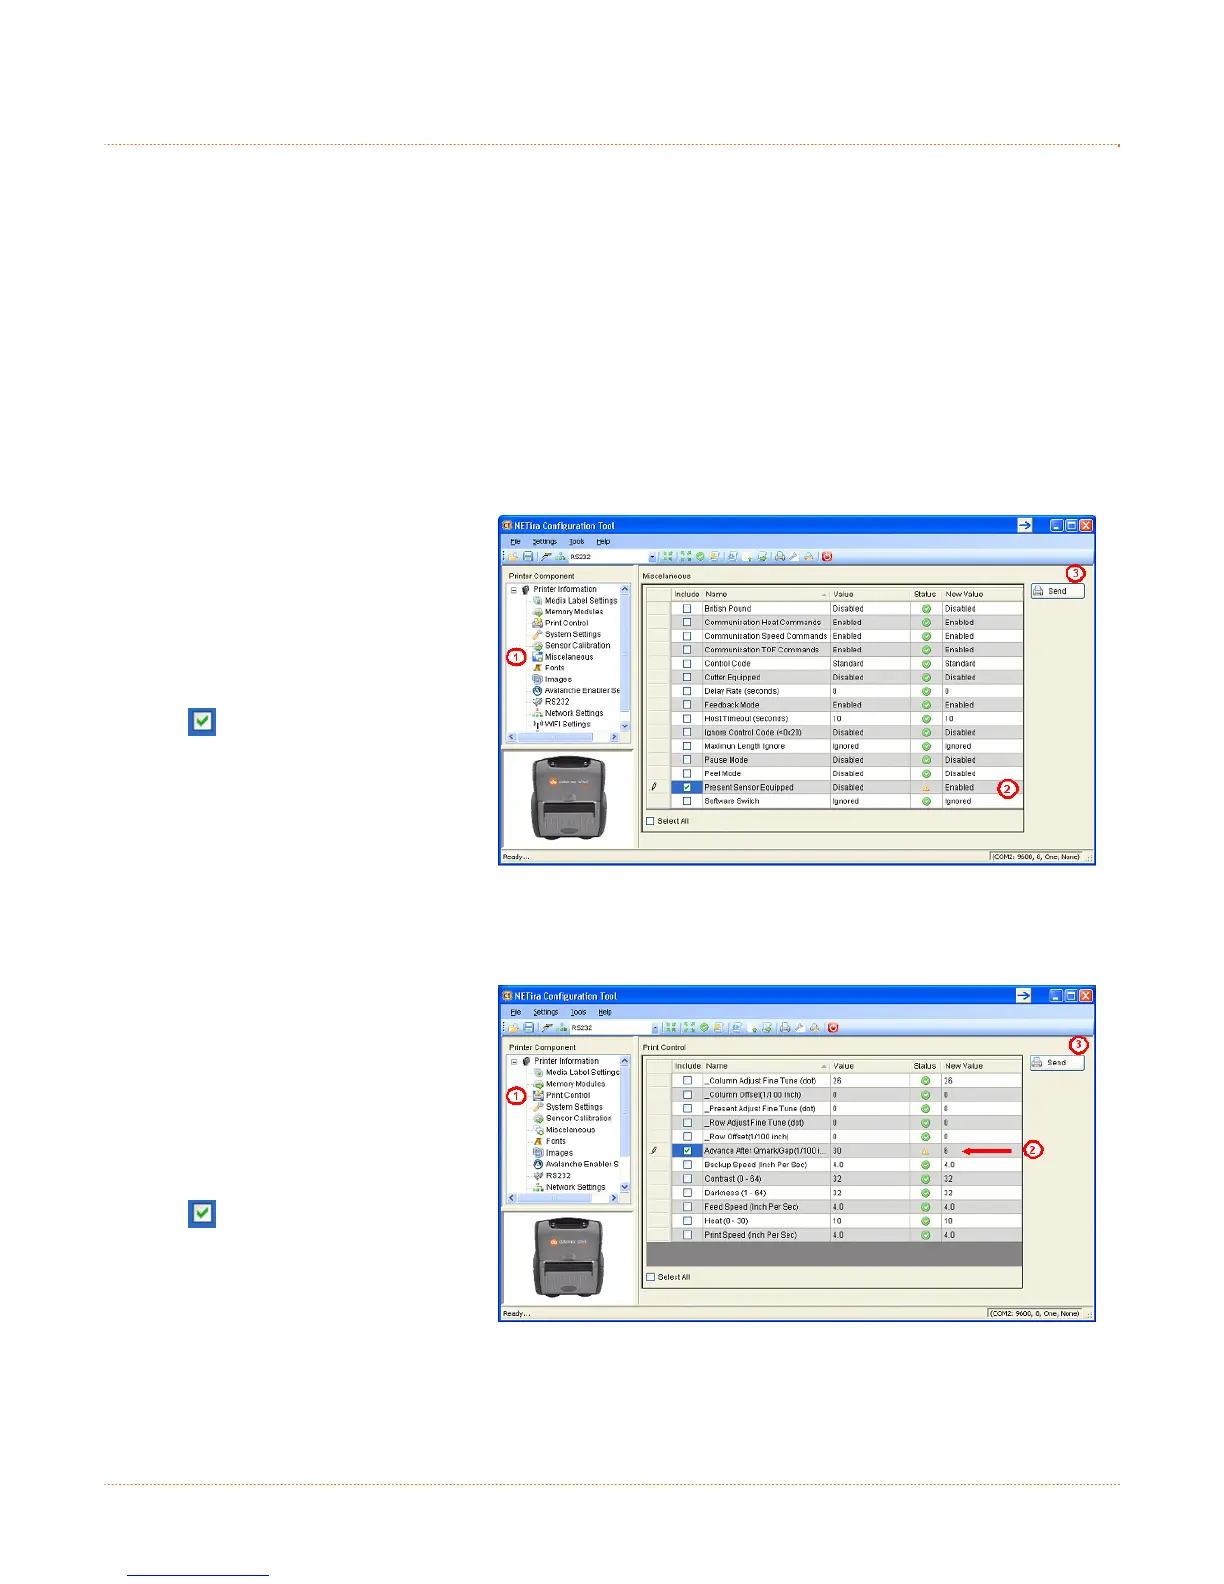
Enable the Presenter Sensor:
1) Click on the ‘Miscellaneous’
printer component.
2) Set the ‘Present Sensor
Equipped’ to Enabled.
3) After updating the “New Value”
column, click on the check box
to select this parameter
change to be sent to the
printer. Click the Send button
to send these changes to the
printer.
Setting the Advance after QMark Parameter:
1) Click on the ‘Printer Control’
printer component.
2) Set the ‘Advance After
Qmark(1/100 inch)’ to a value
of 6.
3) After updating the “New Value”
column, click on the check box
to select this parameter
change to be sent to the
printer. Click the Send button
to send these changes to the
printer.