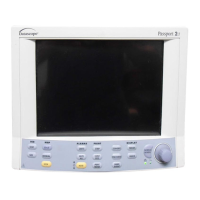
Verification Calibration Procedure
6 - 20 0070-10-0441 Passport 2®/Passport 2 LT™ Service Manual
6.5.2.5 Alarms
1. Set the simulator to 1mv ECG QRS signal, rate set to 60 bpm.
2. Set the Passport 2 to Print on Alarm, install paper in the recorder, and set the Low HR
alarm to 50 bpm, and Hi alarm to 120 bpm.
3. Increase the HR to 125 and verify the following:
• The high alarm violates with an audio tone and red led active on keypad
• The recorder is initiated and prints the ECG strip showing the ECG information
4. Measure the Grid and verify the overall width of 40 mm ± 2 cm.
5. Mute the alarm by pressing the MUTE ALL key.
6. Verify that the mute alarms message is displayed in the Message Area “A” and the
alarm is silent.
7. Press the MARK EVENT key. Press the TREND key and examine the trend data. The
high HR rate should be red (LCD) or normal brightness (EL) indicating the High HR was
violated.
6.5.3 IBP 1 and IBP 2 Verification
1. Set the simulator to 0 mmHg for both IBP 1 and IBP2.
2. Press the ZERO ALL key. Verify the Systolic, diastolic and mean displays “0” ±
1 mmHg.
3. Apply 50,150, and 300 mmHg and verify that the following parameters Sys/ Dia /
Mean agree.
4. Apply a 120/80/mmHg signal into IBP 1 and a 60 / 20/ mmHg signal into IBP 2 and
verify the correct waveforms are displayed in the window.
6.5.4 Temperature Verification
1. Set the Simulator to 37° C 400 series probe
2. Verify the temperature is 37° +/- 0.3°
3. Repeat same test for 700 series probe.
6.5.5 SpO
2
Verification
1. Set the Passport 2 to display waveform 4 as pleth. Set the HR source to Auto.
2. Verify that the SpO
2
message is displaying SpO
2
No Sensor in Message area “B”.
3. Connect the SpO
2
sensor to the Panel connector. Verify the SpO
2
message changes to
Sensor off or SpO
2
initializing.
4. Apply sensor to finger.
5. Verify window 4 displays the pleth waveform, and the SpO
2
indicates a valid reading.
Verify the HR is from SpO
2
and a beep tone is present.