13
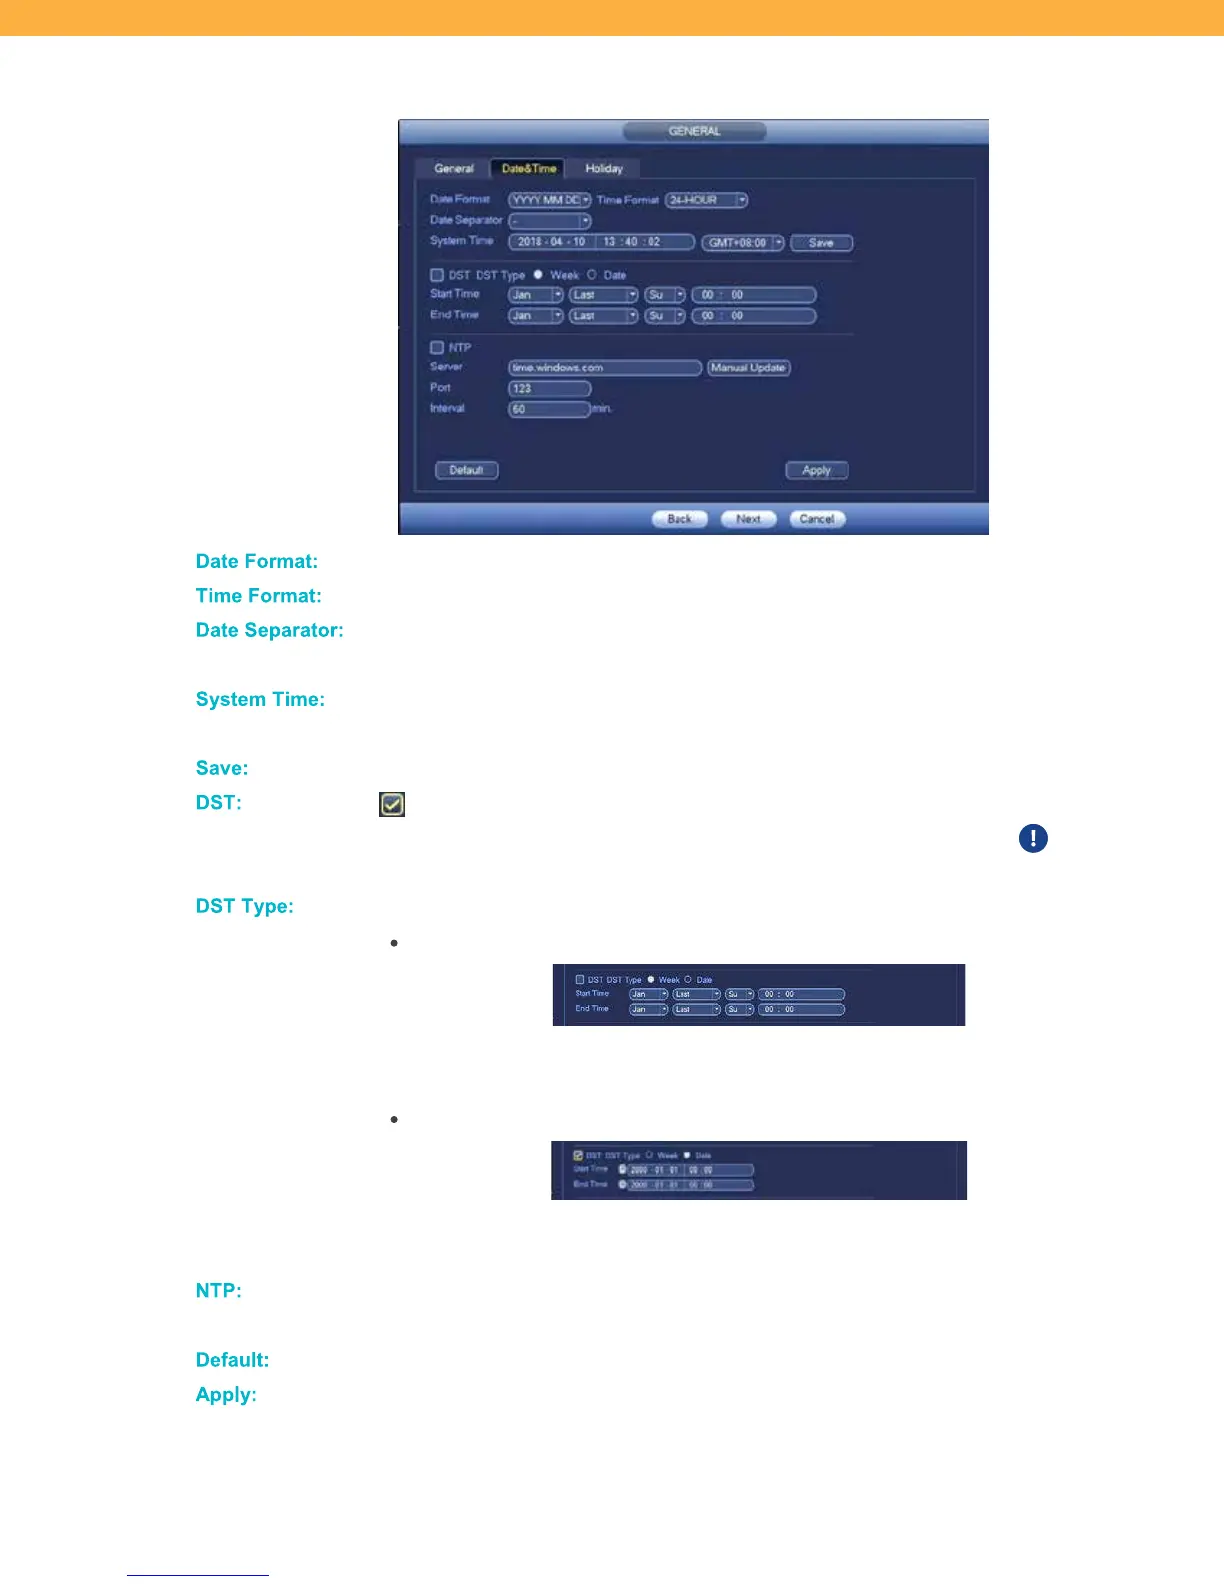
Date & Time Tab
Da te For mat:
Use the drop down to select the date format. This is how the date will appear on-screen.
Tim e For mat:
Select the Clock format using the drop down to select 24 hour or 12 hour clock.
Da te S eparator:
Select the format for how the Year, Month, and Day will be separated using the drop
down to select from the options.
System T im e:
Use the drop down to select your time zone. This will set the System Time which is
used to determine the correct time of recordings.
Save:
Click Save to update the Date & Time selections.
DS T:
If selected Daylight-Saving Time will be turned on and the system will automatically
adjust the hour for your time zone based on the DST settings entered. Time will
update only if the system is connected to the Internet.
DS T T ype:
Click to select how the DST will be updated by selecting Week or Date.
Week
Select the Month, Recurrence, Day, and enter the Time when DST Starts and
Ends. The time will automatically adjust based on these settings.
Date
Enter the Date and Time when DST Starts and End. The time will automatically adjust
based on these settings.
NT P:
The Network Time Protocol is automatically setup based on your network. These
settings do not need to be adjusted.
De fault:
Click to change back to the default settings.
Apply:
Click to apply your changes without leaving the screen.