18
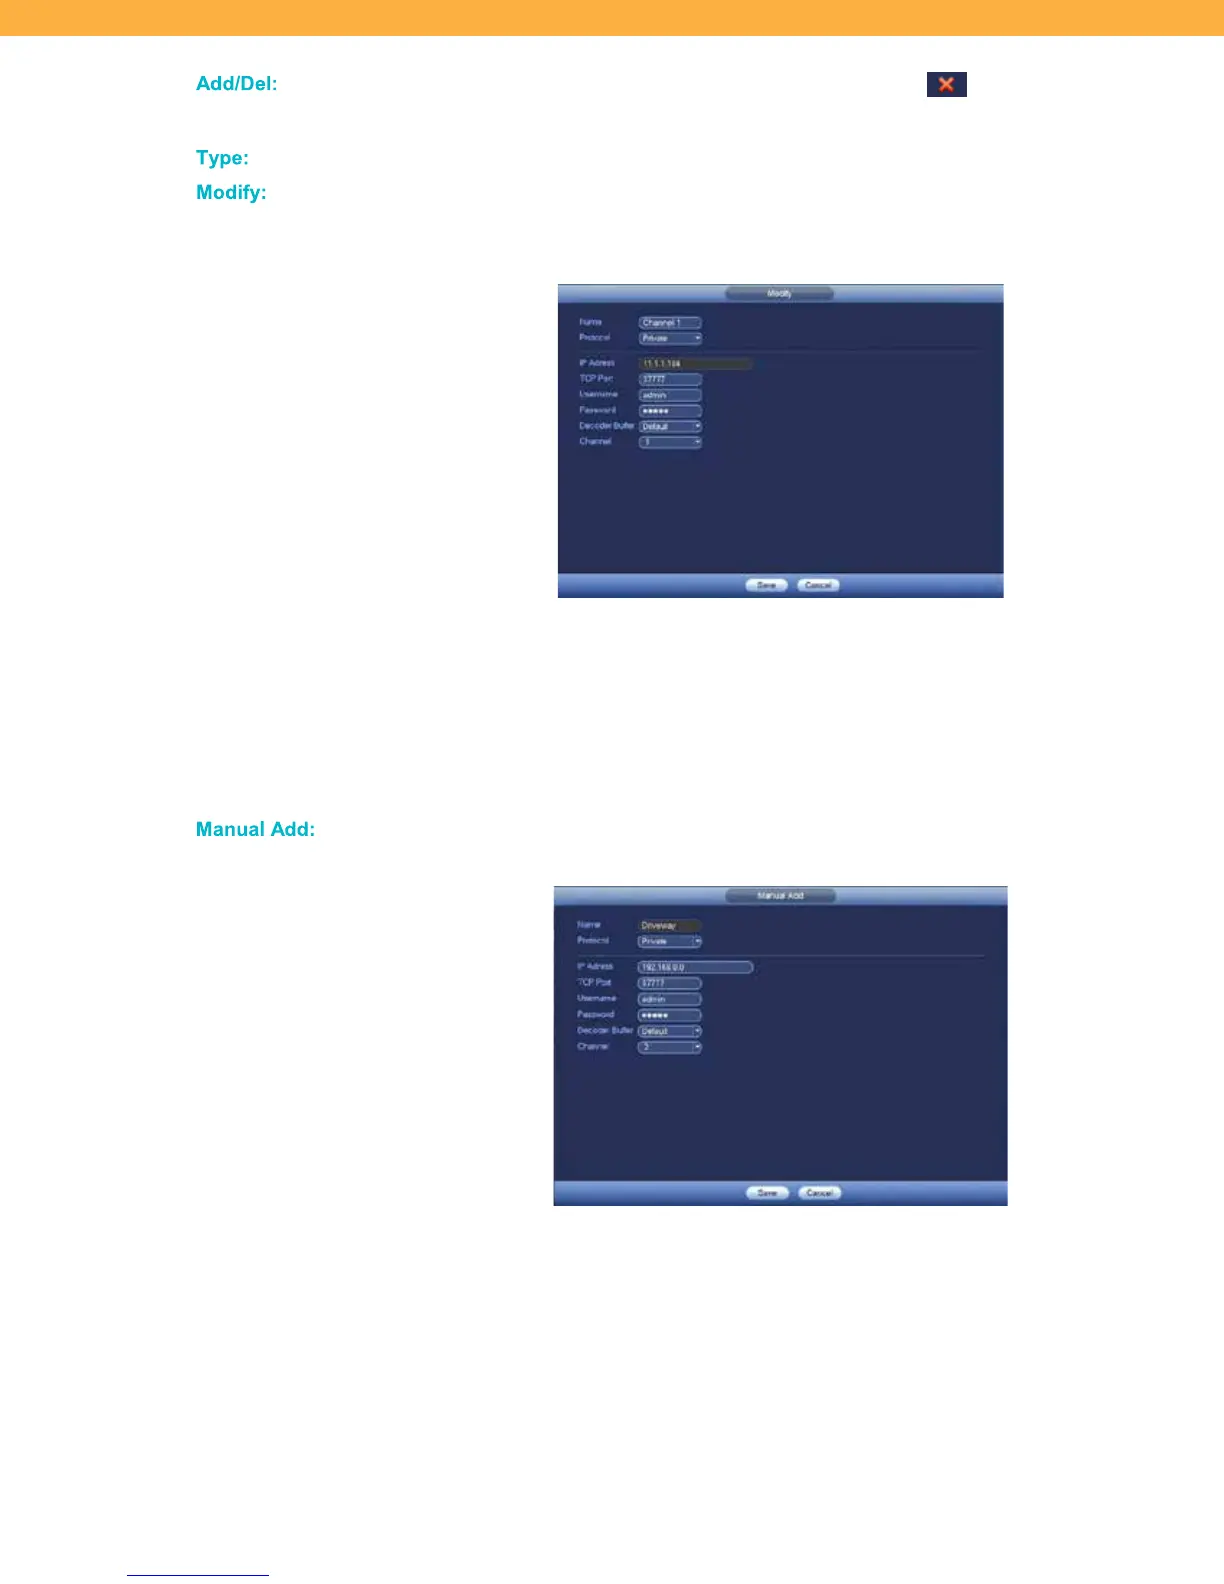
Add/D el:
When the camera has been connected use the Remove icon to remove the
camera.
Type:
This indicates the way the camera is connected to the system.
Modif y:
Click Modify to change the camera details. The Password on this screen must be
the same as the NVR password – connectivity between the NVR and the camera
can be affected if the password is different.
NAME: Click the field to enter a new name for the camera (example: front door,
driveway, etc).
CHANNEL: You can change the position assigned to the camera which will
change where the camera will appear on the Live View screen. Click the drop
down to select from options 1 to 4.
SAVE: Click to apply your changes.
Manua l Add:
If the camera does not appear on the list you can add it manually.
READ THESE STEPS BEFORE STARTING
NAME: Click the field to enter a name for the camera (example: front door,
driveway, etc).
PROTOCOL: Select Private.
IP ADDRESS: Click the field to enter the IP Address for your network.
TCP PORT: This identifies the type of Port. Click the field to enter the number.
USER NAME & PASSWORD: This is defaulted to your current login.