3. Remove the side-light cable from the securing clip on the chassis.
4. Remove the two screws (M3x5) that secure the side light to the chassis.
5. Lift the left side of the side-light bar slightly from the screw hole at the rear of the chassis.
6. Lift the right side of the side-light bar slowly from the screw hole at the front of the chassis.
7. Lift the side-light bar from the chassis.
Installing the side light
Prerequisites
If you are replacing a component, remove the existing component before performing the installation procedure.
About this task
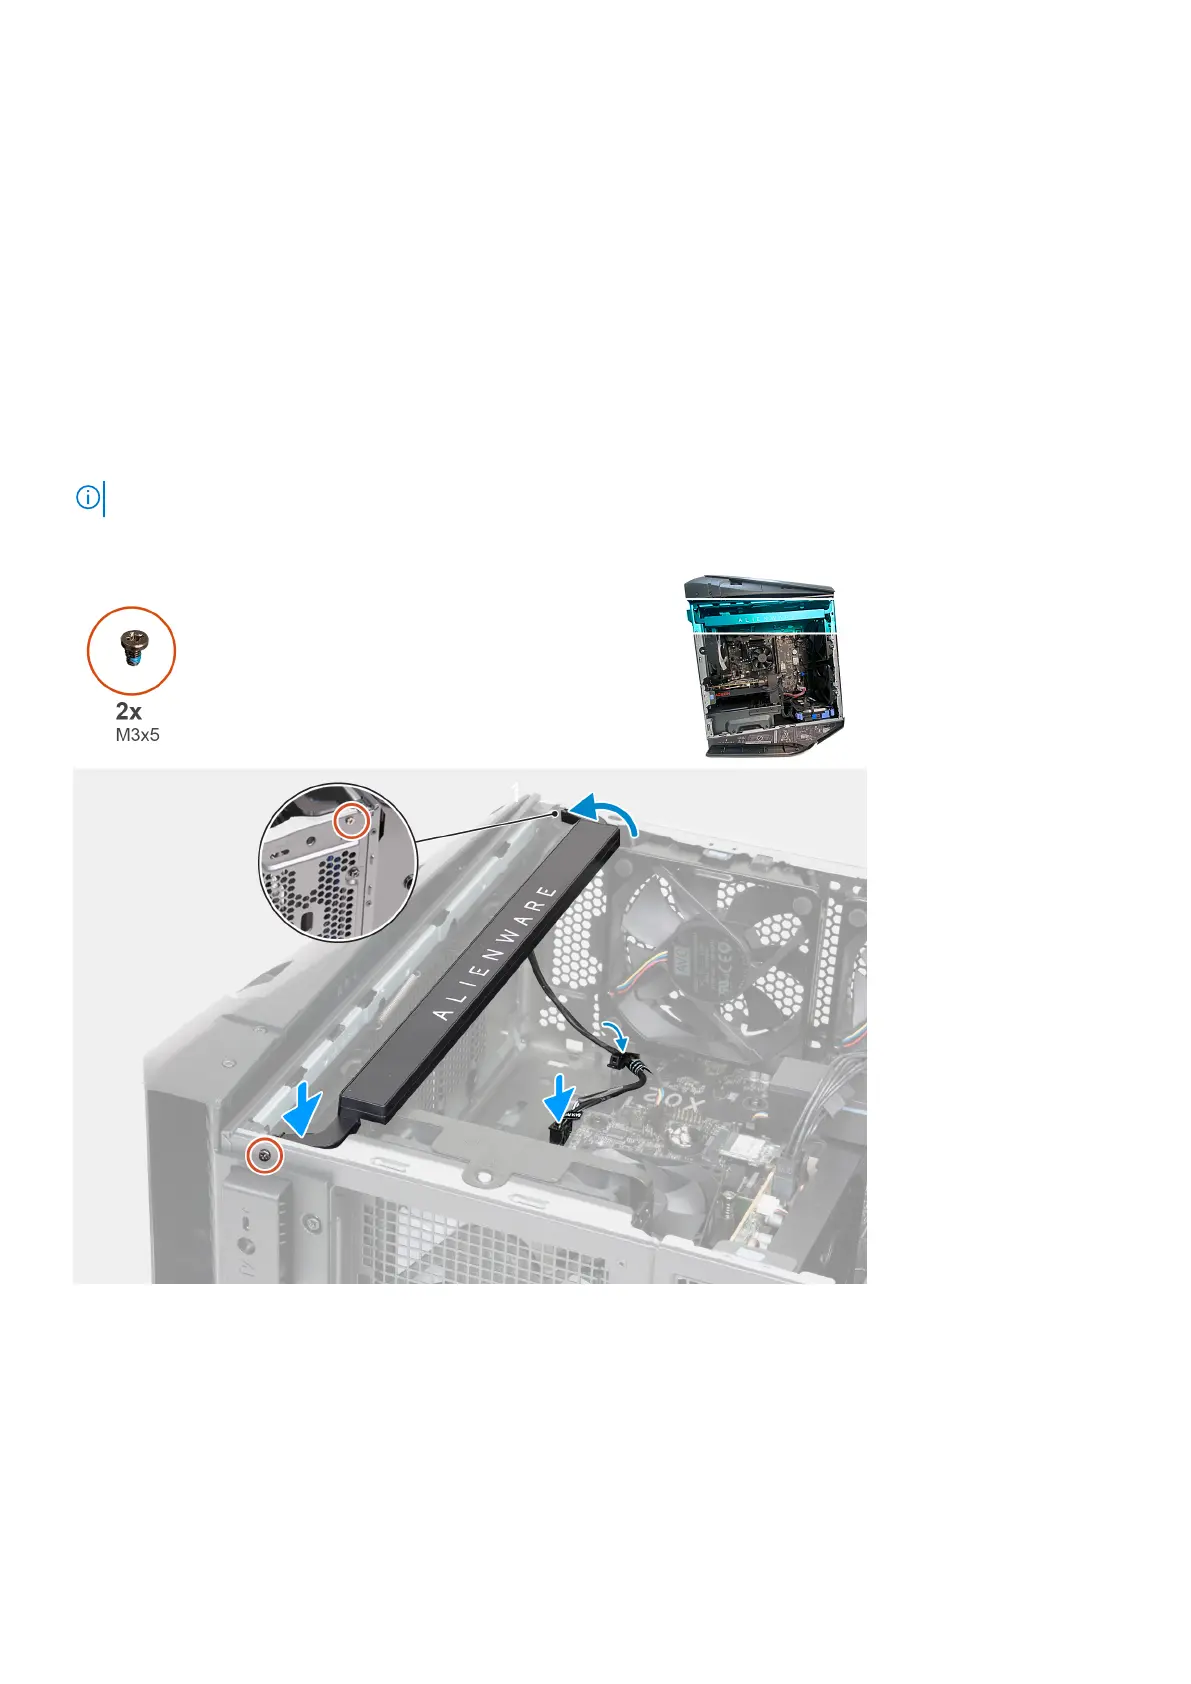
NOTE: Side light is available only on computers that are shipped with clear left-side covers.
The following images indicate the location of the Side light and provide a visual representation of the installation procedure.
Steps
1. Lay the computer on its right side.
2. Align the left screw hole of the Side light with the screw on the rear of the chassis.
3. Lift the right side of the Side light slowly until the right screw of the Side light is aligned with the screw hole on the front of
the chassis.
4. Replace the two screws (M3x5) that secure the Side light to the chassis.
5. Route the side-light cable through the securing clip on the chassis.
6. Connect the side-light cable to the system board.
Removing and installing components
27