Display Assembly: Dell Latitude E4300 Service Manual
file:///C|/Biz%20Client/2015/Lola%20(Defect%20Fix)/display.htm[5/25/2015 11:14:10 AM]
10. Turn the computer upside-down.
11. Remove the WLAN/WWAN cover, and loosen the two antenna cables by moving them out of the cable guides.
12. Slide the two antenna cables through the hole in the palm rest.
13. Turn the computer rightside-up.
14. Disconnect the three antenna cables from the radio switch board. The display antenna cables (gray, white, and black)
are situated in vertical formation on the upper-right side of the radio switch board.
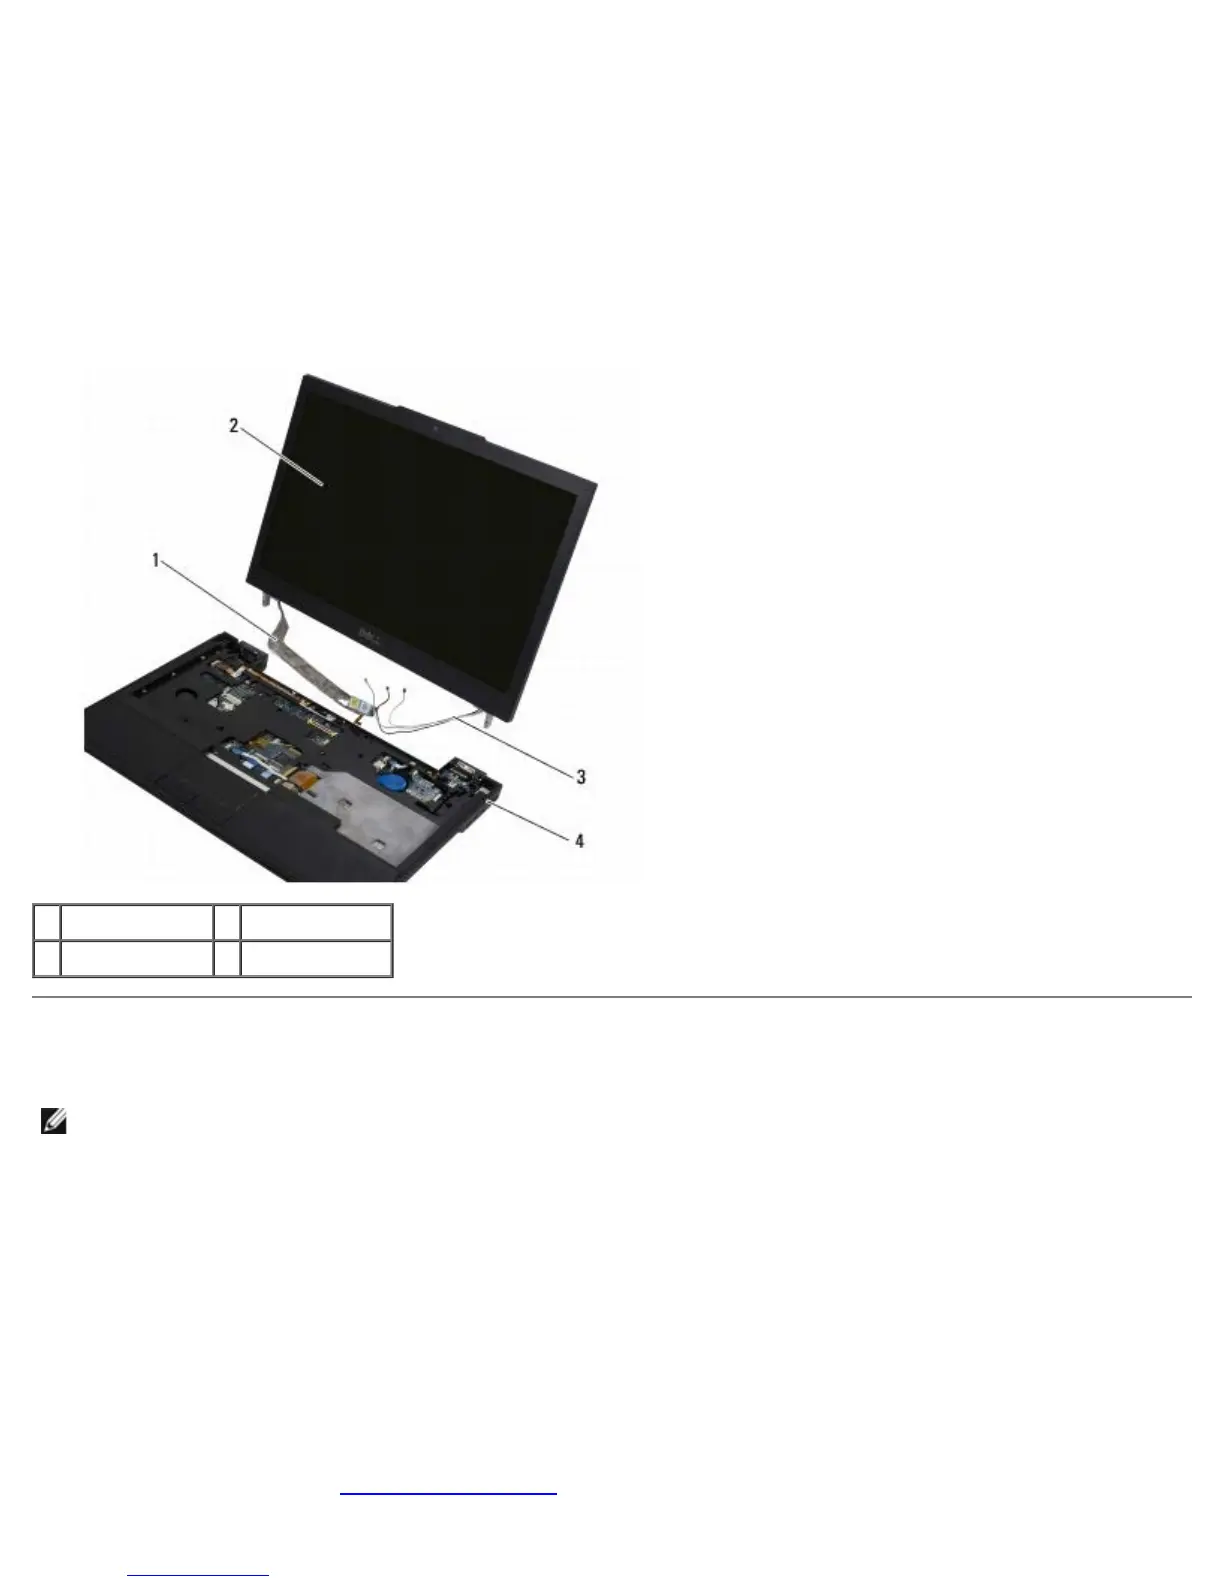
15. Lift the display and cables away from the computer.
1 display cable 2 display
3 antenna cables 4 computer base
Replacing the Display Assembly
NOTE: This procedure assumes that you have completed the removal procedure first.
1. Thread the two longer antenna cables through the hole in the system board, located just below the radio switch board.
2. Turn the computer over and thread the cables through the cable guides in the WLAN/WWAN compartment.
3. Replace the WLAN/WWAN cover, and then turn the computer rightside- up.
4. Reconnect the three shorter antenna cables to their respective labeled ports, threading each cable through the plastic
cable guide closest to its port.
5. Carefully reseat the display cable into its guide tabs.
6. Reconnect the display cable by placing it above the display cable connector and snapping it into place.
7. Lift the display assembly to a vertical position, and then lower it to reseat the hinges.
8. Replace the keyboard (see Replacing the Keyboard
).