Keyboard: Dell Latitude E4300 Service Manual
file:///C|/Biz%20Client/2015/Lola%20(Defect%20Fix)/keyboard.htm[5/25/2015 11:14:09 AM]
Back to Contents Page
Keyboard
Dell™ Latitude™ E4300 Service Manual
Removing the Keyboard
Replacing the Keyboard
Removing the Keyboard
CAUTION: Before working inside the computer, read the safety information that shipped with the
computer. For additional safety best practices information, see the Regulatory Compliance Homepage on
www.dell.com at: www.dell.com/regulatory_compliance.
NOTICE: The keycaps on the keyboard are fragile, easily dislodged, and time consuming to replace. Be
careful when removing and handling the keyboard.
1. Follow the instructions in What You Need to Know For Your Safety
.
2. Remove the LED dashboard cover (see Removing the LED Dashboard Cover
).
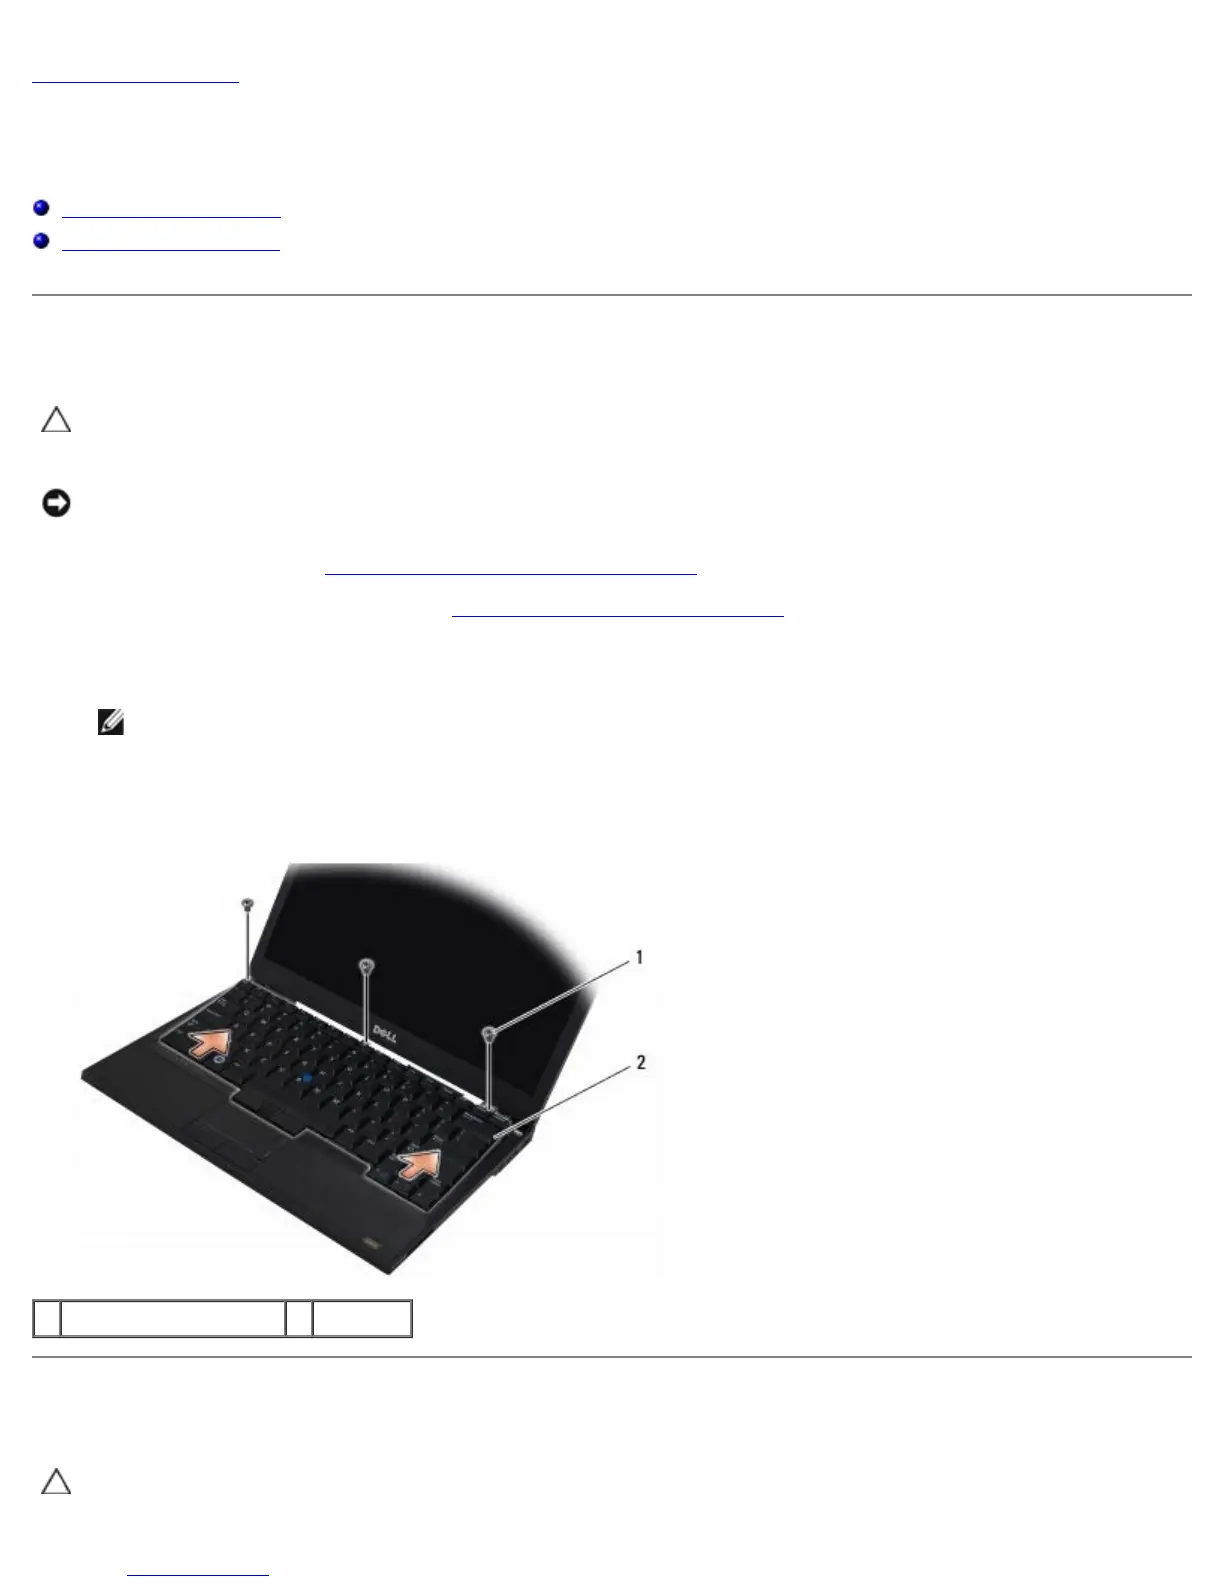
3. Remove the three M2 x 3-mm screws at the top of the keyboard.
NOTE: Lift the keyboard carefully to ensure that you do not pull on the display cable.
4. Lift the keyboard only enough to hold it up, and then slide it forward out of the computer.
The connector is part of the keyboard assembly and slides out of its slot when you remove the keyboard.
1 M2 x 3-mm screws (3) 2 keyboard
Replacing the Keyboard
CAUTION: Before working inside the computer, read the safety information that shipped with the
computer. For additional safety best practices information, see the Regulatory Compliance Homepage on