Optical Drive: Dell Latitude E4300 Service Manual
file:///C|/Biz%20Client/2015/Lola%20(Defect%20Fix)/optical.htm[5/25/2015 11:14:14 AM]
Back to Contents Page
Optical Drive
Dell™ Latitude™ E4300 Service Manual
Removing the Optical Drive
Replacing the Optical Drive
Removing the Optical Drive
CAUTION: Before working inside the computer, read the safety information that shipped with the
computer. For additional safety best practices information, see the Regulatory Compliance Homepage on
www.dell.com at: www.dell.com/regulatory_compliance.
1. Follow the instructions in What You Need to Know For Your Safety
.
2. Close the display and turn the computer upside-down.
3. Remove the memory cover.
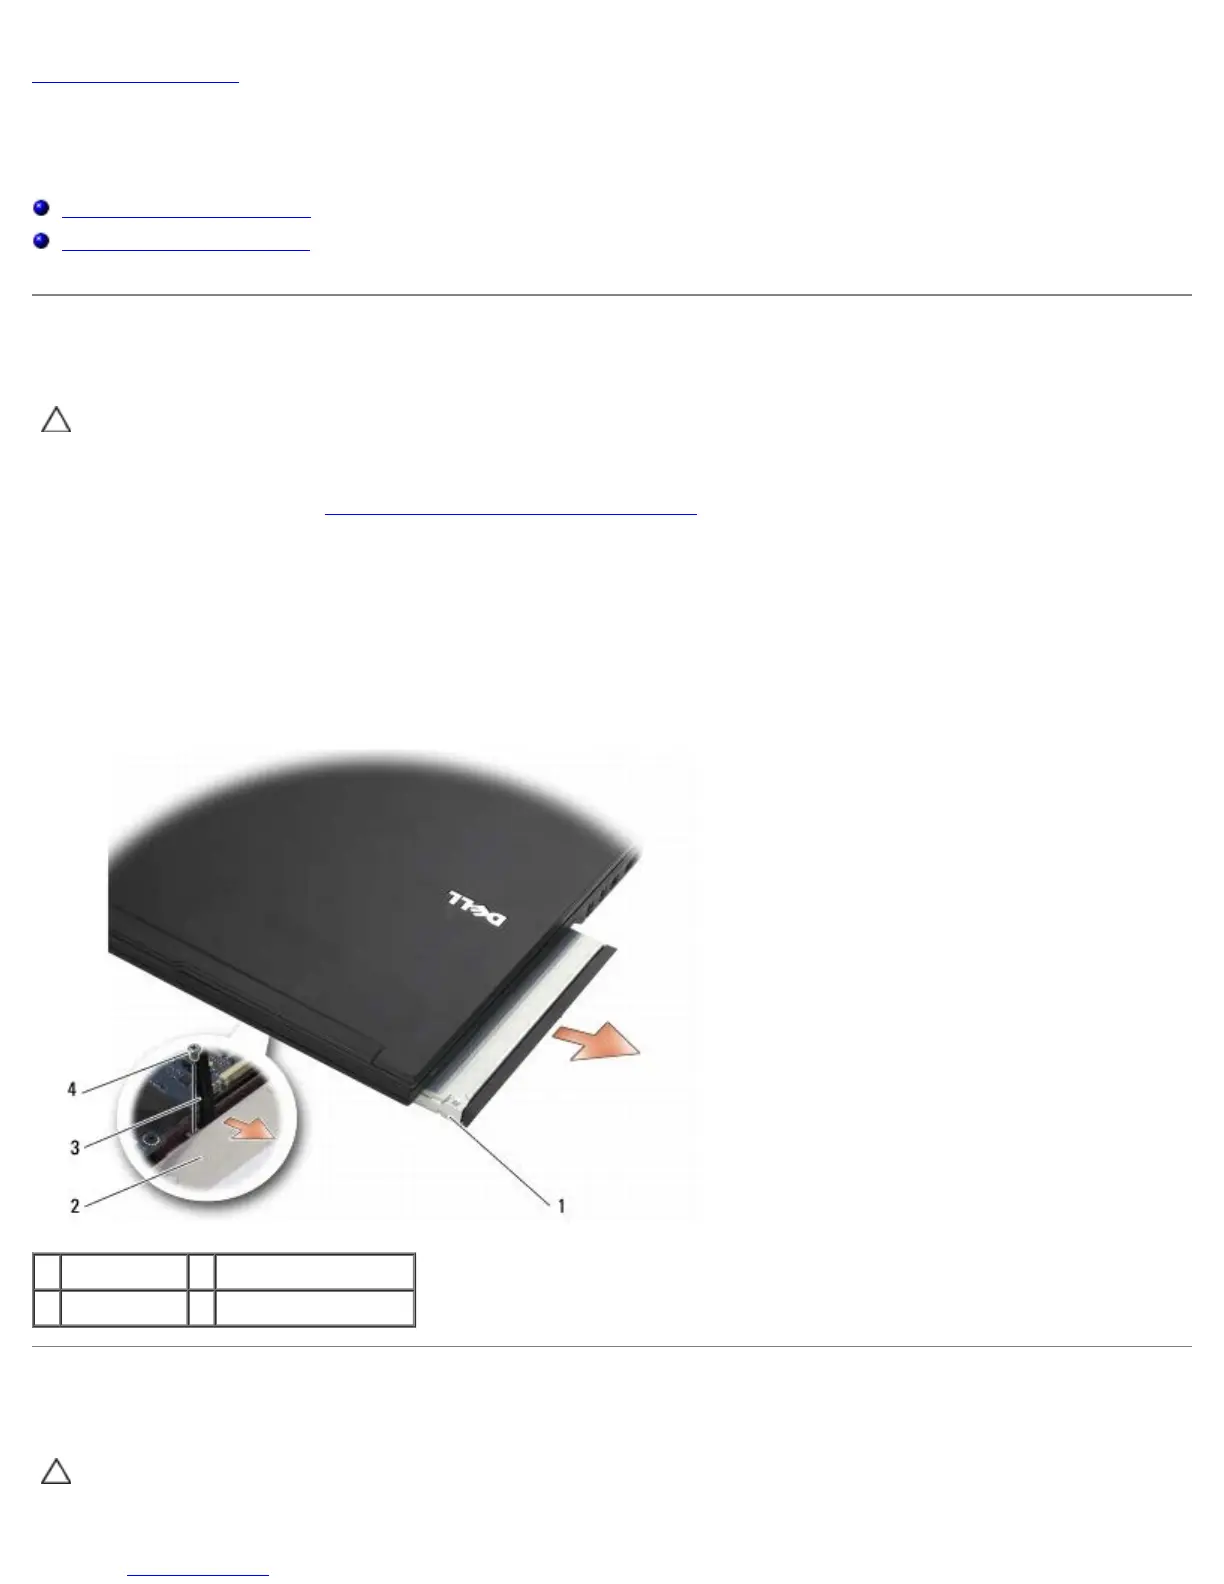
4. Remove the M2.5 x 5-mm screw securing the optical drive to the system board. The screw is located in the center of
the lower-left edge of the memory module compartment.
5. Using a scribe, push on the tab that held the screw to slide the optical drive from its slot on the side of the computer.
1 optical drive 2 bottom of computer
3 scribe tool M2.5 x 5-mm screw
Replacing the Optical Drive
CAUTION: Before working inside the computer, read the safety information that shipped with the
computer. For additional safety best practices information, see the Regulatory Compliance Homepage on