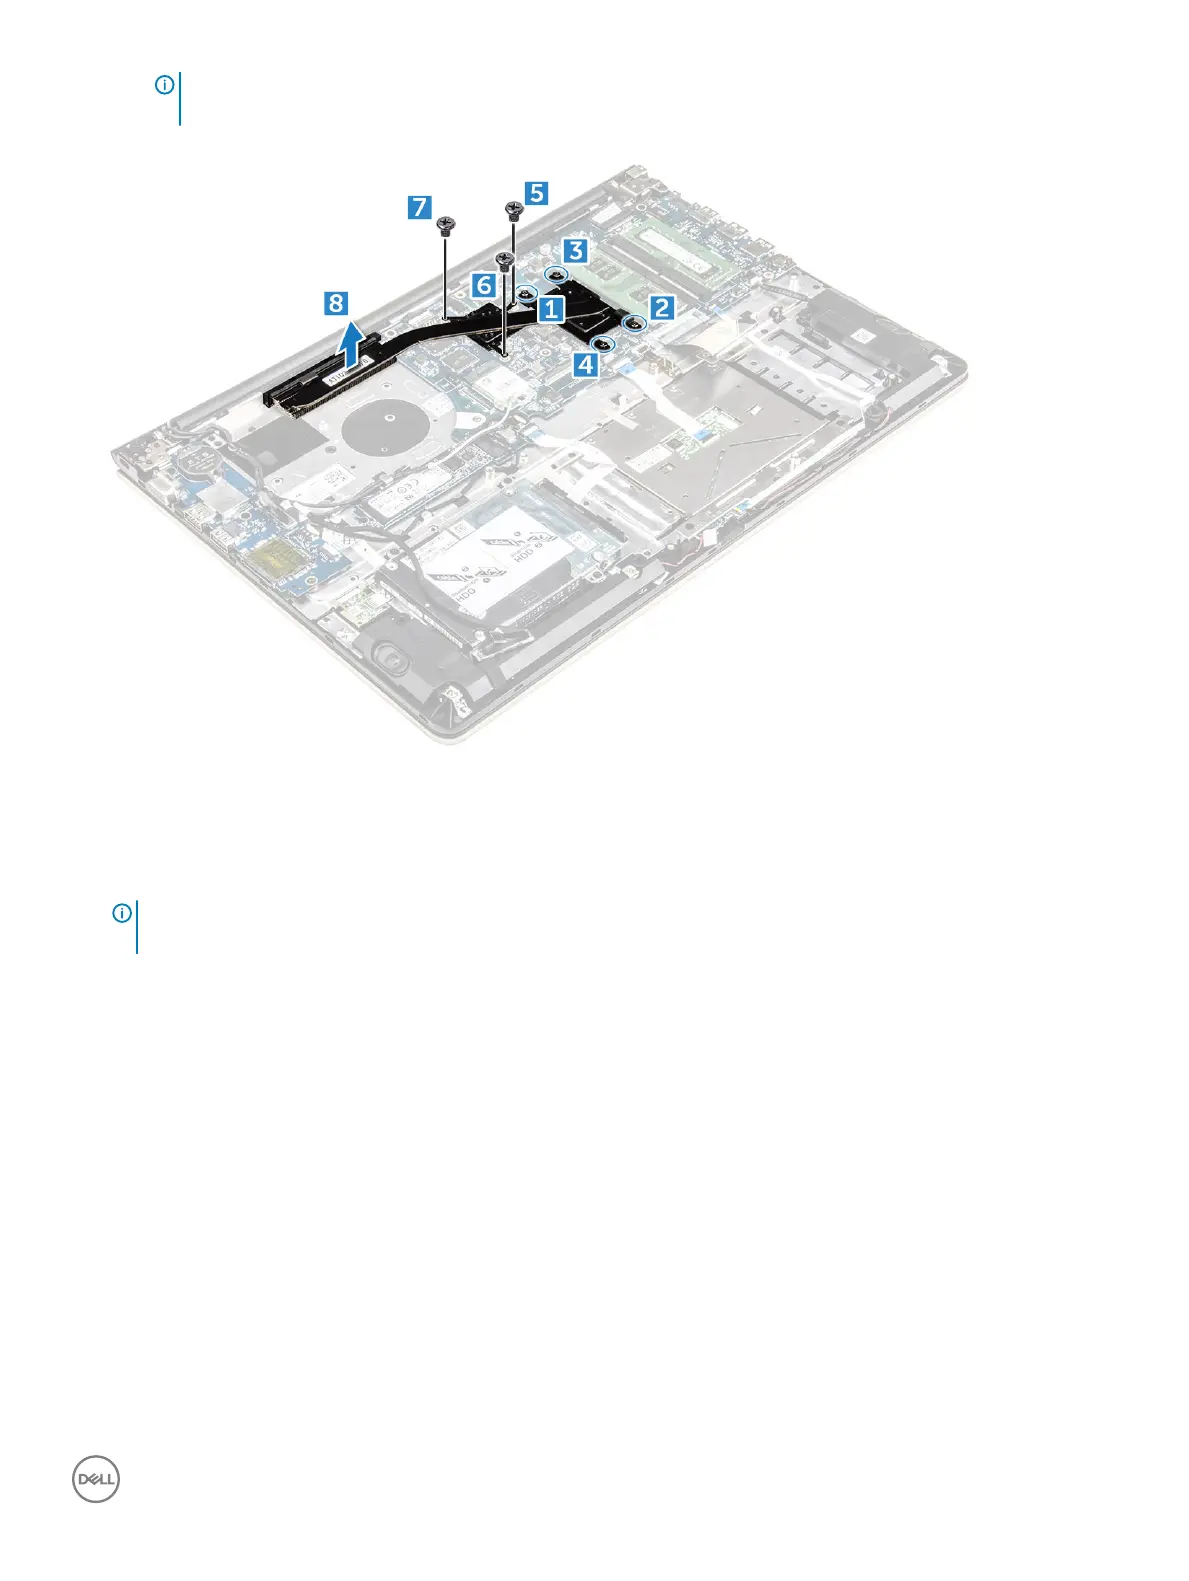
NOTE: Loosen the screws in the order of the callout numbers [1, 2, 3, 4, 5, 6, 7]. Except for screws [5,6,7] the rest of
the screws are retention screws and cannot be fully removed
b Remove the heatsink module from the slot on the system board [8].
Installing the heatsink
1 Place the heatsink module into its slot on the system board.
2 Tighten the screws to secure the heatsink module to the computer.
NOTE
: Secure the screws in the order of the callout numbers [1, 2, 3, 4] as seen on the heatsink module. Tighten the rest of
the screws.
3 Install the:
a system fan
b battery
c back cover
4 Follow the procedure in After working inside your computer
Removing the LED board
1 Follow the procedure in Before working inside your computer.
2 Remove the:
a back cover
b battery
3 To remove the LED board:
a Lift the tab to disconnect the LED board connector cables from the system board [1].
b Remove the screw that secures LED board to the computer chassis [2].
c Remove the LED board from the computer [3].
Removing and installing components
29