Heat sink
Removing processor heatsink for systems with discrete
graphics
NOTE: Depending on the conguration you ordered, the appearance of the processor heatsink and the number of screws may
dier.
NOTE: The procedure you see below is for the removal of heatsink with discrete graphics.
1 Follow the procedure in Before working inside your computer.
2 Remove the:
a USB dongle-bay cover
b back cover
c system-board shield
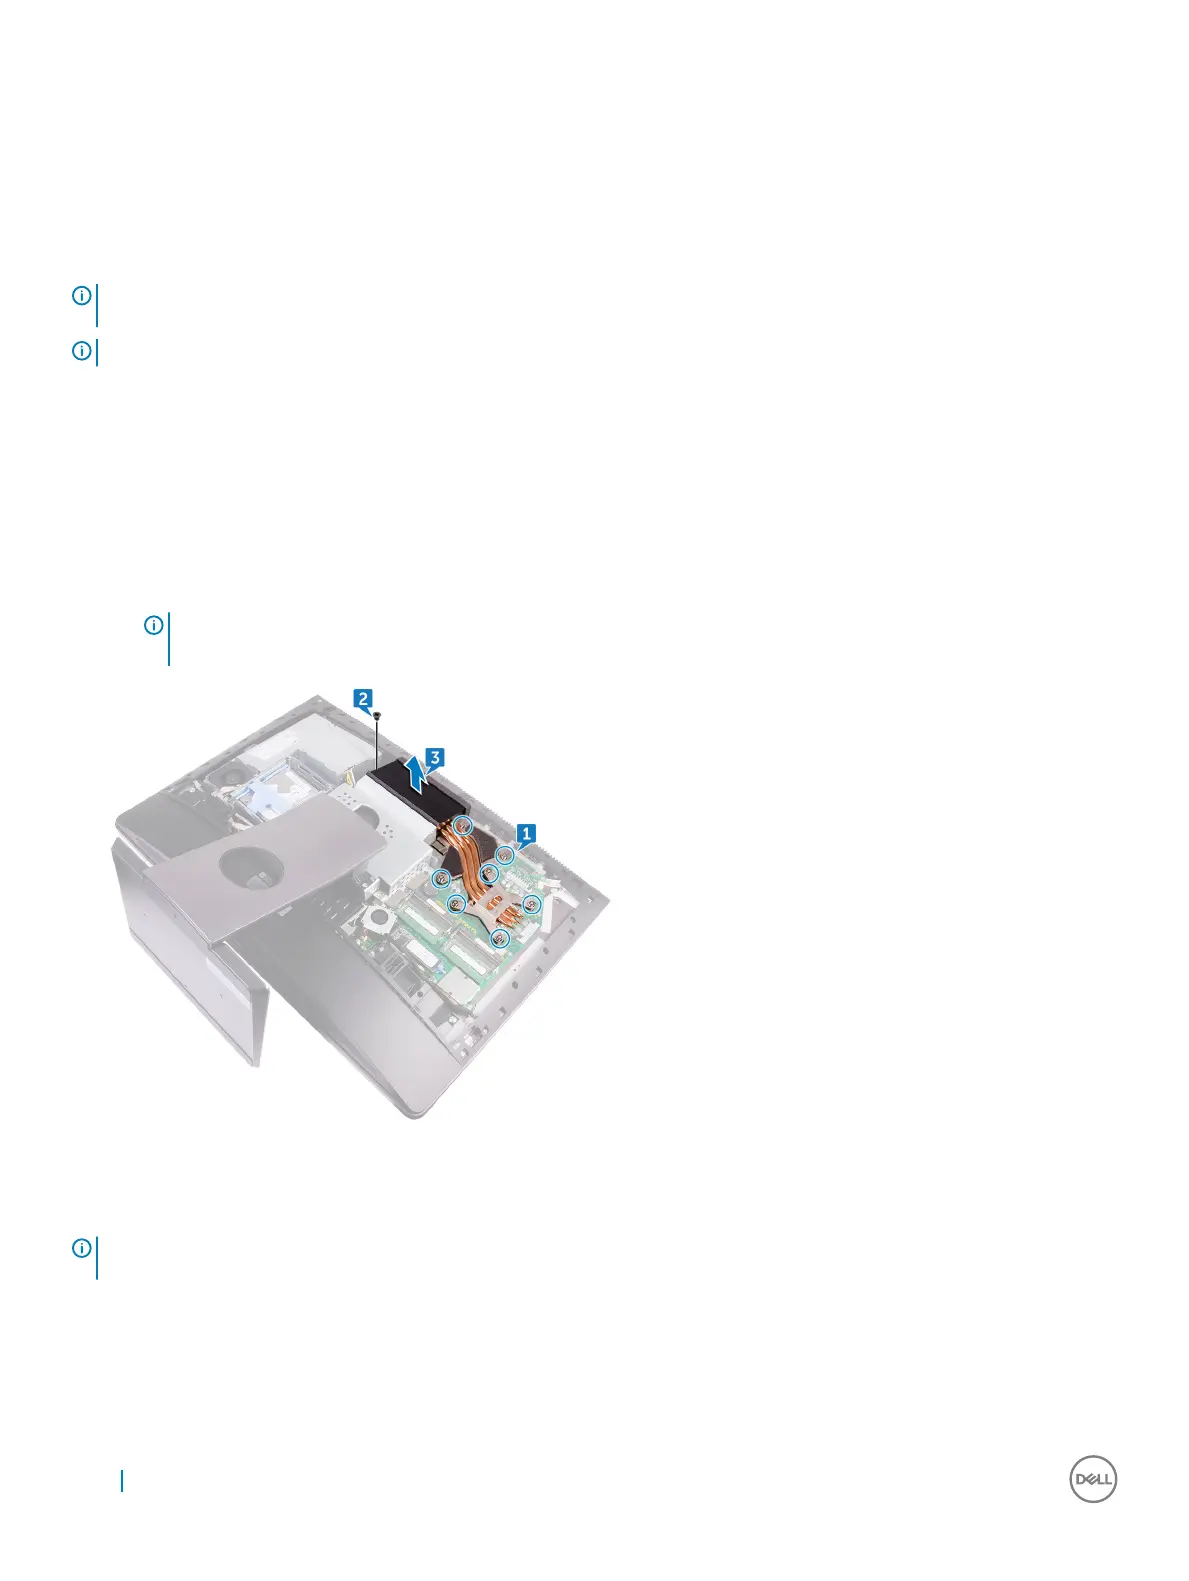
3 In sequential order (indicated on the heatsink), loosen eight captive screws that secure the processor heatsink to the system board [1].
4 Remove the screw (M3X4) that secures the processor heat-sink fan to the middle frame [2].
5 Lift the processor heatsink o the system board [3].
NOTE: Computers that support AMD Radeon Pro WX7100 and AMD Radeon Pro WX4150 graphics are shipped with
seven captive screws
Removing heatsink for computers with integrated graphics
NOTE
: Depending on the conguration you ordered, the appearance of the processor heat-sink and the number of screws may
dier.
1
Follow the procedure in Before working inside your computer.
2 Remove the:
a USB dongle-bay cover
b back cover
22
Removing and installing components