Chapter 7 Optional AccessoriesME300
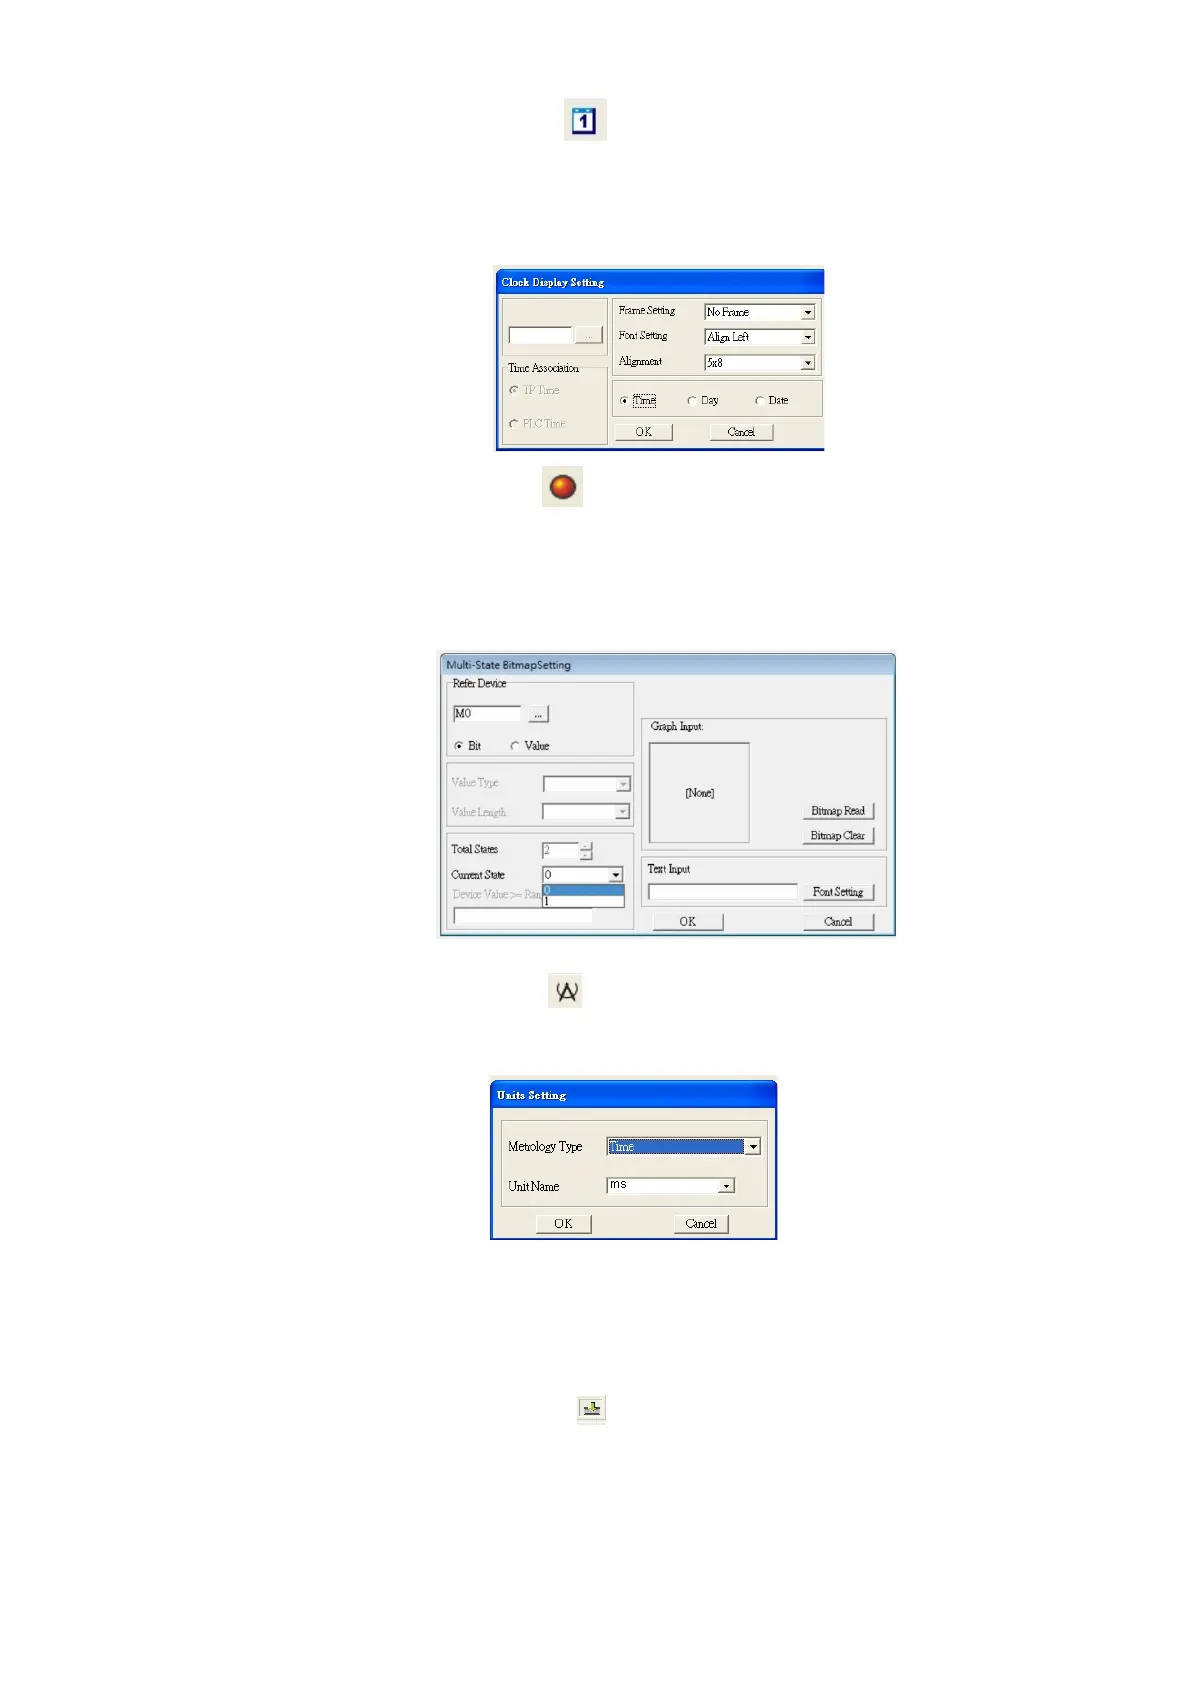
(7) Clock Display Setting: on the toolbar, click . You can display the time, day, or date on the keypad.
Open a new page and click once in that window to add a clock display.
Choose to display Time, Day, or Date on the keypad. To adjust time, go to #9 on the keypad’s menu.
You can also specify the Frame Setting, Font Setting, and Alignment.
(8) Multi-state bitmap: on the toolbar, click
. The setup window of the multi-state is shown as the image
below. This object reads a bit’s property value from the PLC (ME300 does not support the PLC function).
It defines the image or text that appears when this bit is 0 or 1. Set the initial status (Current State) to
be 0 or 1 to define the displayed image or text.
(9) Unit Measurement: on the toolbar, click .
Open a new blank page, and double-click on that window to display the Units Setting dialog box.
Choose the Metrology Type and the Unit Name. For Metrology, the choices are Length, Square
Measure, Volume/Solid Measure, Weight, Speed, Time, and Temperature. The unit name changes
automatically when you change metrology type.
(10) Numeric Input Setting: on the toolbar, click .
This object allows you to provide parameters or communication ports and to input numbers.
Open a new file and double-click on that window to display the Numeric Input Setting dialog box.
 Loading...