16
ENGLISH
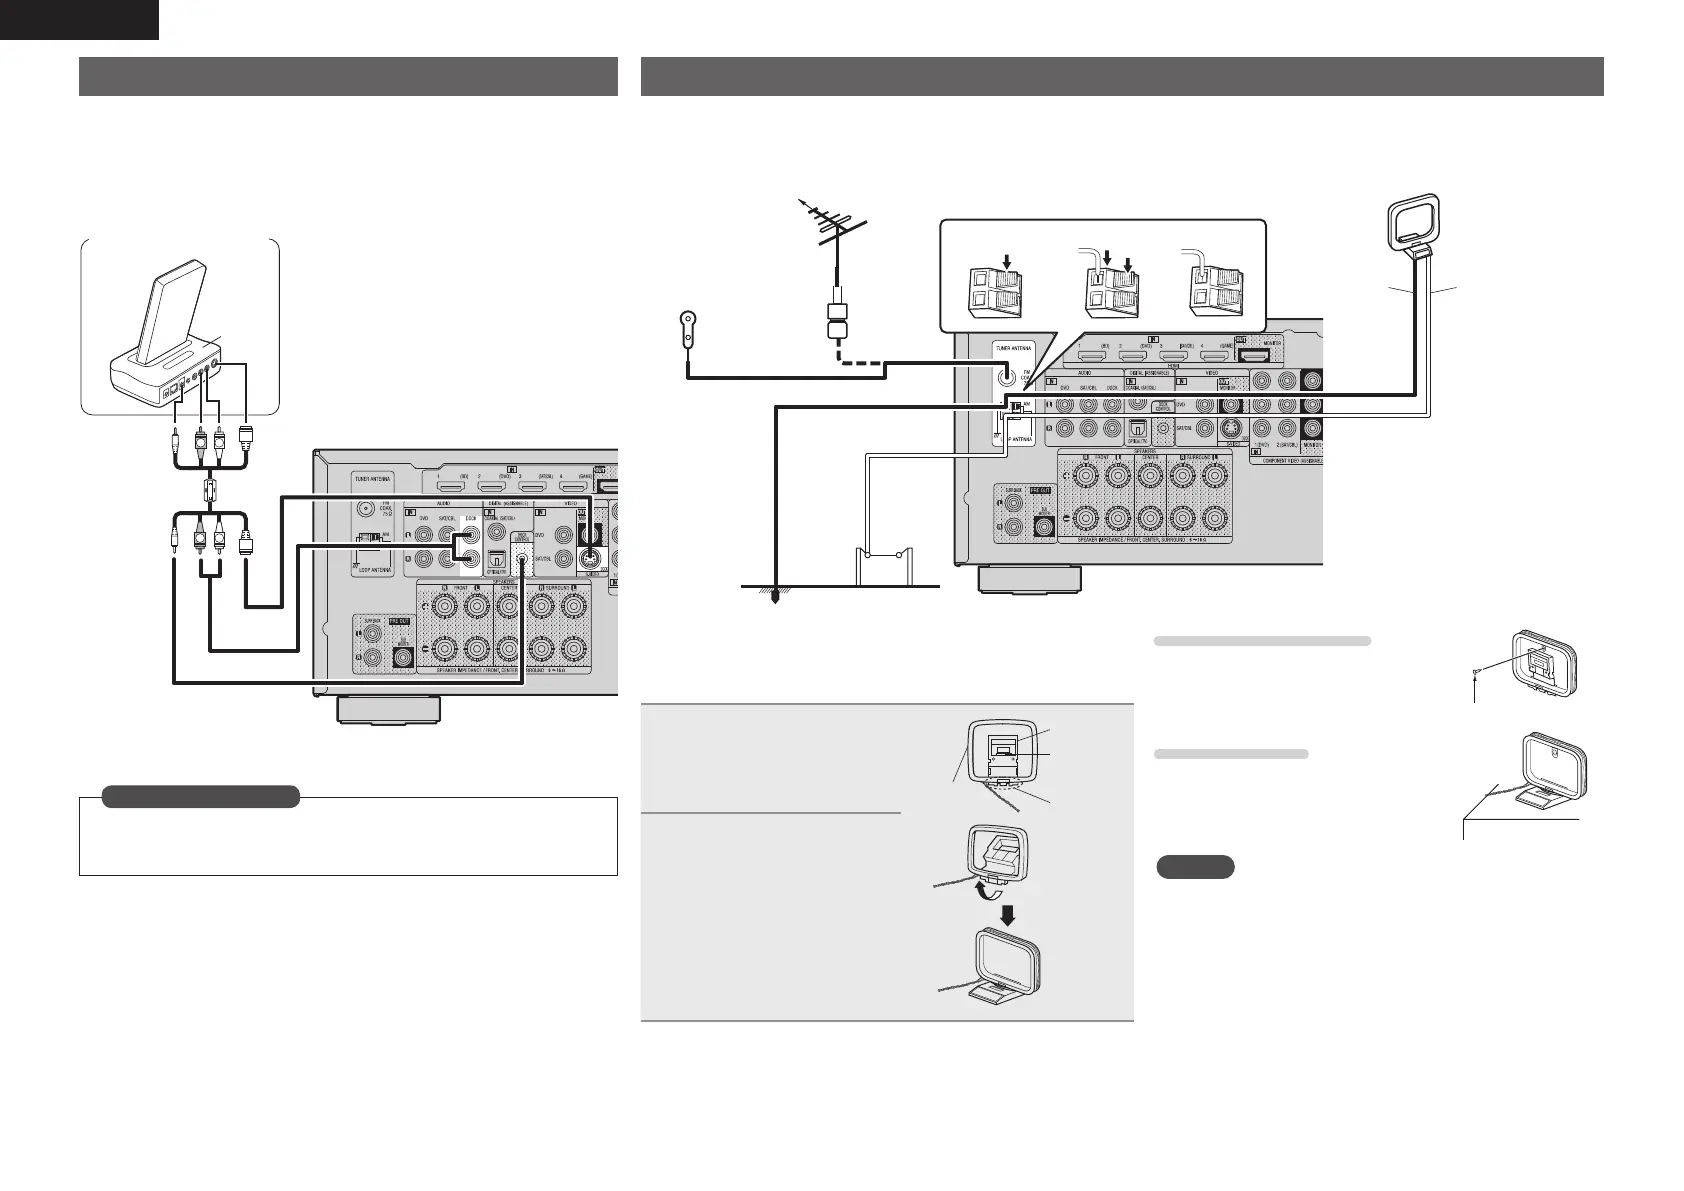
Connecting an antenna
• Connect the FM antenna or AM loop antenna supplied with the unit to enjoy listening to radio broadcasts.
• After connecting the antenna and receiving a broadcast signal (vpage20 “Listening to FM/AM broadcasts”), fi x the antenna with tape
in a position where the noise level becomes minimal.
weq
FM outdoor
antenna
75 Ω Coaxial
cable
Ground
AM outdoor
antenna
AM loop antenna
(supplied)
Black White
FM indoor
antenna
(supplied)
Direction of broadcasting station
n AM loop antenna assembly
1
Put the stand section
through the bottom of the
loop antenna from the
rear and bend it forward.
Stand
Square
hole
Projecting
part
Loop
antenna
2
Insert the projecting part
into the square hole in
the stand.
n Using the AM loop antenna
Suspending on a wall
Suspend directly on a wall without
assembling.
Nail, tack, etc.
Standing alone
Use the procedure shown left to
assemble.
NOTE
• Do not connect two FM antennas simultaneously.
• Even if an external AM antenna is used, do not disconnect the
AM loop antenna.
• Make sure the AM loop antenna lead terminals do not touch
metal parts of the panel.
• If the signal has noise interference, connect the ground
terminal (GND) to reduce noise.
• If you are unable to receive a good broadcast signal, we
recommend installing an outdoor antenna. For details, inquire
at the retail store where you purchased the unit.
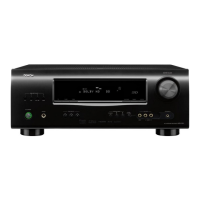
Connecting a control dock for iPod
• Connect a control dock for iPod to the unit to enjoy video and music stored
on an iPod.
• For a control dock for iPod, use ASD-11R, ASD-3N, ASD-3W, ASD-51N and
ASD-51W made by DENON (sold separately).
• For instructions on the control dock for iPod settings, refer to the control
dock for iPod’s operating instructions.
R
L
R
L
ASD-51N
Control dock for iPod
zUse the AV/Control Cable supplied with the DENON
control dock for iPod.
z
Set this to change the digital input connector to which the input source
is assigned.
“Input Assign” (vpage33)
in Set as Necessary
1.AVR1311E2ENG3rd100617.inddSec:161.AVR1311E2ENG3rd100617.inddSec:16 2010/06/1718:24:132010/06/1718:24:13
 Loading...