EasyManua.ls Logo

DigiDesign D-Control User Manual

DigiDesign D-Control
184 pages
To Next Page IconTo Next Page
To Previous Page IconTo Previous Page
Page #36 background image
D-Control Guide28
2 Replace the mounting post housing on the underside of the
display shelf panel with the provided cover plate.
3 Run the display cabling through the cable port in the dis-
play shelf panel.
4 Route the display cabling down through the Main Unit and
through the cable port in the bottom of the Main Unit. (You
may need to remove a panel covering this cable port.)
5 Replace the display shelf panel on the Main Unit.
6 Place the display on the display shelf.
Installing an Arm-Mounted TFT Display
The articulated video display arm included with the D-Con-
trol Main Unit can support a VESA-style display that weighs
up to 20 pounds (9 kg).
To install an arm-mounted TFT display:
1 Mount the video display on the display arm assembly ac-
cording to the manufacturer’s instructions.
2 Discard the mounting post included with the monitor arm
assembly. A correctly sized replacement post is included with
the D-Control Main Unit.
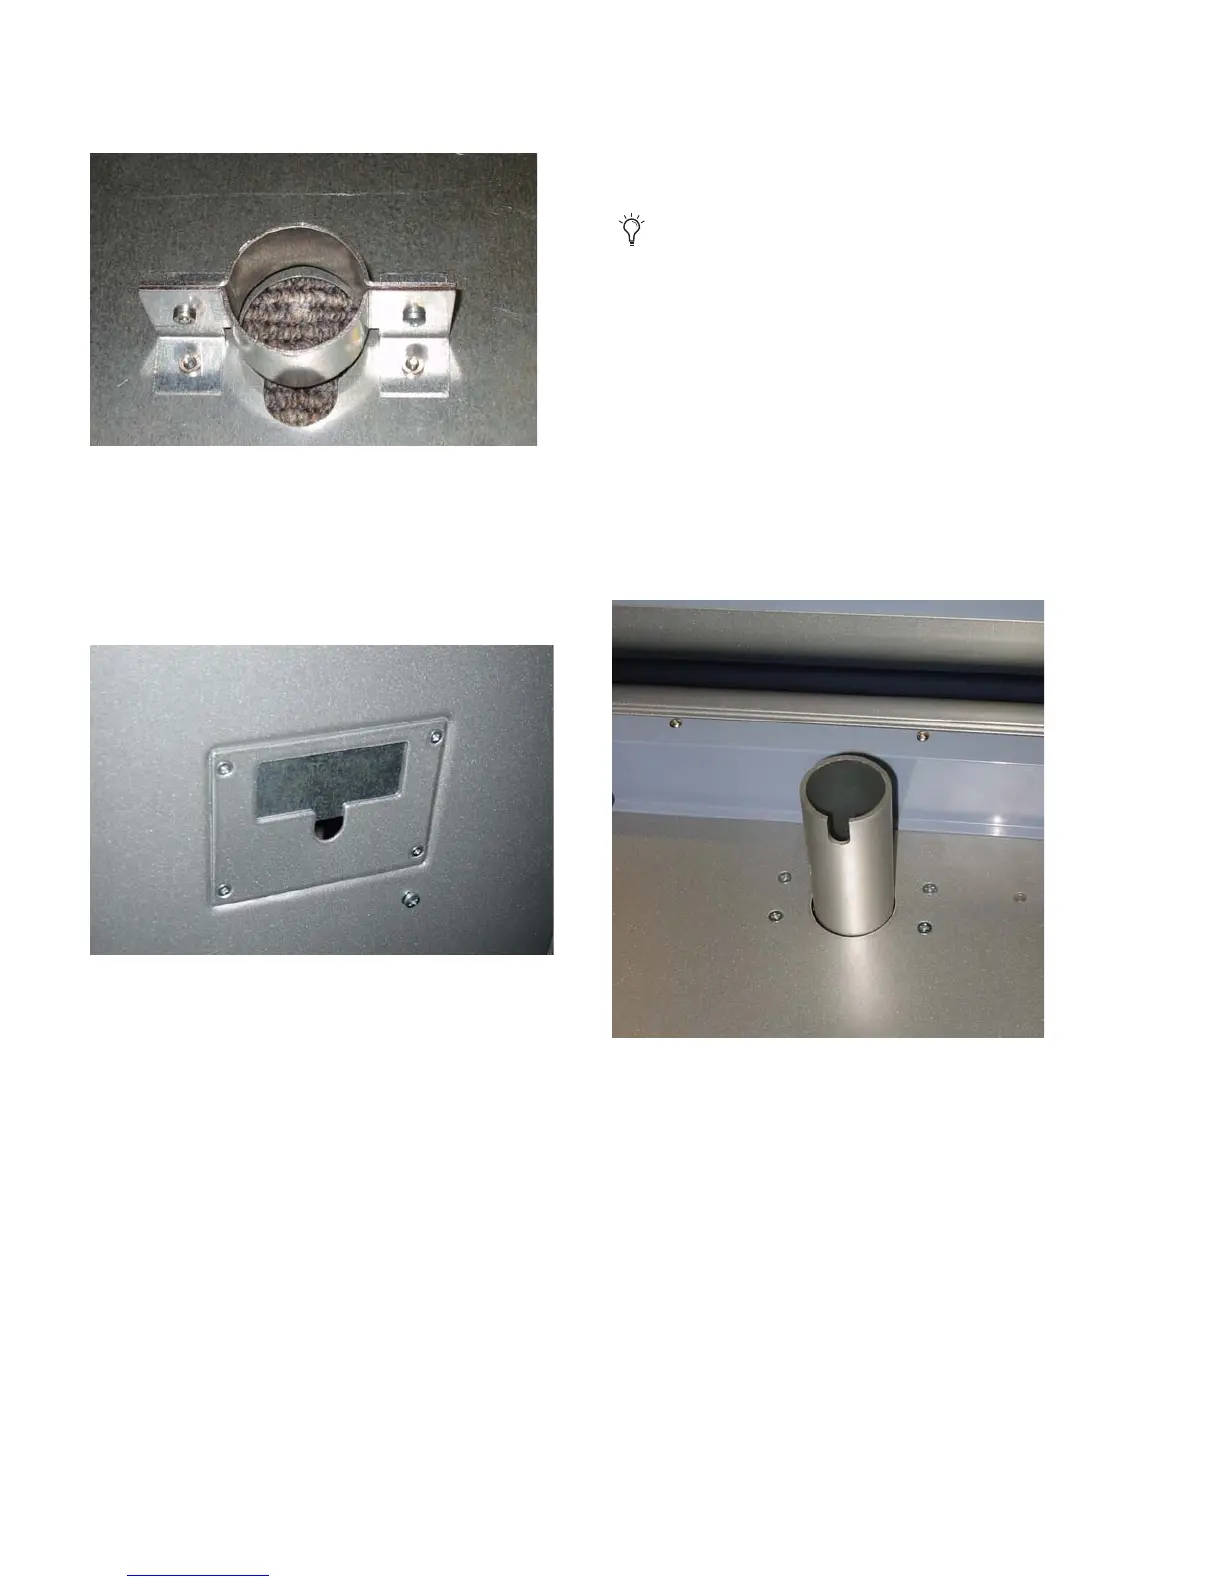
3 Install the new mounting post in the Main Unit. Note the
orientation of the post (the side with the longer slot faces the
back of the unit).
4 Run the display cabling through the cable port behind the
mounting post housing (you many need to remove the dis-
play shelf to route any connectors through the port).
5 Route the display cabling down through the Main Unit and
through the cable port in the bottom of the Main Unit. (You
may need to remove a panel covering this cable port. See Fig-
ure 38.)
6 Place the display arm collar over the mounting post assem-
bly. Do not tighten the set screw for the collar.
Figure 37. Mounting post housing (back of display shelf panel)
Figure 38. Cable port in bottom of Main Unit (view from below)
The video display arm is packaged separately and includes
hardware that is not needed for D-Control. The
arm-mounting hardware is pre-installed in the bottom of
the Main Unit.
Figure 39. Installing the mounting post in the Main Unit

Table of Contents

Other manuals for DigiDesign D-Control

Question and Answer IconNeed help?

Do you have a question about the DigiDesign D-Control and is the answer not in the manual?

DigiDesign D-Control Specifications

General IconGeneral
BrandDigiDesign
ModelD-Control
CategoryMusic Mixer
LanguageEnglish

Summary

Introduction to D-Control

D-Control Overview

D-Control Main Unit Overview

Describes the top panel controls and sections of the D-Control Main Unit.

Setting Up D-Control

D-Control Stand Assembly

Provides step-by-step instructions for assembling the D-Control stand for 16 and 32-fader systems.

Installing D-Control Units on the Stand

Guides the installation of Main and Fader modules onto the assembled D-Control stand.

Connecting D-Control

D-Control Connection Overview

Summarizes the required power, Ethernet, and USB connections for D-Control operation.

Audio Connections

Details audio connections for control room monitoring and studio communication via the XMON interface.

Configuring D-Control

Setting D-Control Preferences

Covers preferences set directly on the D-Control surface affecting faders, encoders, and display.

Channel Strip Controls

Channel Strips Overview

Details the components of a D-Control channel strip, including encoders, display, and faders.

Rotary Encoder Controls

Explains the function and behavior of the six touch-sensitive rotary encoders on each channel strip.

Fader Section Controls

Explains the touch-sensitive faders, automation mode indicators, and group status indicators.

Channel Strip Master Section Overview

Describes the master controls on the left and right sides for easy access to channel functions.

Plug-in Controls

Assigning and Removing Plug-ins

Provides methods for assigning and removing plug-ins directly from the D-Control surface.

Dynamics Section Plug-in Controls

Describes the dedicated controls in the Dynamics section for compressor, gate, and limiter plug-ins.

EQ Section Plug-in Controls

Details the dedicated controls in the EQ section for multi-band EQ plug-ins.

Transport and Navigation Controls

Transport Section Overview

Details the transport controls, mode switches, and audition/locate functions.

Management and Soft Key Sections

Soft Keys Section Overview

Explains access to Pro Tools commands and D-Control preferences via the Soft Keys.

Console Preferences

Details various D-Control specific preferences for meters, operation, and display settings.

Monitor and Meter Sections

Assigning Inserts, Sends and I/O with the Assign Matrix

Custom Fader Modes

Appendix A: Utility Mode

Appendix B: Audio Connections and Pinouts

Related product manuals