EC-BOS-9 Install and Startup Guide Chapter 2 Commissioning
Preparing software to install
The topic explains installing software by stepping through the Commissioning Wizard. The next five wizard
steps relate to installing software and a station.
Prerequisites: You are running the Commissioning Wizard and just completed the licensing step. If you plan to
ask the wizard to install a station from your PC, you must know the station's passphrase.
The Enabled Runtime Profiles step saves space in the controller by restricting the modules that can be
installed.
Step 1 Do one of the following.
• To install the documentation JAR files, leave the DOC: Module JARs having to Java classes
box selected and click Next to continue.
• To save space on the controller, remove the check mark from this option box and click Next.
The other options are pre-configured for best results.
All EC-Net 4 platforms require run time profiles. These runtime profiles should be used in the host:
• RUNTIME identifies the core modules with runtime Java classes only. These modules do not sup-
port the user interface.
• UX identifies bajaUX modules that support the user interface only.
• WB identifies the modules that support the EC-Net 4 Pro user interface.
• SE identifies modules that support the full Java 8 Standard Edition. These are not available for
QNX-based controllers.
• DOC identifies documentation modules. These are not recommended for file space reasons on a
controller.
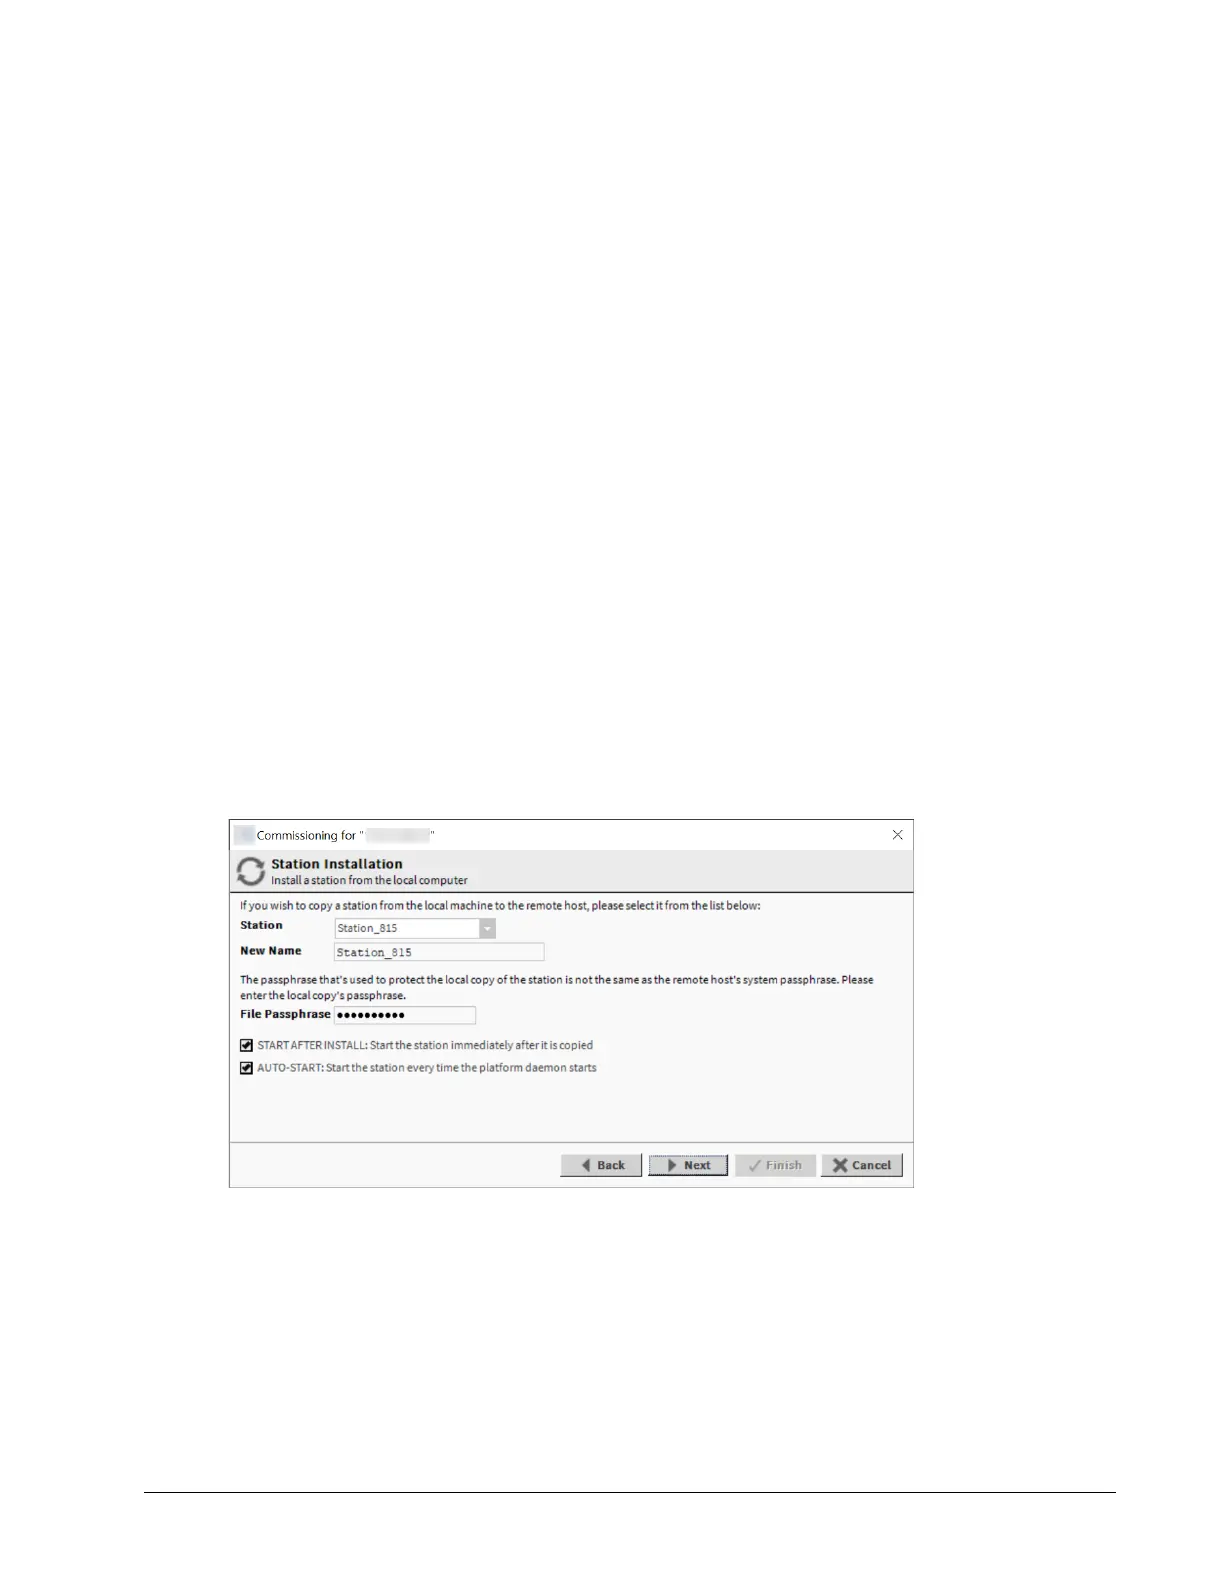
The Station Installation (Install a station from the local computer) window opens.
Step 2 Do one of the following:
• If this is a new controller and no station exists for it yet, click Next.
• If you are upgrading and the station already exists in the controller, select Don't transfer
station.
• If you have the station on your PC, select the Station name and possibly give it a New Name.
Listed are station subfolders under in your EC-Net 4 Pro User Home.
Step 3 If the station is on your PC, enter its File Passphrase.
August 14, 2023 17