5
Chapter 1: Product Introduction
Dehumidier
packet
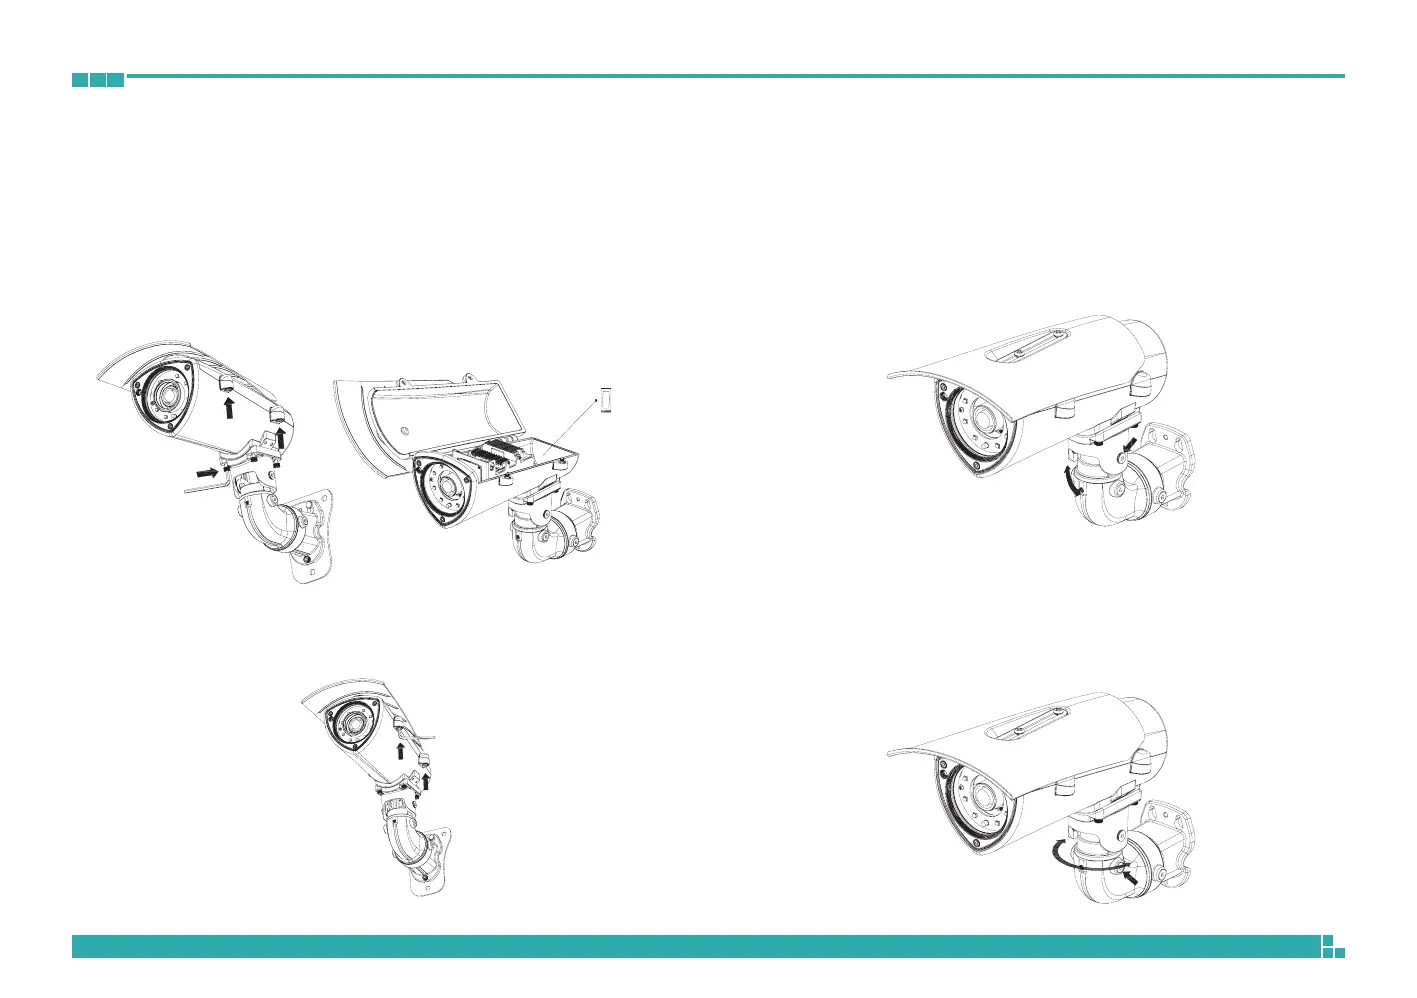
4. Secure the camera to the wall mount bracket with the four screws and
hex wrench. Open the camera’s cover and connect the cables to their
corresponding ports on the MB module. Then, glue the dehumidifier
packet onto the metal bracket using the adhesive sticker on its back,
as depicted in the diagram below. Quickly close the camera’s cover and
ensure the clip is locked in position to prevent the dehumidifier packet
from losing its effectiveness.
5. Secure the top cover to finish the installation.
3-axis Angle Adjustment
1. The vertical tilt angle of the camera can be adjusted up or down within
an angle of 55°. Loosen the left and right screws depicted below to
adjust the vertical tilt angle and then tighten the screws after finishing
the adjustment.
55° Rotate
2. The horizontal tilt angle of the camera can be adjusted left or right within
an angle of 180°. Loosen the left and right screws depicted below to
adjust the horizontal tilt angle and then tighten the screws after finishing
the adjustment.
180° Rotate