5
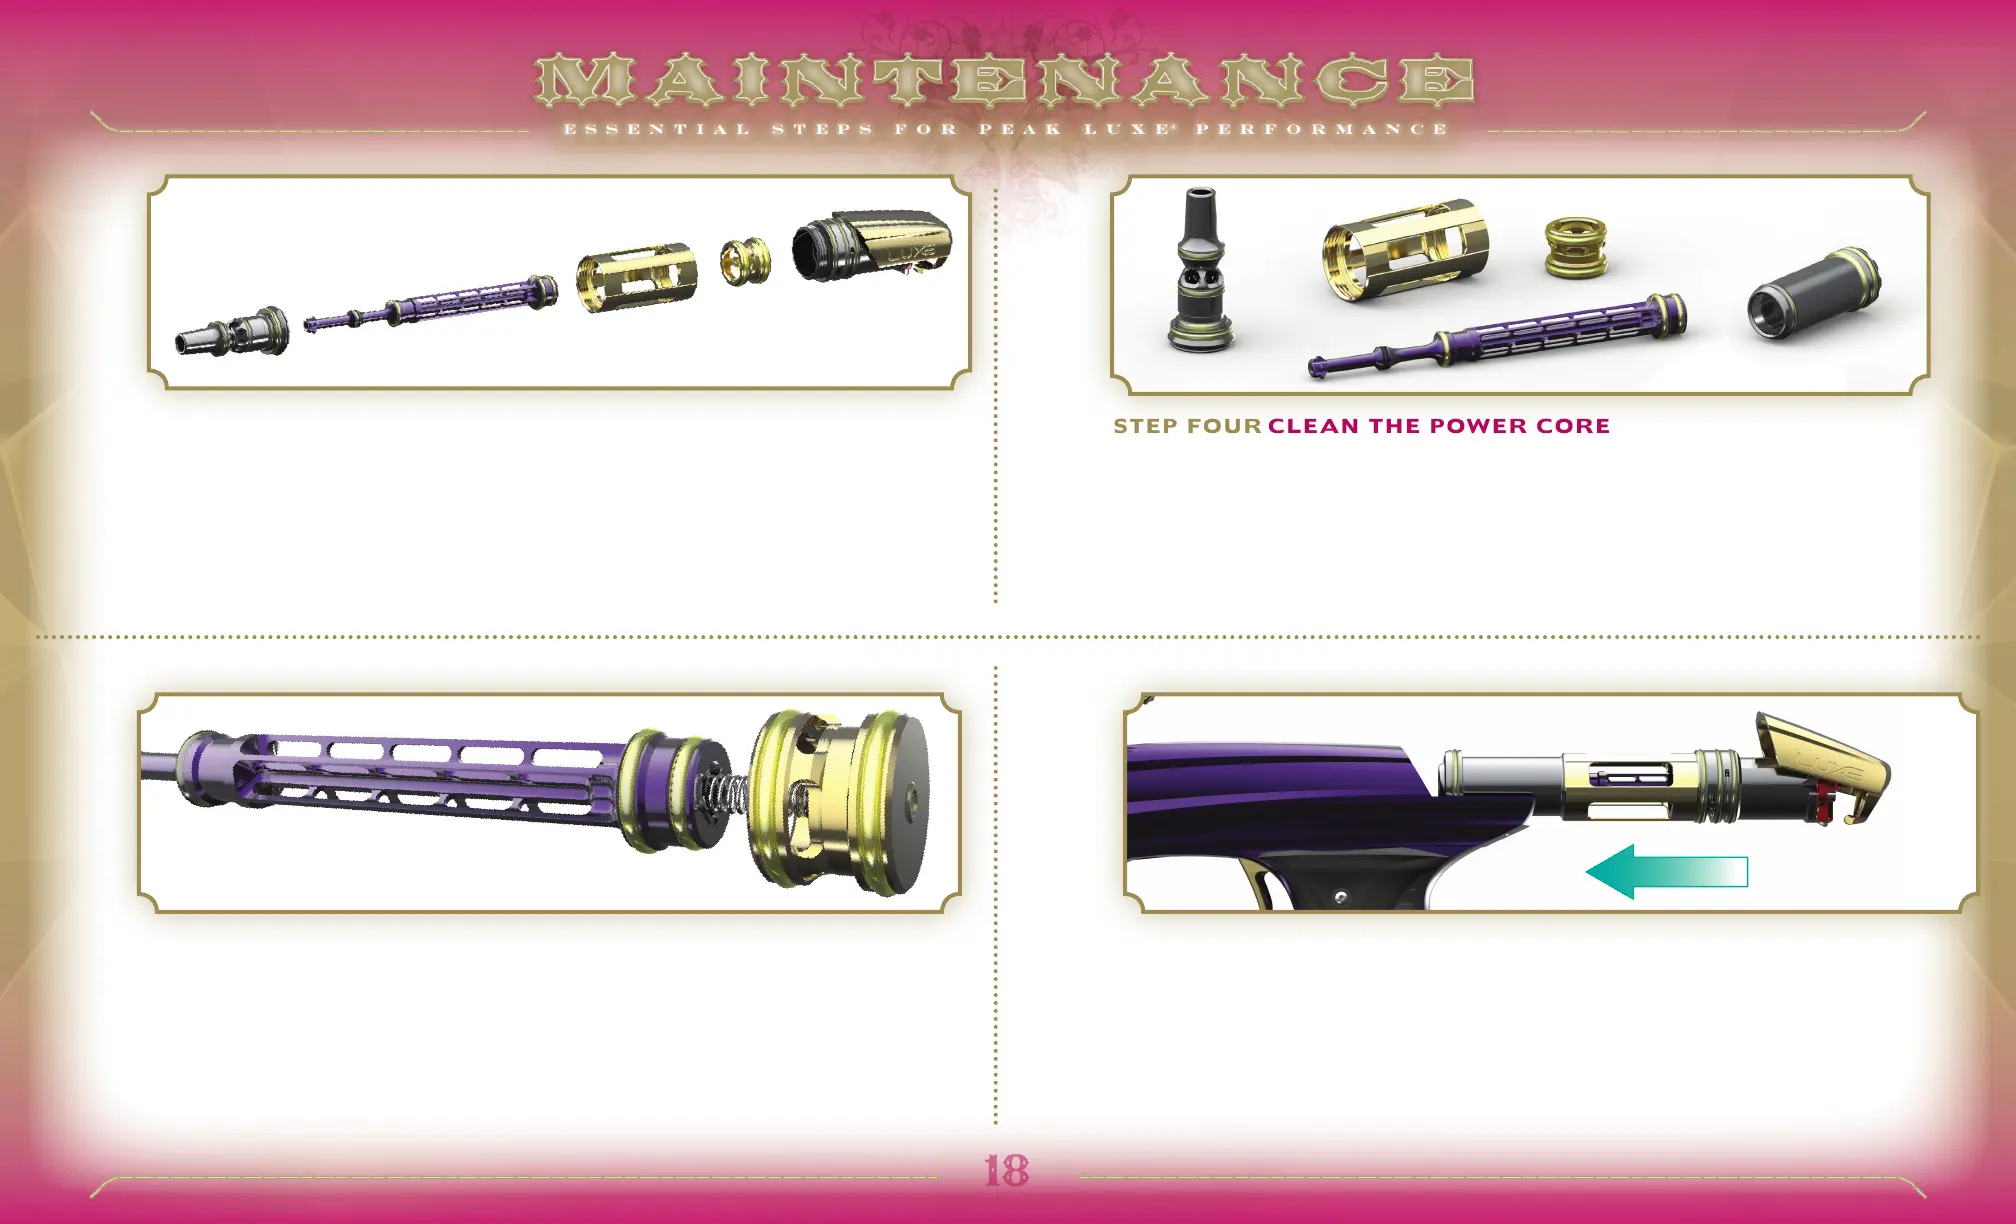
STEP FOUR CLEAN THE POWER CORE
USING A CLEAN, SOFT CLOTH, wipe dirt, paint debris and old grease from all of the Power
Core surfaces. Inspect all o-rings and replace any which show significant signs of wear, or
have rips, tears or other damage. The windows milled into the side of the fire chamber allow
easy access for inspecting internal o-rings and changing them if necessary. Make sure the gas
vents in the sides and front of the fire chamber and bolt are clean and clear.
STEP SIX REINSERT THE POWER CORE
Insert the Power Core into the rear of the Luxe
®
body, with the quick strip latch lifted up. Once the
Power Core is in position, close the quick strip latch.
43
STEP THREE REMOVE THE FIRE CHAMBER AND INTERNALS
ONCE THE BOLT HAS BEEN REMOVED the bolt guide can slide forward out of it’s seat where
friction golds it in the fire chamber. The slender spool assembly may then be slid out the front.
Unscrewing the fire chamber from the end cap assembly will provide access to slide out the
spool shuttle out of the end cap. It may be necessary to carefully use a pick or other hooked tool
to grasp the spool shuttle and pull it out. Take care not to scratch the interior surfaces of the
spool shuttle.
STEP FIVE LUBRICATE THE POWER CORE
LUBRICATE ALL O-RINGS WITH A LIGHT COATING of GR33SE™ marker grease. Take care to
ensure that grease is applied to inner o-rings at the front and middle of the fire chamber. Re-
assemble the power core in the opposite order of disassembly. Take care to be sure the spool
spring remains on its guide in the spool shuttle, and slides into the spool assembly without
binding.
6