56 16.50 PRO DR
®
RAPID-FEED™ CHIPPER
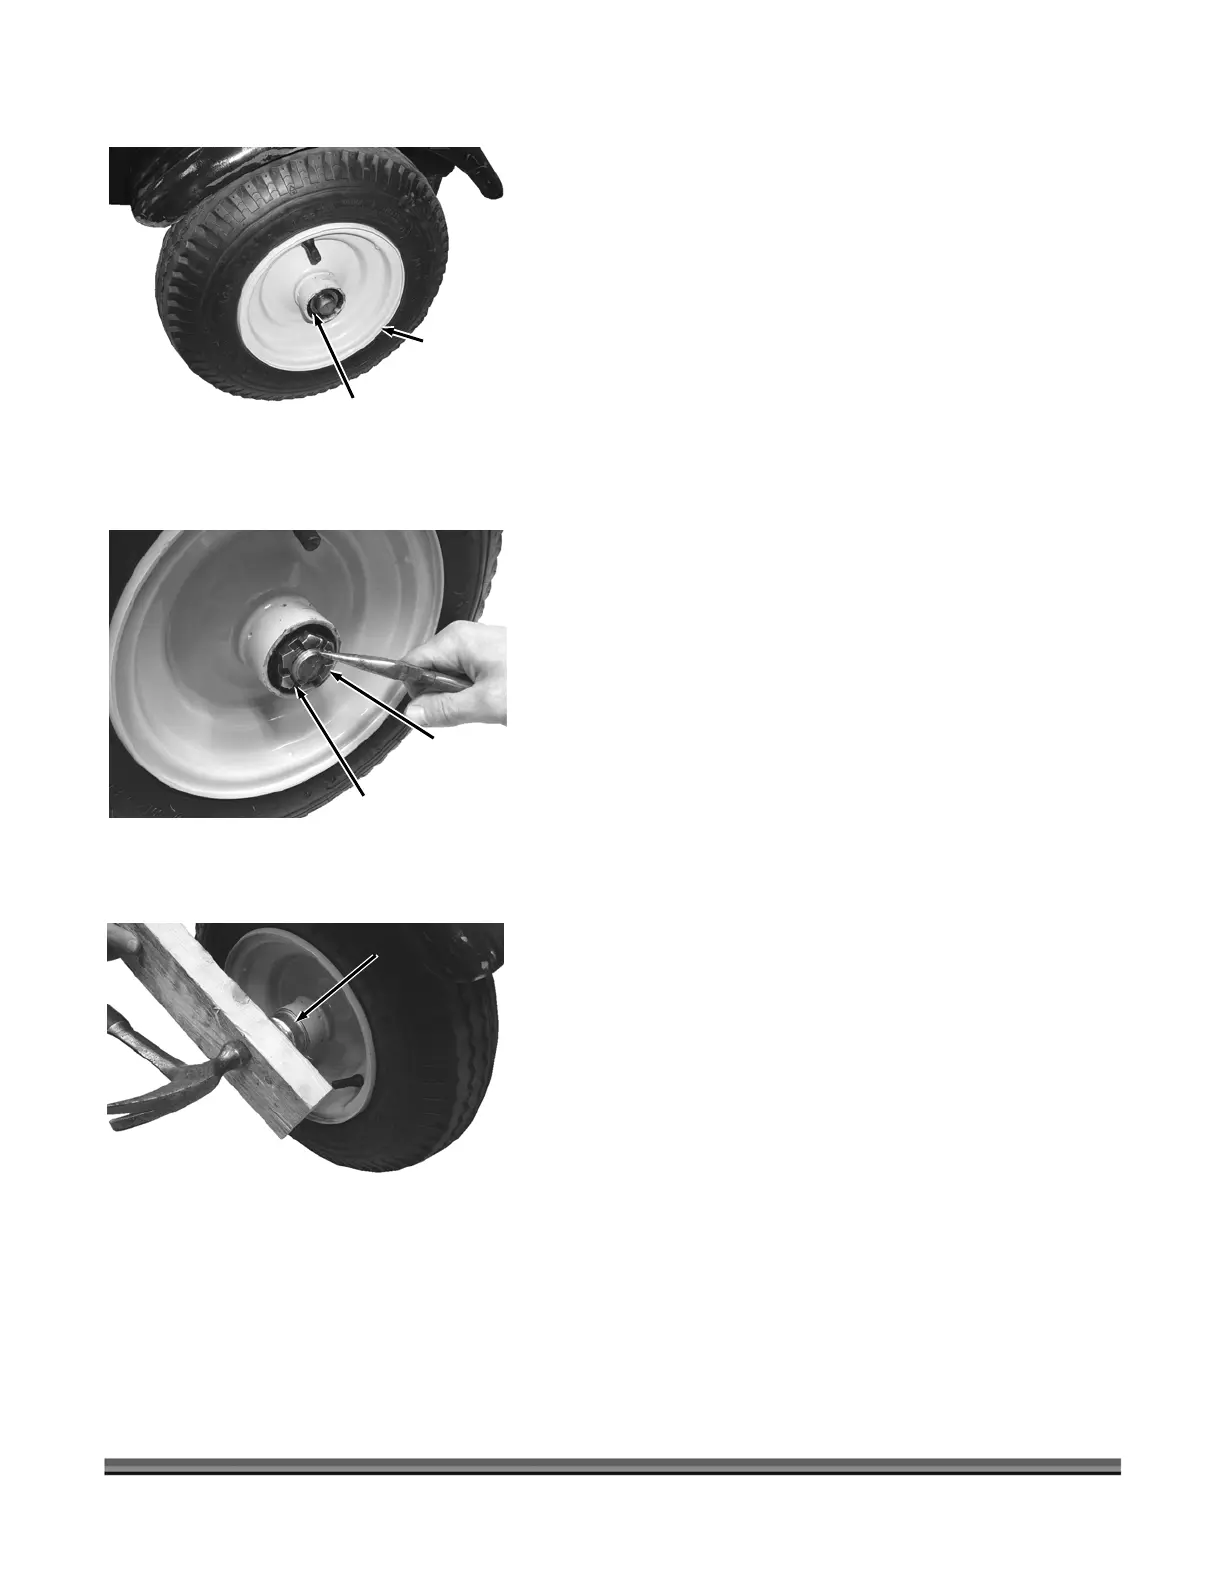
Wheel Assembly onto the Axle Shaft. Make
sure the open side of the Wheel Hub with the loose
cing towards you (Figure 60).
12. Screw the Castle Nut onto the Axle and tighten it with
an adjustable wrench to seat the Bearings (Figure 61).
13. Back the Castle Nut off and then snug it up to the
14.
15.
to secure it.
od over it and
until it is against the
f 60 psi
11. Slide a
Taper Bearing is fa
Bearing lightly.
Insert a Cotter Pin through the slots of the Castle Nut
and into the hole in the Axle.
Bend the ends of the Cotter Pin with Needle nose
Pliers
16. Place the Dust Cap onto the Wheel Assembly and
secure it by placing a piece of wo
pounding lightly with a hammer
lip (Figure 62).
17. Jack the back of the Chipper up and remove the jack
Stands.
18. Lower the Chipper to the ground.
19. Check the Tire for proper air pressure o
maximum in each Tire.
Fi
ure 60
Wheel
Assembly
Taper
Bearing
Fi
ure 61
Castle
Nut
Cotter Pin
Fi
ure 62
Wheel
Assembly
Dust Cap
 Loading...

